
Squirrly SEO
Dominate Search Engine Rankings with AI and the Full Force of SEO. Best Holistic SEO app on the internet.
Articles
Schema
NewsArticle Schema
NewsArticle Schema
NewsArticle schema is used by publishers, news organizations, and websites that produce news content. By implementing this schema markup on their articles, they provide search engines with specific details about the article.
This type of structured data markup is used to provide additional context and information about news articles on a website. It helps search engines understand the content of news articles.
When using the NewsArticle schema for rich snippets in search engine results, there are several properties that are typically considered mandatory or strongly recommended to provide comprehensive information about the news article. While some properties are required, others are optional but highly beneficial for enhancing the rich snippet appearance.
Here are the mandatory and recommended fields for a NewsArticle schema:
Mandatory Fields:
headline: The headline of the news article.
datePublished: The date when the article was first published. Should be in ISO 8601 format (e.g., “YYYY-MM-DD”).
articleBody: The main content of the news article.
Strongly Recommended Fields:
dateModified: The date when the article was last modified. Helps search engines understand the freshness of the content.
author: The author of the news article.
image: An image related to the news article. This can be a thumbnail or a larger image.
Additional Recommended Fields:
publisher: The organization that publishes the news article.
description: A brief description of the news article.
mainEntityOfPage: Indicates the main entity of the page. In the case of a news article, this would typically be the article itself.
keywords: Keywords or tags related to the news article.
Here is an example of NewsArticle schema looks:

How to access Newsarticle schema using Rich Snippets
Access it from METAs – Rich Snippet – Newsarticle

Clicking on the “+” symbol will open up a panel where you can start editing and customizing your Schema Template.
A pop-up will appear:
Mandatory fields will have small red starlike symbol (*) added to them:

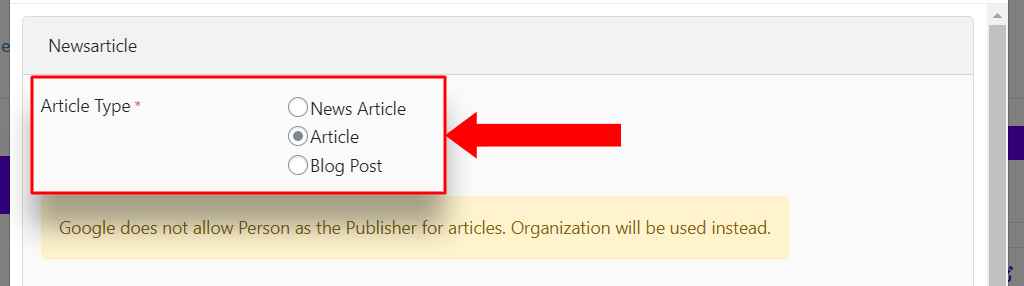
Select the Article type:
News Article/Article/ Blog post – depends on the content you have
Note: Google does not allow a person as a publisher, only an Organization. By attributing content to organizations rather than individuals, Google aims to ensure that published content can be associated with entities that have a measure of public accountability.
Thus, if you’re an individual content creator, consider setting up a legal entity that represents your publishing activities. This could be as simple as registering a business name under which all your content is published.
Headline – Aim for a headline that is concise yet informative, typically between 50 to 70 characters
This field is imported automatically by Squirrly SEO, however you can manually set it as well.

Description – A good length for a description is approximately 150 to 160 characters, as this is the sweet spot for being informative while staying concise enough for quick reading.
This field is {{excerpt}} meaning that it will import a brief summary or snippet of the content on the page, and is added automatically, but it can also be manually inserted.

Author name – Including the author’s name is crucial for providing transparency and credibility to the content.
The {{name}} will be imported automatically, however as mentioned, it can also be manually adjusted.

Recommendations:
Here’s a pattern you can use with the placeholder “{{title}}” for inserting a title: “{{title}}”
This field is automatically imported from your article, however you can also replace “{{title}}” with your desired title or text.
For the author name, if you have multiple authors, ensure that you create a name field for each one of your authors. It will look like this

Published date: should be in the format of “YYYY-MM-DD” – if you click on date a menu will open and you can manually select the date

Keywords – Involves strategically selecting and using specific words or phrases that summarize the core themes, topics, or subjects of your content. Separate them by commas.

Image – Adding image URLs helps with visual appeal, clarity, increases click-through rates, improves user experience, and boosts SEO visibility. You can manually add the width and height for teh image, so it matches your needs.
You can manually insert the URL for the image that you need to add.

Make sure to Save:

Now, you have your Newsarticle schema setup. All there is left to do is check it up and see if it works as expected
This is easier than you imagine, and Squirrly will help with the steps.
Verify Markup
After saving your changes, you can verify that the Newsarticle schema markup has been added correctly by viewing the page or post source code. Look for the JSON-LD markup representing the Newsarticle schema.
1. Once saved click onJSON-LD Code – Validate jSON-LD

2. A new page / tab will open please, click on TEST CODE

3. A small pop-up appears, and you will have to wait a few moments for the data to be processed
4. Once data is processed, you will be able to see your work, test it, share it and use it to enhance your work.

For further details, we recommend referring to the following resources
NewsArticle
Article (Article, NewsArticle, BlogPosting) structured data
FAQ Schema
FAQ Schema
The FAQPage schema is used by websites featuring frequently asked questions (FAQs) to provide structured data about these pages. This schema assists search engines in comprehending the content and purpose of FAQ sections on a website.
Important update from Google regarding FAQ schema. Read here.
Similar to the NewsArticle schema, implementing the FAQPage schema involves providing specific details to search engines. This structured data markup enhances the visibility and presentation of FAQ pages in search engine results, offering users more context about the frequently asked questions available on a website.
The FAQPage schema, used for frequently asked questions pages, has both mandatory and recommended fields. Here they are:
Mandatory Fields:
- mainEntity: This property should be an array of Question items, each representing a frequently asked question on the page.
Recommended Fields:
- name: The name or title of the FAQ page.
- acceptedAnswer: An array of Answer items providing responses to the frequently asked questions listed on the page.
- description: A brief description of the FAQ page’s content or purpose.
- url: The URL of the FAQ page.
These fields provide essential information about the FAQ page and its contents, allowing search engines to understand and display the information more effectively. However, while these fields are recommended, they are not mandatory for implementing the FAQPage schema.
Here is an example of FAQ schema looks like:

How to access FAQ schema using Rich Snippets
Access it from METAs – Rich Snippet – FAQ Page
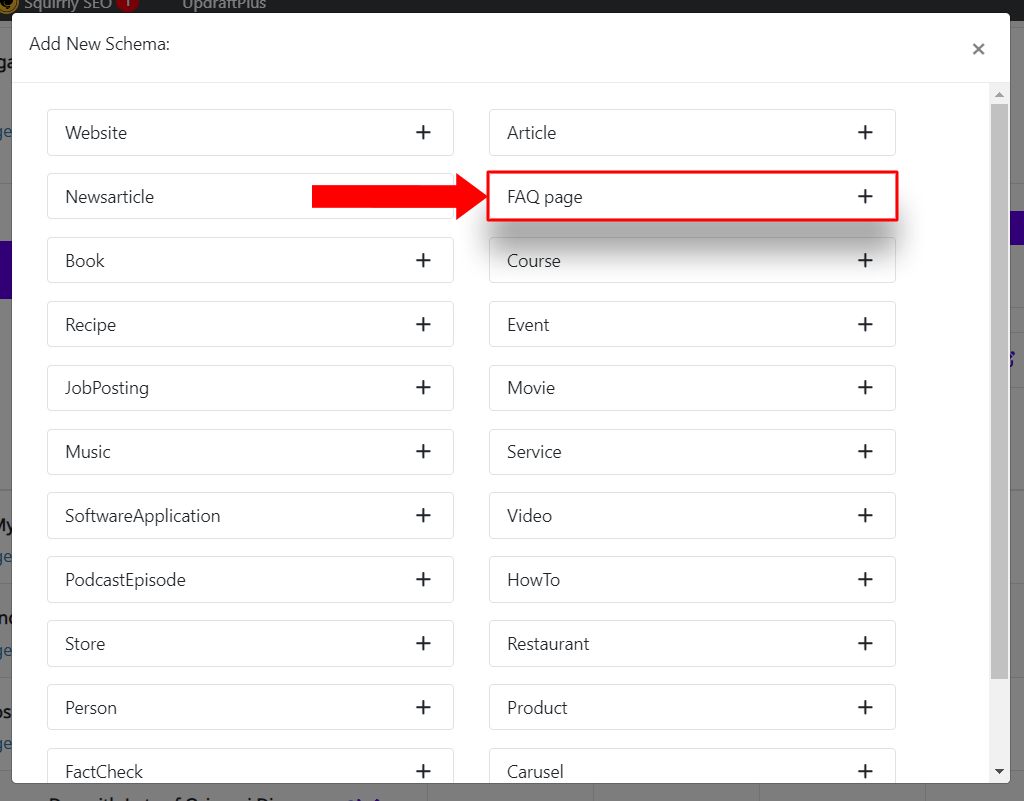
Clicking on the “+” symbol will open up a panel where you can start editing and customizing your Schema Template.
A pop-up will appear

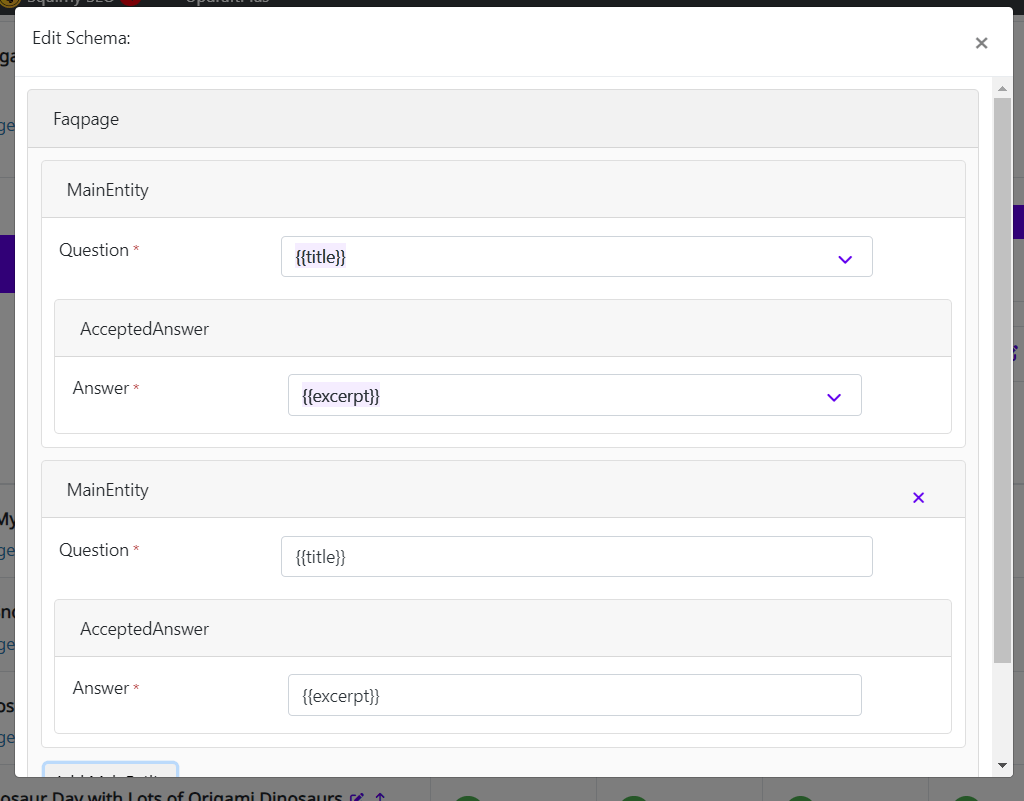
Add your data, a question and its answer.
Mandatory fields will have small red starlike symbol (*) added to them:


Add additional questions by clicking on Add MainEntity

A new Question and Answer can now be added:
Recommendations:
Acceptable scenarios:
- The page displays both the question and answer.
- The question is visible, and the answer is hidden behind an expandable section. Users can access the answer by clicking the expandable section.
Unacceptable scenarios:
- The FAQ content is completely inaccessible or not present on the page.
Make sure to click on Save

With this you have a FAQ schema set up. All there is left to do is check it up and see if it works as expected. This is easier than you imagine, and Squirrly will help with the steps.
Verify Markup
After saving your changes, you can verify that the FAQ schema markup has been added correctly by viewing the page or post source code. Look for the JSON-LD markup representing the FAQ schema.
1. Click on JSON-LD Code – Validate JSON-LD
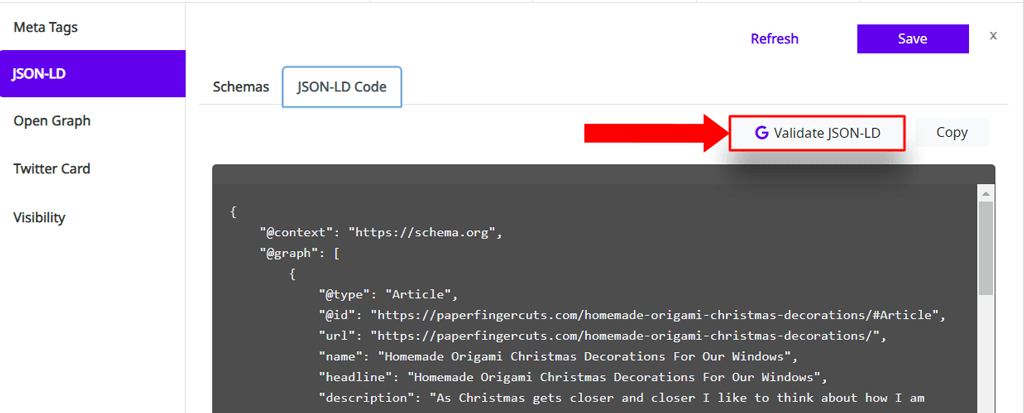
2. A new page / tab will open please, click on TEST CODE

3. A small pop-up appears, and you will have to wait a few moments for the data to be processed
4. Once data is processed, you will be able to see your work, test it, share it and use it to enhance your work.

For further details, we recommend referring to the following resources
FAQ Schema
FAQ (FAQPage, Question, Answer) structured data
Book Schema
Book Schema
The Book schema is employed by websites featuring books to provide structured data about these publications. This schema aids search engines in comprehending the content and attributes of books listed on a website.
Similar to the FAQPage and NewsArticle schemas, implementing the Book schema involves furnishing specific details to search engines.A book schema is added to a webpage for detailing information about a book, including its title, author(s), publication date, ISBN, and more. This markup enhances the visibility and presentation of books in search engine results, providing users with more context about the available publications.
The Book schema, used for book listings, includes both mandatory and recommended fields. Here they are:
Mandatory Fields:
- name: The title of the book.
- author: The author(s) of the book.
- publisher: The publisher of the book.
- isbn: The International Standard Book Number (ISBN) of the book.
Recommended Fields:
- description: A brief description of the book’s content or summary.
- datePublished: The publication date of the book.
- image: An image of the book cover.
- url: The URL of the page featuring the book.
These fields provide crucial information about the book and its attributes, allowing search engines to understand and present the information more effectively. While these fields are recommended, they are not mandatory for implementing the Book schema.
Here is an example of Book schema looks like:

How to access Book schema using Rich Snippets
Access it from METAs – Rich Snippet – Book Page

Clicking on the “+” symbol will open up a panel where you can start editing and customizing your Schema Template.
A pop-up will appear.
Note: Squirrly automatically populates placeholders with the actual data from your custom fields upon schema creation, thus utilizing the custom field patterns in your schema template, such as {{name)}}, will be populated by Squirrly. For instance, when you input {{image}}, Squirrly SEO seamlessly substitutes it with your designated image.
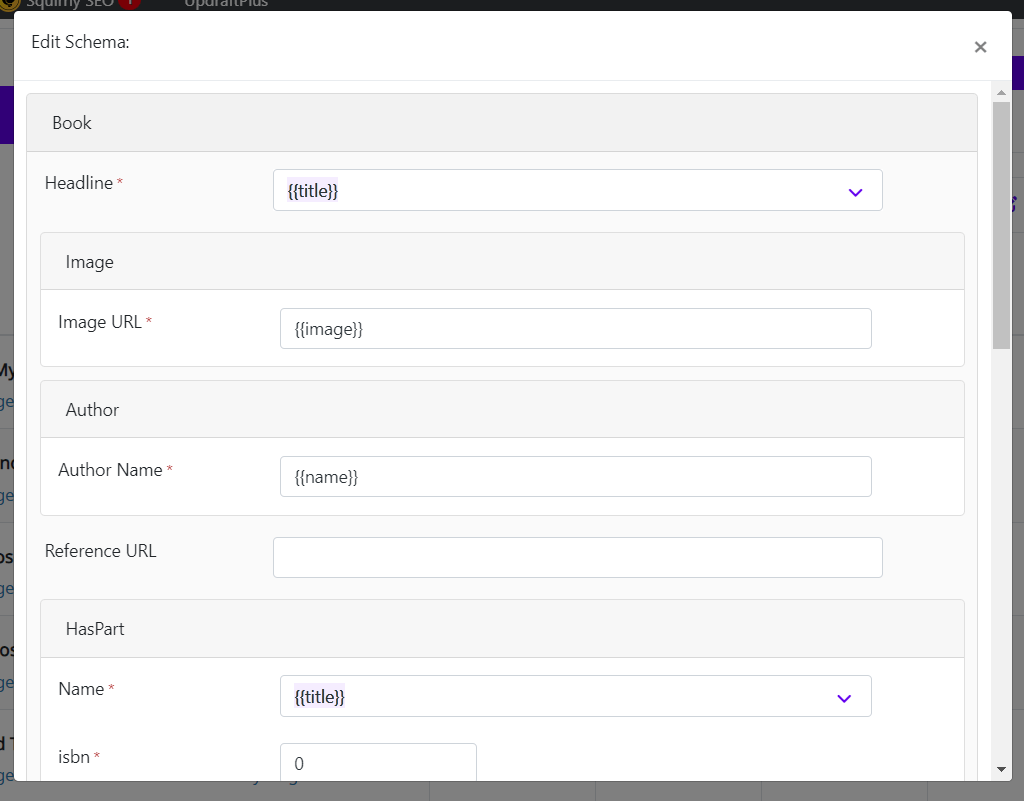
Add your data, a question and its answer.
Mandatory fields will have small red starlike symbol (*) added to them:
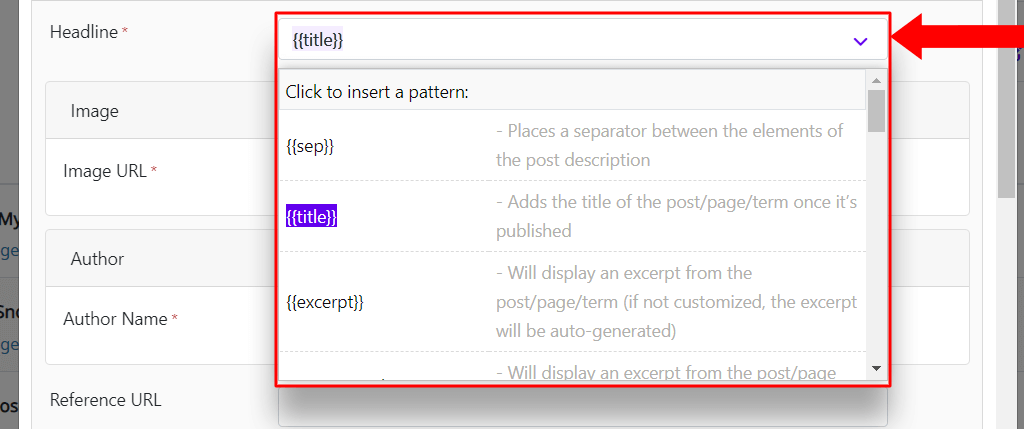
Please take note of the following options:
Image URL – {{image}} property is used to specify the URL of the book cover image. Replace this with the actual URL of the image you want to include. This URL should point to a publicly accessible image file (JPEG, PNG, etc.) of the book cover.

Add the name of the Author

A reference web page’s URL that clearly identifies the person or organization, such as a Wikipedia page dedicated to them, is required.
Incorporating reference URLs into your book schema can enrich the learning experience, promote academic integrity, facilitate access to updated information, and support various modes of learning, including digital and online platforms.

Adding the “hasPart” property in a book schema helps organize the book’s content, facilitates navigation for readers, supports modularity and reusability of content. Here you can add a name, book edition, isbn ets. As you can see this part is mandatory, as it’s purpose is typically used to indicate the parts or components that make up the book.
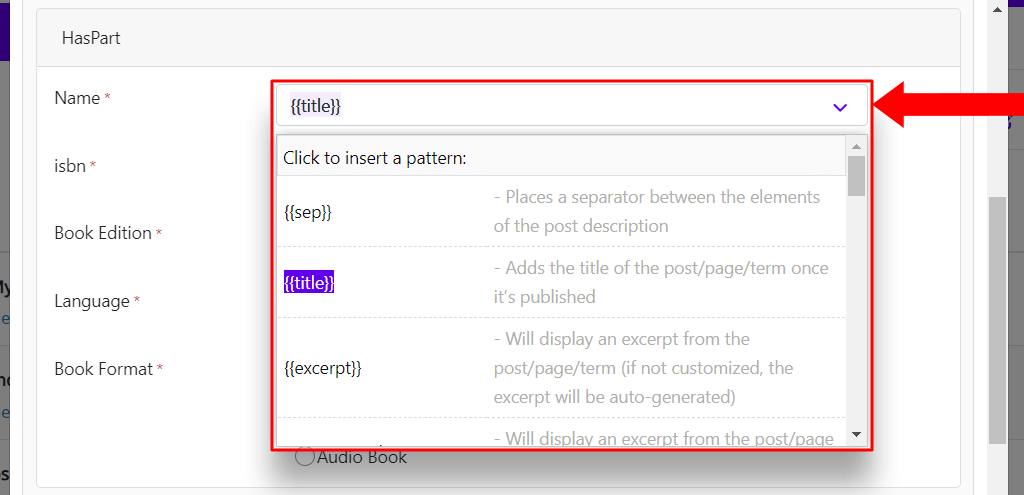
ISBN refers to International Standard Book Number

When adding this field, there are a few mentions that we would like to make:
Google Search favors ISBN-13, you also have the following alternatives:
- Online Computer Library Center (OCLC) Number
- Library of Congress Control Number (LCCN)
- JP e-code
Important: Google Search does not support ISBN-10. If your books only have ISBN-10, utilize an ISBN conversion tool to convert them to ISBN-13 before submitting your feed to Google.
Book edition refers to a specific version or variation of a book. It typically includes information such as the edition number (e.g., first edition, second edition), publication date, and any revisions or updates made to the content compared to previous editions. Including book edition information in a schema helps users identify and distinguish between different versions of the same book, providing clarity and context for understanding the publication history and any changes made over time.

Adding language to a book schema helps search engines categorize the book correctly and ensures users find content in their preferred language.

Selecting book format in a schema specifies how the book is available, guiding user access and compatibility.

Adding published and modified dates to a book schema provides users with important information about the book’s publication date and any subsequent updates or revisions. The “publishedDate” and “dateModified” properties should be added in ISO 8601 format, which is a standardized date and time representation. This format is YYYY-MM-DD for dates, optionally followed by the time in the format HH:MM:SS.
For example, “2024-02-26” represents February 26th, 2024.

Including the author’s name in a book schema is essential for properly attributing authorship and providing credit for the work.
The author’s name should be added as a value for the “author” property. The format for the author’s name can vary, but it’s typically entered as a string, representing the full name or the name as it appears on the book cover.

In a book schema, the review rating should be added as a value in the Review rating section.
The format for the review rating is typically a numerical value representing the rating score, often on ascale of 1 to 5, with 1 being the lowest and 5 being the highest.

Selecting the “review” property allows publishers or authors to include user-generated reviews or ratings associated with the book.

Make sure to click on Save

With this you have a Book schema set up. All there is left to do is check it up and see if it works as expected. This is easier than you imagine, and Squirrly will help with the steps.
Verify Markup
After saving your changes, you can verify that the BOOKschema markup has been added correctly by viewing the page or post source code. Look for the JSON-LD markup representing the Book schema.
1. Click on JSON-LD Code – Validate JSON-LD

2. A new page / tab will open please, click on TEST CODE
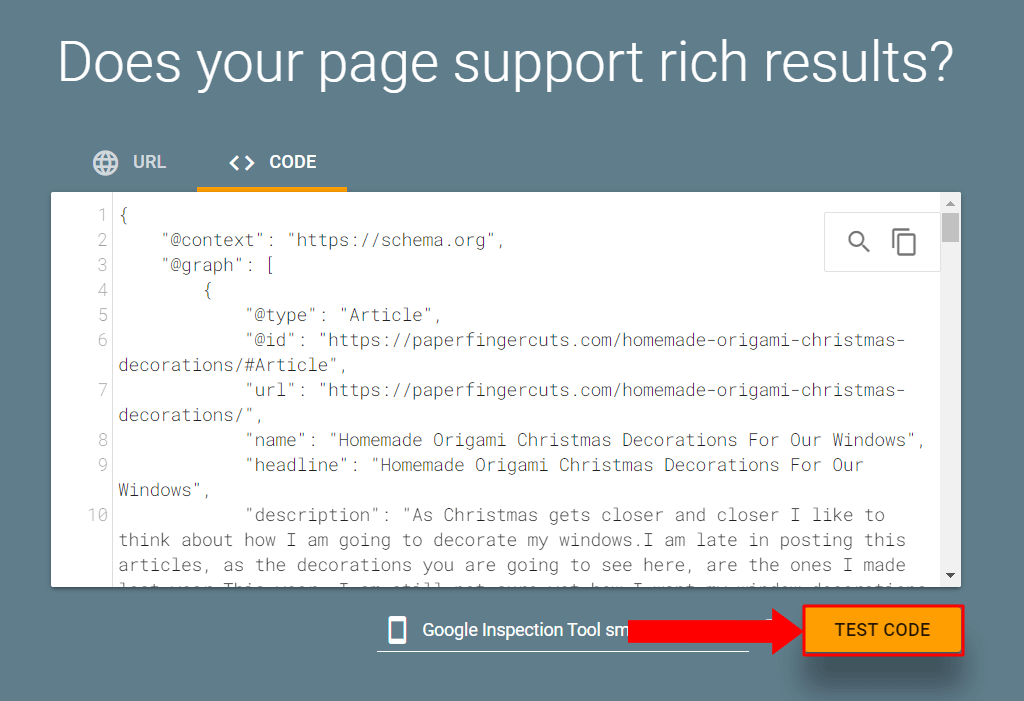
3. A small pop-up appears, and you will have to wait a few moments for the data to be processed
4. Once data is processed, you will be able to see your work, test it, share it and use it to enhance your work.

For further details, we recommend referring to the following resources
Book Schema
Book actions (Book) structured data
Course Schema
Course Schema
Course Schemas provides detailed information about an educational course on a webpage. It includes properties like title, description, instructor(s), duration, prerequisites, etc. Implementing this markup helps search engines understand and present course-related content in search results.
A course schema typically includes various properties such as the course title, description, provider, instructor, duration, start date, end date, prerequisites, language, audience, delivery method (e.g., online, in-person), course fees, and more. Can be used by various platforms and applications to display course information consistently and accurately across different interfaces.
Mandatory Fields:
- Title: The name or title of the course.
- Description: A brief overview or summary of the course content.
- Provider: The entity or organization offering the course.
- Start Date: The date when the course begins.
- End Date: The date when the course concludes.
Recommended Fields:
- Instructor: The individual or individuals responsible for teaching the course.
- Duration: The time it takes to complete the course.
- Prerequisites: Any requirements or qualifications needed before enrolling in the course.
- Audience: The intended target audience or demographic for the course.
- Language: The primary language used in the course materials.
- Delivery Method: How the course is delivered, whether online, in-person, or through a specific medium.
- Fees: Any costs associated with enrolling in the course.
Including both mandatory and recommended fields in a course schema ensures that the course is effectively represented and provides the necessary information for users to find, evaluate, and enroll in the course.
Here is an example of Course schema looks like:

How to access Course schema using Rich Snippets
Access it from METAs – Rich Snippet – Course Page

Clicking on the “+” symbol will open up a panel where you can start editing and customizing your Schema Template.
A pop-up will appear

Add your data, a question and its answer.
Mandatory fields will have small red starlike symbol (*) added to them:

Select the Provider
“Organization” refers to an entity that offers the course, such as a school or business;
“Person” denotes an individual, like a teacher or instructor, responsible for or associated with the course.

Add a description for the course, while there’s no specific character limit for the “description” field as defined by https://schema.org/Course. For optimal SEO, keep descriptions concise, aiming for 150-160 characters, similar to meta descriptions, to highlight essential information.

Adding “published date” and “modified date” adds clear timestamps for when the course was first offered and last updated. This helps users understand the currency of the course content and search engines to recognize the freshness and relevance of the information, potentially influencing search rankings and user trust.

Adding an author name attributes the content to its creator, enhancing credibility and user trust.

Adding review ratings highlights user satisfaction, influencing trust and enrollment decisions.
Use valid rating scale values (1 to 5) to accurately reflect the feedback from actual users to maintain integrity and trustworthiness in the data presented.

Incorporating reviews into a Course schema enhances the information with real user feedback
Special mention: Ensure reviews are genuine and include the “Review” property with detailed “reviewRating” and “author” information to provide context and authenticity to the feedback.

With this you have a Course schema set up. All there is left to do is check it up and see if it works as expected. This is easier than you imagine, and Squirrly will help with the steps.
Verify Markup
After saving your changes, you can verify that the Course schema markup has been added correctly by viewing the page or post source code. Look for the JSON-LD markup representing the Course schema.
1. Click on JSON-LD Code – Validate JSON-LD
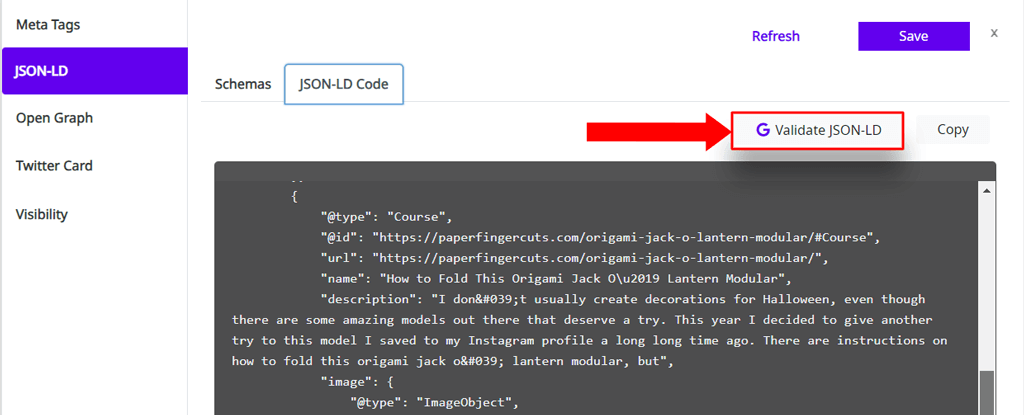
2. A new page / tab will open you will get you test code, click on TEST CODE
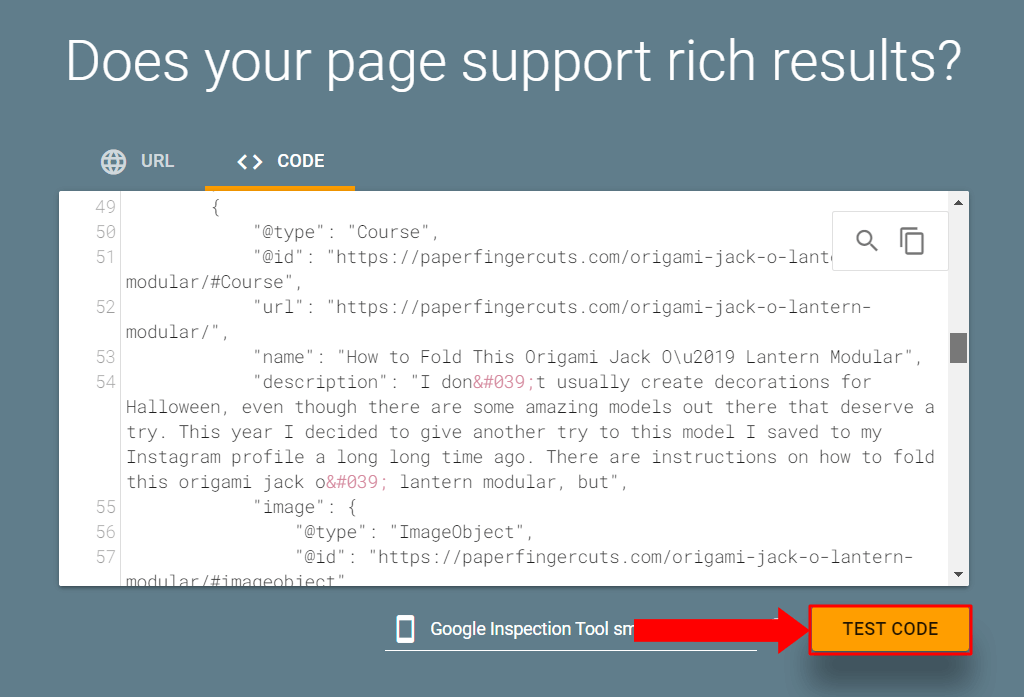
3. A small pop-up appears, and you will have to wait a few moments for the data to be processed
4. Once data is processed, you will be able to see your work, test it, share it and use it to enhance your work.

For further details, we recommend referring to the following resources
Course schema
Course list (Course) structured data
Recipe Schema
Recipe Schema
Recipe Schema is a structured format for providing detailed information about a recipe on a webpage. It includes properties like title, ingredients, cooking instructions, and more. Implementing this markup helps search engines understand and present recipe-related content in search results.
Recipe Schema
The Recipe schema is utilized by culinary websites to provide structured information about recipes. Helps search engines understand the details of recipes presented on a website, enhancing their visibility in search results.
Implementing the Recipe schema is similar to utilizing other content-specific schemas, such as the FAQPage or NewsArticle. It involves providing search engines with specific details about the recipe. When you add a Recipe schema to a webpage, it details crucial information such as the recipe name, ingredients, cooking time, and instructions. This markup improves the appearance of recipes in search results, offering users immediate insights into the recipe content.
For recipe listings, the Recipe schema includes mandatory and optional fields, as follows:
Mandatory Fields:
name: The name of the dish.
image: Images of the prepared dish.
recipeInstructions: The step-by-step cooking instructions.
recipeIngredient: The components required to make the dish.
Recommended Fields:
author: The creator of the recipe.
datePublished: When the recipe was first published.
prepTime: The preparation time for the dish.
cookTime: The cooking time for the dish.
description: A summary or brief description of the dish.
recipeYield: The number of servings or the quantity it makes.
recipeCategory: The type of meal or cuisine.
recipeCuisine: The culinary style or origin of the recipe.
nutrition: Nutritional information of the dish.
While the mandatory fields are necessary for a valid Recipe schema, including the recommended fields can significantly enhance the user experience by providing more detailed information, which can also positively affect the recipe’s search rankings and visibility.
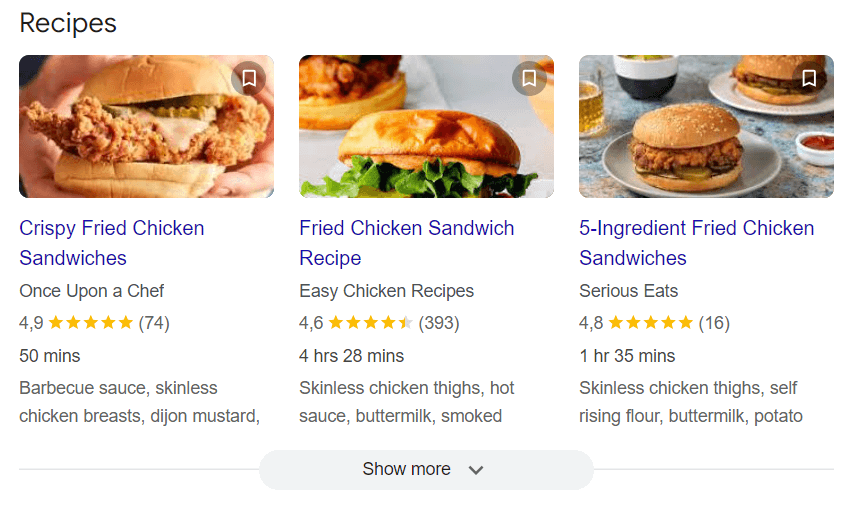
Here is an example of Recipe schema looks like:
How to access Recipe schema using Rich Snippets
Access it from METAs – Rich Snippet – Recipe
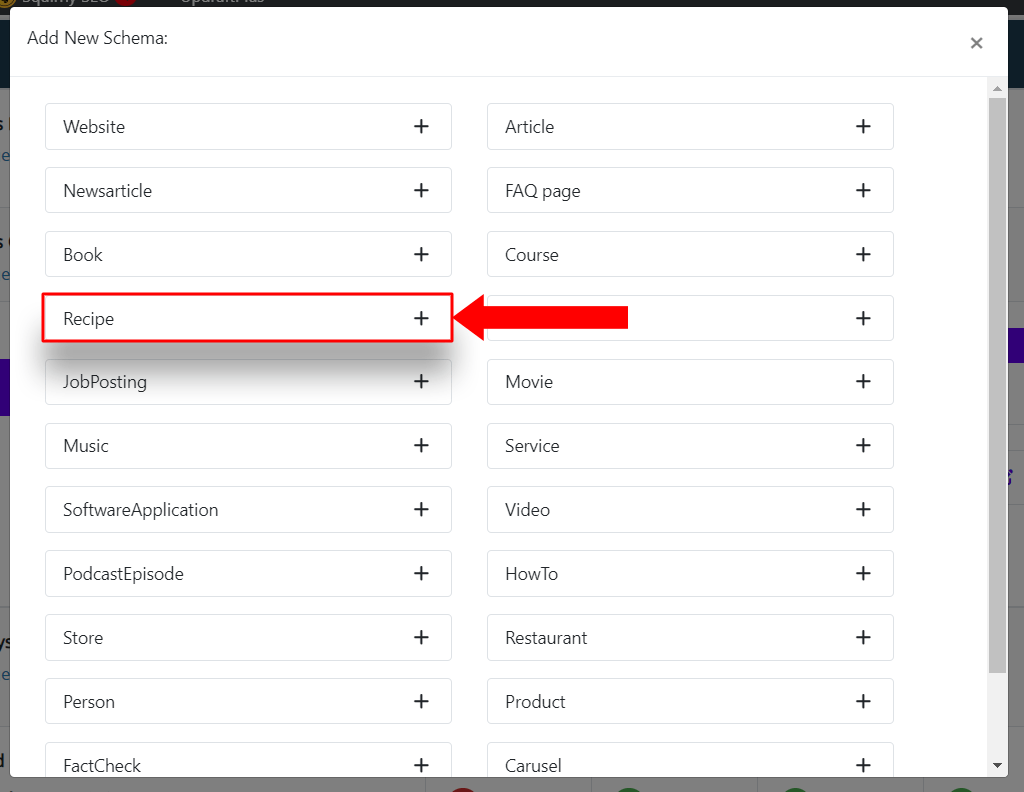
Clicking on the “+” symbol will open up a panel where you can start editing and customizing your Schema Template.
A pop-up will appear

Add your data, a question and its answer.
Mandatory fields will have small red starlike symbol (*) added to them:

The recommended format for dates in structured data according to ISO 8601 is YYYY-MM-DD.

For the author’s name use the “Author” property

In the description, you want to keep it engaging and informative, ideally between 50-300 characters to ensure it’s long enough to be descriptive but concise enough to be digestible at a quick glance.
Remember that the description should accurately reflect the recipe content to meet user expectations and search engine guidelines.

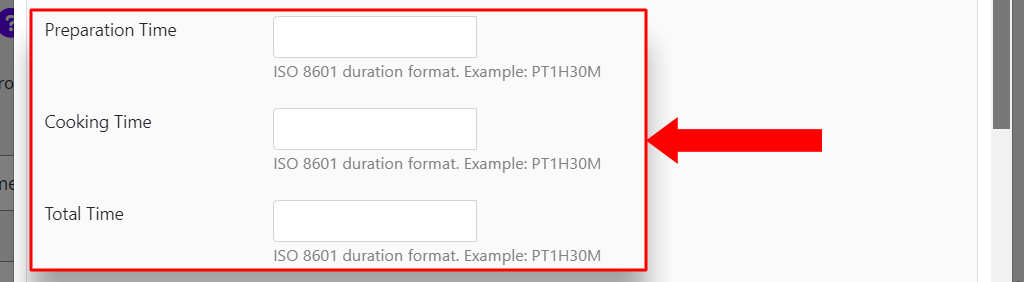
The recommended format for durations in structured data is ISO 8601 duration format. In this format, you would express the preparation time in hours and minutes like “PT1H30M” for 1 hour and 30 minutes, or “PT15M” for 15 minutes.
For the recipe type, you should use a common name for the category of the dish, such as “Dessert”, “Main Course”, or “Salad”. While for Cuisine, there is no particular format, try using a simple word, such as “Italian”, as this field defines the culinary tradition or country the recipe belongs to

The “keywords” property can be used to include relevant search terms associated with the recipe. This field is essentially a list of words or phrases that someone might use to search for your recipe or related content

The “recipe yield” property specifies the quantity or number of servings that the recipe produces, such as “serves 4” or “12 cookies”

Adding the calories section provides nutritional information, specifically the caloric content.
Specify the caloric content in kilocalories (kcal), the standard unit of energy in nutrition. The format is a numerical value followed by ” kcal”.

Ensure that each ingredient is added in a different line, to add new ingredients, click on “Add RecipeIngredient” as this will list your ingredients on separate lines

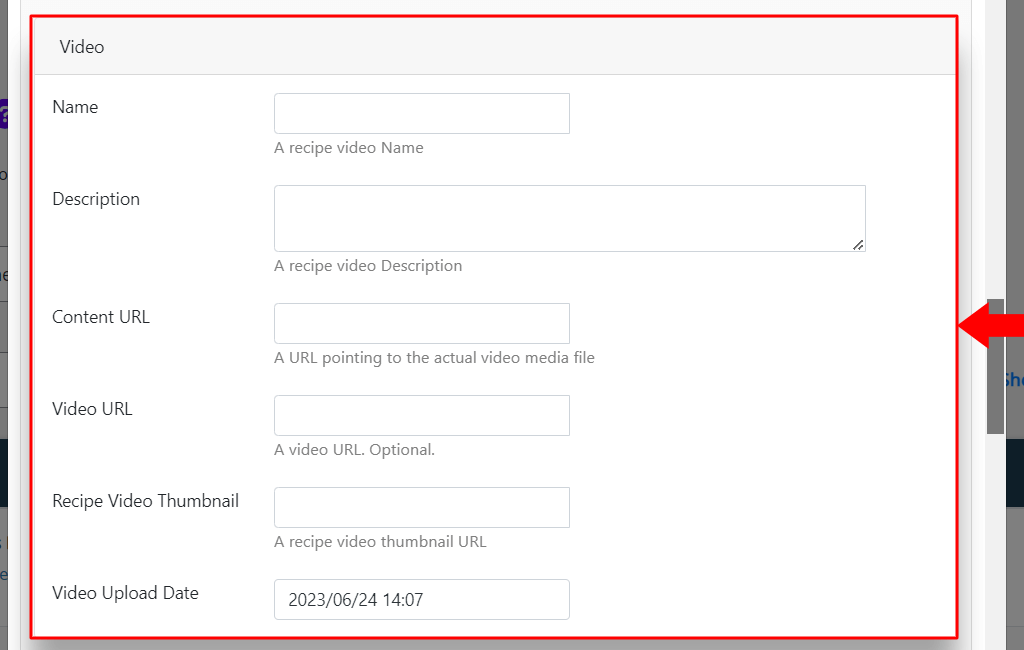
Videos should be in a web-friendly format, such as MP4, that is widely supported across devices and browsers.
Keep videos concise; ideally, between 2 to 5 minutes, respecting the ISO 8601 duration standard. This length is long enough to cover essential details without losing the viewer’s attention.
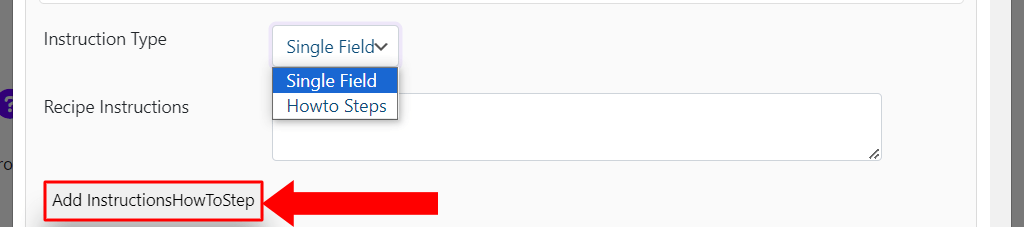
when recipe instructions are provided as a single text field, all steps are included in one continuous block of text;
this format is simpler but might be less user-friendly for complex recipes.
B) Howto Steps
using HowTo Steps offers a more structured approach. For each step you will add a new “Add IngridiesntsHowToStep” field;
Start each step with an action verb to make the instructions dynamic and easier to follow (e.g., “Mix”, “Bake”, “Chop”);
when relevant, include timing (e.g., “Bake for 20 minutes”) and quantities (e.g., “1 cup of flour”) within the steps for precision
Adding image URLs helps with visual appeal, clarity, increases click-through rates, improves user experience, and boosts SEO visibility.

Adding reviews enhances credibility and user trust by showcasing real user experiences and feedback. Reviews can influence decision-making by providing insights into the recipe’s success and taste.
The format used must be ISO 8601 format YYYY-MM-DD

The name of the “author” should be provided as a simple text string representing the full name of the author

Reviews can improve search engine optimization (SEO) by adding fresh, relevant content, which search engines favor. Similar to other rich snippets, such as Book Schema, the recommended format is “1 to 5”

Make sure to click on Save

With this you have a Recipe schema set up. All there is left to do is check it up and see if it works as expected. This is easier than you imagine, and Squirrly will help with the steps.
Verify Markup
After saving your changes, you can verify that the Recipe schema markup has been added correctly by viewing the page or post source code. Look for the JSON-LD markup representing the Recipe schema.
1. Click on JSON-LD Code – Validate JSON-LD

2. A new page / tab will open please, click on TEST CODE

3. A small pop-up appears, and you will have to wait a few moments for the data to be processed
4. Once data is processed, you will be able to see your work, test it, share it and use it to enhance your work.

For further details, we recommend referring to the following resources
Recipe Schema
Recipe (Recipe, HowTo, ItemList) structured data
Event Schema
Event Schema
The Event schema is employed by websites to offer structured details about various events. It enables search engines to grasp the specifics of events showcased on a website, thereby improving their visibility in search results.
Implementing the Event schema is akin to using other specific schemas like the FAQPage or NewsArticle. It entails giving search engines precise information about the event. When an Event schema is added to a webpage, it outlines essential information such as the event name, date, location, and description. This markup enhances how events are presented in search results, providing users with immediate insights into the event details.
For event listings, the Event schema includes both mandatory and optional fields, as follows:
Mandatory Fields:
name: The name of the event.
startDate: The starting date and time of the event.
location: The venue of the event, which can include detailed sub-properties like address.
Recommended Fields:
endDate: The ending date and time of the event.
description: A summary or brief description of the event.
image: Images related to the event.
organizer: The organizer of the event.
eventStatus: The current status of the event (e.g., scheduled, canceled, postponed).
performer: The performer(s) at the event.
offers: Details about tickets for the event, including price and availability.
While the mandatory fields are essential for a valid Event schema, including the recommended fields can greatly improve the user experience by offering more comprehensive details. This, in turn, can positively impact the event’s search rankings and visibility, making it easier for potential attendees to find and understand event information.
Here is an example of Event schema looks like:

How to access Event schema using Rich Snippets
Access it from METAs – Rich Snippet – Event

Clicking on the “+” symbol will open up a panel where you can start editing and customizing your Schema Template.
A pop-up will appear

Add your data, a question and its answer.
Mandatory fields will have small red starlike symbol (*) added to them:

From Description add your description, think of it like adding a mini-advertisement for your event

Select the Event type you wish to add:

Event status – indicates if the event is still scheduled to happen, has been canceled, or is being postponed to a later date

Event attendance mode – refers to how the event will take place, online, offline or a mix of the two

Location – in this field, ensure you add the relevant data to where your event will take place, making sure to manually add this information

Performer – this property can include details such as the performer’s name, type, website

Organizer – is used to detail the organizer’s name, type (e.g., Person or Organization), and contact information.

Use ISO 8601 Format: This is the standard way to write dates and times, making it clear and understandable worldwide. For dates, use YYYY-MM-DD (e.g., 2024-03-30). If you’re including the time, write it like YYYY-MM-DDThh:mm:ss plus a time zone if needed (e.g., 2024-03-30T10:00:00+00:00 for 10 AM UTC).

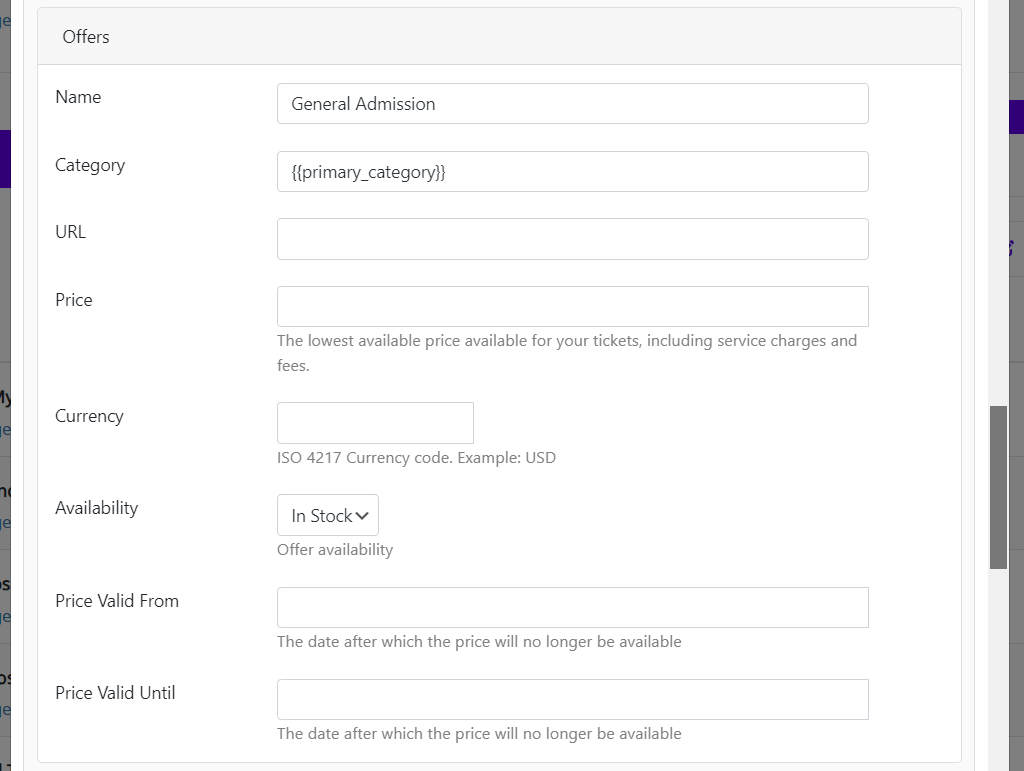
Offers refer to the details (price, availability, currency etc) about tickets or registrations for the event.
Reviews provide social proof, showing potential attendees what others thought of the event, provide a numerical rating, typically on a scale (e.g., 1 to 5)

Adding image URLs helps with visual appeal, clarity, increases click-through rates, improves user experience, and boosts SEO visibility.

Make sure to click on Save

With this you have an Event schema set up. All there is left to do is check it up and see if it works as expected. This is easier than you imagine, and Squirrly will help with the steps.
Verify Markup
After saving your changes, you can verify that the Event schema markup has been added correctly by viewing the page or post source code. Look for the JSON-LD markup representing the Event schema.
1. Click on JSON-LD Code – Validate JSON-LD

2. A new page / tab will open please, click on TEST CODE
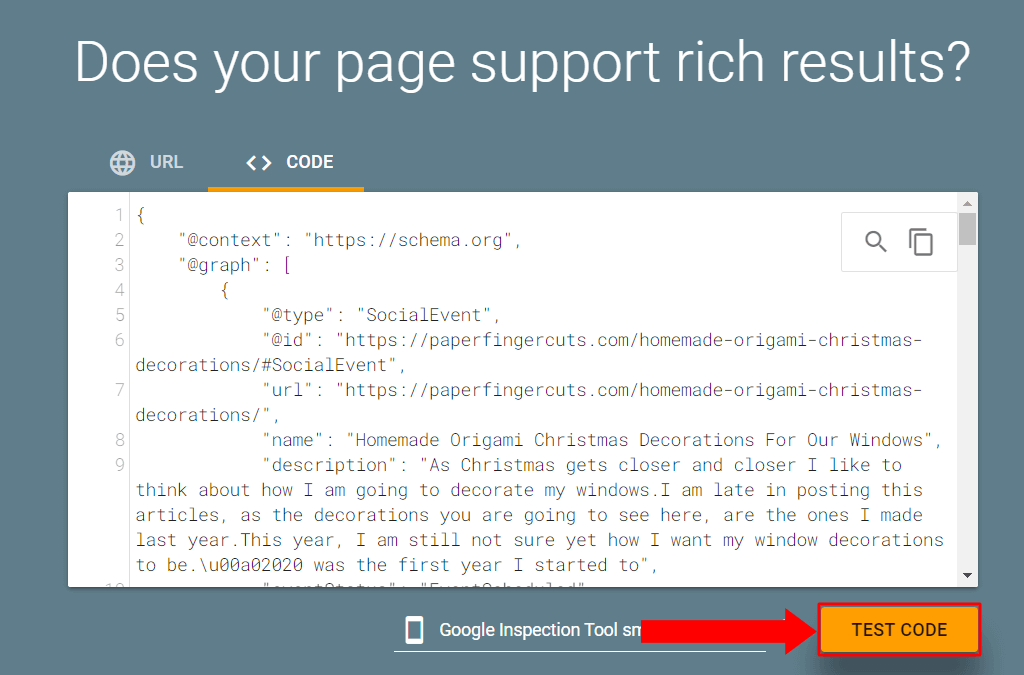
3. A small pop-up appears, and you will have to wait a few moments for the data to be processed
4. Once data is processed, you will be able to see your work, test it, share it and use it to enhance your work.

For further details, we recommend referring to the following resources
Event Schema
Event (Event) structured data
JobPosting Schema
JobPosting Schema
The JobPosting schema is a structured format designed to communicate details about job vacancies on a webpage effectively. It includes properties such as the job title, description, location, and salary. Implementing this markup assists search engines in understanding and displaying job-related content more prominently in search results.
Purpose of the JobPosting Schema
Just as the Event schema helps search engines better understand event-related details, the JobPosting schema serves a similar purpose for job listings. It enables search engines to grasp the specifics of job openings presented on a website, thereby improving their visibility in search results.
By adding a JobPosting schema to a webpage, you provide precise information about the job vacancy. This structured data markup enhances how job postings are presented in search results, offering users quick insights into key job details.
Key Components of the JobPosting Schema
The schema encompasses both mandatory and recommended fields to provide a comprehensive overview of the job opening:
Mandatory Fields:
title: The official title of the job vacancy.
description: A detailed description of the job, including responsibilities and qualifications.
hiringOrganization: The company or organization looking to hire.
jobLocation: The location where the job is based, which can include detailed sub-properties like address.
Recommended Fields:
salaryCurrency: The currency of the salary (e.g., USD, EUR).
salary: The salary range or fixed salary for the job.
datePosted: The date when the job posting was published.
validThrough: The date until which the job posting is valid.
employmentType: The nature of employment (e.g., FULL_TIME, PART_TIME).
Including both mandatory and recommended fields not only fulfills the basic requirements for a valid JobPosting schema but also significantly enhances the job listing. Providing detailed information can improve the job’s search rankings and visibility, making it easier for potential candidates to discover and understand the job opportunity.
Implementing the JobPosting schema is akin to employing other specific schemas like FAQPage or NewsArticle. It’s about giving search engines detailed, structured information that enhances the visibility and comprehensibility of job listings in search results, thereby aiding both employers in attracting suitable candidates and job seekers in finding relevant opportunities.
Here is an example of JobPosting schema looks like:

How to access JobPosting schema using Rich Snippets
Access it from METAs – Rich Snippet – JobPosting
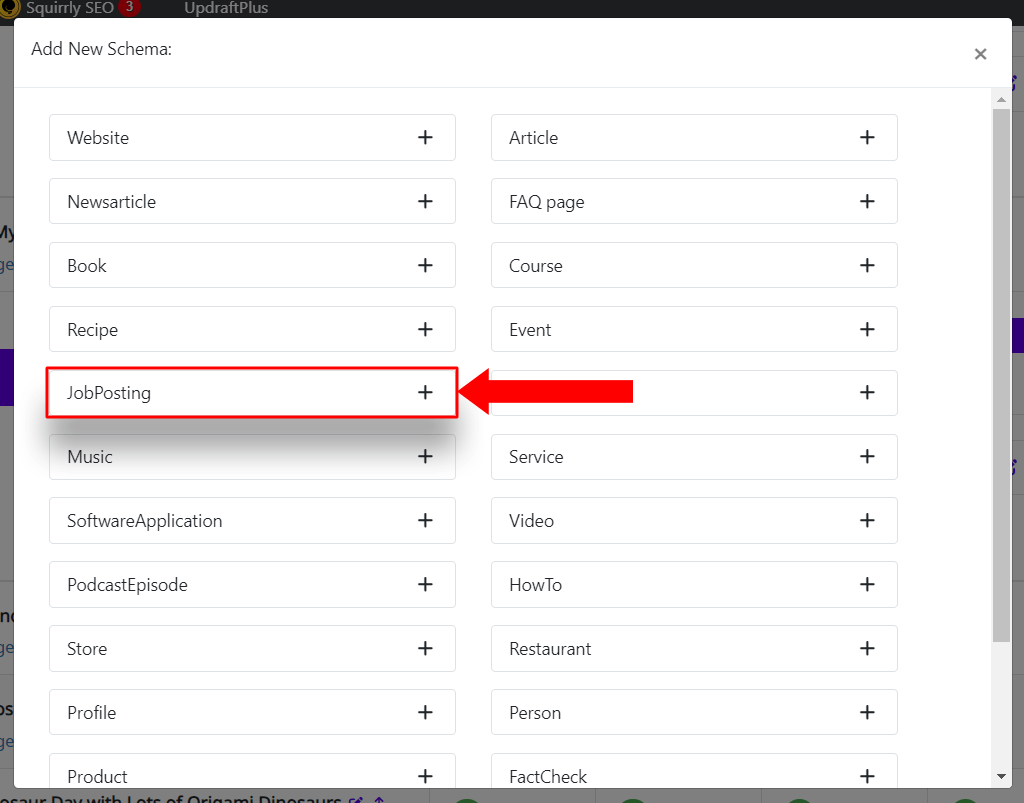
Clicking on the “+” symbol will open up a panel where you can start editing and customizing your Schema Template.
A pop-up will appear to edit your rich snippet

Add your data, a question and its answer.
Mandatory fields will have small red starlike symbol (*) added to them:
Headline – keep it between 50-70 characters, focusing on the job title and a key highlight

Description – aim for 300-700 words to balance detail with conciseness, use headings, bullet points, and a conversational tone, include sections for responsibilities, requirements, and benefits.

Payroll – clarifies compensation details, enhancing transparency and attracting candidates by setting clear expectations about salary or wages upfront

HiringOrzanization – provides essential information about the employer, plus adding a URL and logo for the company enhances credibility

Identifier field distinguishes each job posting, enabling efficient tracking, management, and reference across systems and platforms. Here is an example for what format to use JOB-2024-000123 – type of record (job), year, a unique serial number, to identify the posting

JobLocation – helps candidates quickly see where the job is based, recommended format: “City, State/Region, Country” for clarity and consistency

Image URL – allows for the addition of a relevant image, such as a company logo or workplace photo

Address – provides specific location details of the job, aiding candidates in understanding the exact work location. Recommended format: “Street Address, City, State/Region, Postal Code, Country” for precision and clarity.
Make sure to Save your work

With your JobPosting schema now in place, the next step is simply to verify that it functions as intended. This task is more straightforward than it might seem, and tools like Squirrly are available to guide you through the verification process.
Verify Markup
After saving your changes, you can verify that the JobPosting schema markup has been added correctly by viewing the page or post source code. Look for the JSON-LD markup representing the JobPosting schema.
1. Click onJSON-LD Code – Validate JSON-LD

2. A new page / tab will open you will get you test code, click on TEST CODE

3. A small pop-up appears, and you will have to wait a few moments for the data to be processed
4. Once data is processed, you will be able to see your work, test it, share it and use it to enhance your work.

For further details, we recommend referring to the following resources
JobPosting Schema
Job posting (JobPosting) structured data for Job Search
The Squirrly SEO Patterns List
Movie Schema
Movie Schema
The Movie schema is utilized by websites to provide structured details about films. It enables search engines to understand the specifics of movies listed on a website, thereby enhancing their visibility in search results. Implementing the Movie schema is similar to utilizing other specific schemas like Book or MusicAlbum. It involves giving search engines detailed information about the movie. When a Movie schema is added to a webpage, it delineates essential information such as the movie title, release date, director, and a brief description. This markup improves how movies are displayed in search results, offering users immediate insights into the movie details.
For movie listings, the Movie schema includes both mandatory and optional fields, as follows:
Mandatory Fields:
name: The title of the movie.
director: The director of the movie.
Recommended Fields:
actor: The actors featured in the movie.
datePublished: The release date of the movie.
description: A summary or brief description of the movie.
duration: The runtime of the movie.
genre: The genre of the movie.
image: Images related to the movie, such as posters or stills.
trailer: A link to the movie trailer.
While the mandatory fields are crucial for a valid Movie schema, incorporating the recommended fields can significantly enhance the user experience by providing more detailed information. This, in turn, can positively affect the movie’s search rankings and visibility, making it easier for potential viewers to find and understand movie information.
Here is an example of Movie schema looks like:

How to access Movie schema using Rich Snippets
Access it from METAs – Rich Snippet – Movie
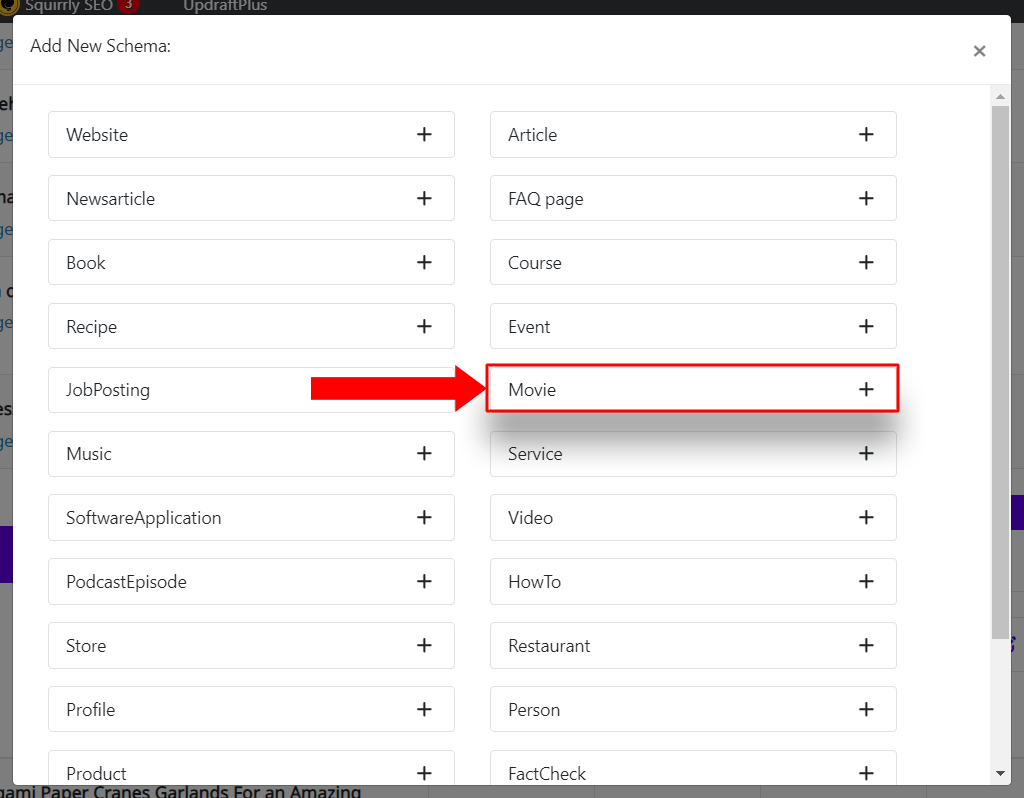
Clicking on the “+” symbol will open up a panel where you can start editing and customizing your Schema Template.
A pop-up will appear

Add your data, a question and its answer.
Mandatory fields will have small red starlike symbol (*) added to them:
Headline – best practices for SEO and usability suggest keeping titles concise and informative, thus this should be maximum of 60 characters or fewer
This field is imported automatically by Squirlly SEO

Description – a good practice is to aim for a description length of about 150 to 160 characters
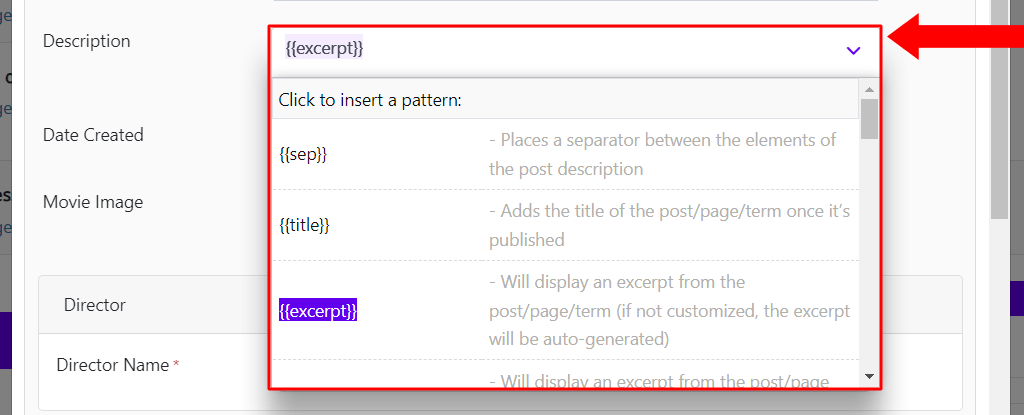
Date created – as for all other schemas your format should be in ISO 8601 format (e.g., “YYYY-MM-DD”).
Movies image – add a representative image for the movie, such as the poster

Director name – the conventional format is “Name Surname”

Reviews provide social proof, showing potential attendees what others thought of the event, provide a numerical rating, typically on a scale (e.g., 1 to 5)

Make sure to click on Save
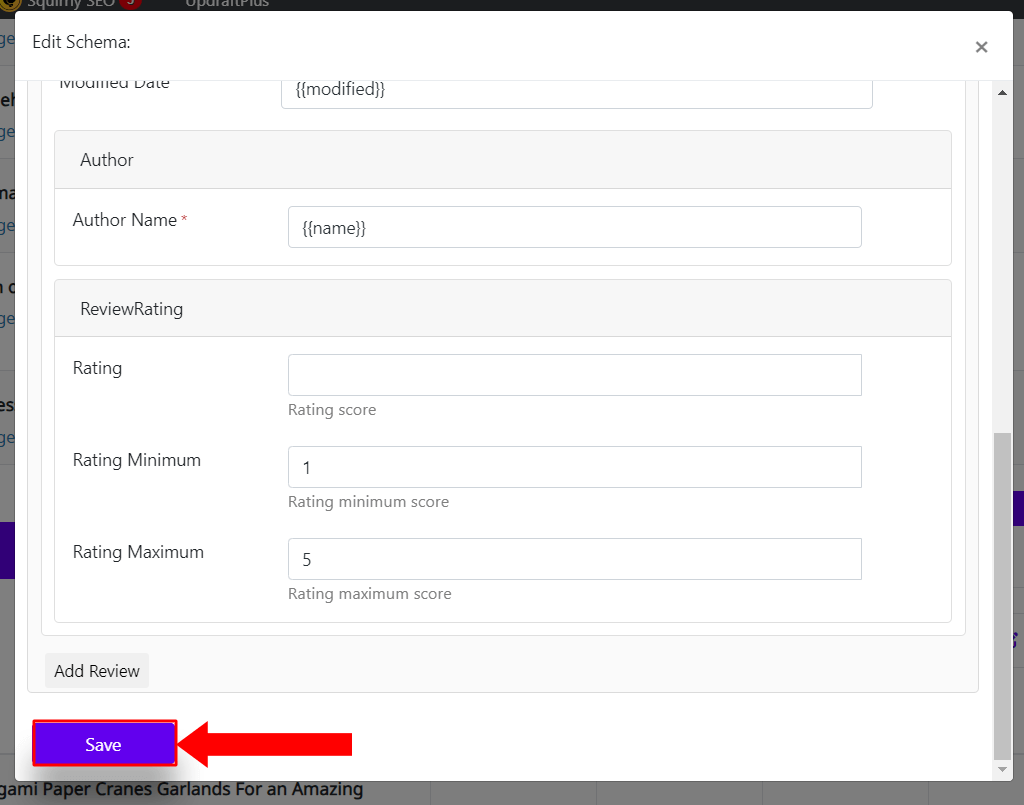
With this you have a Movie schema set up. All there is left to do is check it up and see if it works as expected. This is easier than you imagine, and Squirrly will help with the steps.
Verify Markup
After saving your changes, you can verify that the Movie schema markup has been added correctly by viewing the page or post source code. Look for the JSON-LD markup representing the Movie schema.
1. Click on JSON-LD Code – Validate JSON-LD

2. A new page / tab will open you will get you test code, click on TEST CODE

3. A small pop-up appears, and you will have to wait a few moments for the data to be processed
4. Once data is processed, you will be able to see your work, test it, share it and use it to enhance your work.

For further details, we recommend referring to the following resources
Movie Schema
Movie carousel (Movie) structured data
Music Schema
Music Schema
The Music schema is designed for websites to structure information about music-related content, such as songs, albums, and music videos. This structured data helps search engines comprehend the details of music items on a website, thus improving their representation in search results. Adopting the Music schema, works in a similar fashion to implementing Movie or Book schemas, involves conveying detailed music-related information to search engines. When a Music schema is integrated into a webpage, it highlights critical details like the song or album title, artist name, release date, and a concise description. This markup enhances how music content is displayed in search results, providing users with immediate insights into the music’s specifics.
For music content listings, the Music schema encompasses both essential and optional fields, as described:
Mandatory Fields:
name: The title of the song or album.
byArtist: The artist or band responsible for the music.
Recommended Fields:
datePublished: The release date of the song or album.
description: A summary or brief overview of the music.
genre: The genre of the music.
image: Images related to the music, such as album covers or artist photos.
musicCompositionForm: The composition form of the music (for classical music).
musicReleaseFormat: The format of the music release (e.g., CD, Vinyl, Digital).
recordLabel: The record label that released the music.
duration: The runtime of the song or total album length.
trailer: A link to the music video or teaser.
While the mandatory fields ensure the validity of the Music schema, adding the recommended fields can greatly improve the user experience by offering more comprehensive information. This detailed presentation can positively influence the music content’s search rankings and visibility, facilitating easier discovery and comprehension of music information by potential listeners.
Here is an example of Music schema looks like:

How to access Music schema using Rich Snippets
Access it from METAs – Rich Snippet – Music

Clicking on the “+” symbol will open up a panel where you can start editing and customizing your Schema Template.
A pop-up will appear

Add your data, a question and its answer.
Mandatory fields will have small red starlike symbol (*) added to them:
Headline – best practices for SEO and usability suggest keeping titles concise and informative, thus this should be maximum of 60 characters or fewer
This field is imported automatically by Squirlly SEO
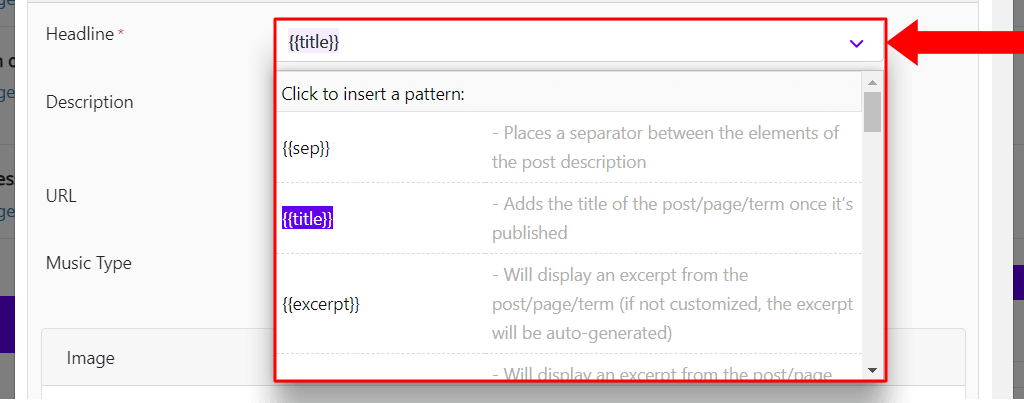
Description – a good practice is to aim for a description length of about 150 to 160 characters
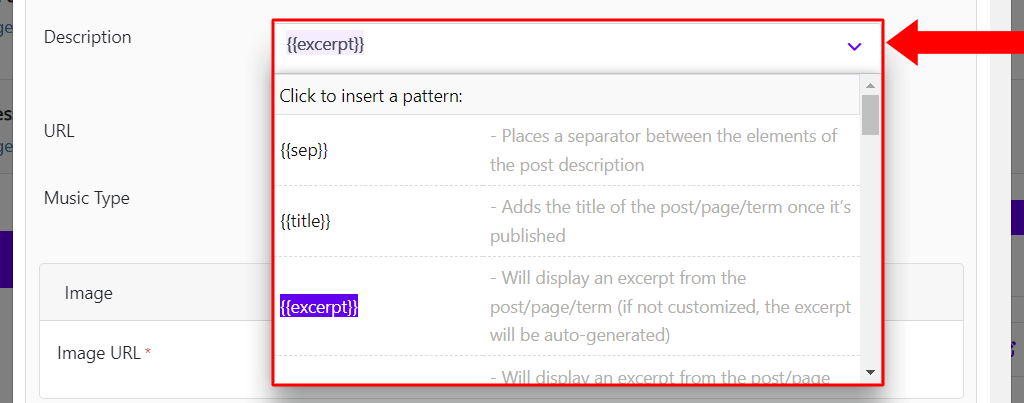
Music type – refers to the specific category or classification of music content
MusicGroup represents a band or a group of musicians who perform together. It’s used to mark up information about the artist or band itself.
MusicAlbum is used to represent a collection of music recordings released together as an album. It’s focused on the product of the music group, not the performers themselves.

Image URL: should be optimized for the web to ensure fast loading times while maintaining quality; recommended format: JPEG, PNG, or WebPy.

Make sure to click on Save

With this you have a Music schema set up. All there is left to do is check it up and see if it works as expected. This is easier than you imagine, and Squirrly will help with the steps.
Verify Markup
After saving your changes, you can verify that the Music schema markup has been added correctly by viewing the page or post source code. Look for the JSON-LD markup representing the Music schema.
1. Click onJSON-LD Code – Validate JSON-LD

2. A new page / tab will open you will get you test code, click on TEST CODE

3. A small pop-up appears, and you will have to wait a few moments for the data to be processed
4. Once data is processed, you will be able to see your work, test it, share it and use it to enhance your work.

For further details, we recommend referring to the following resources
MusicRecording Schema
The Squirrly SEO Patterns List
Service Schema
Service Schema
Service Schema structures details about services offered on a webpage, such as service name, description, price range, availability, and provider information. This structured markup facilitates search engines in comprehending and showcasing service-related content in search results.
Service Schema The Service schema is utilized by websites to provide structured details about the services they offer. This enables search engines to understand the specifics of the services listed on a website, thereby enhancing their visibility in search results.
Implementing the Service schema is similar to using other specific schemas like Product or Article schemas. It involves providing search engines with precise information about the service. When a Service schema is added to a webpage, it outlines essential information such as the service name, description, provider, and price range. This markup improves how services are displayed in search results, offering users immediate insights into the service details.
For service listings, the Service schema includes both mandatory and optional fields, as follows:
Mandatory Fields:
name: The name of the service.
provider: The entity providing the service, which could be an organization or a person.
Recommended Fields:
description: A summary or brief description of the service.
priceRange: The range of costs for the service.
areaServed: The geographical area where the service is available.
serviceType: The type or category of the service.
image: Images related to the service.
offers: Details about service offers or packages.
While the mandatory fields are crucial for a valid Service schema, incorporating the recommended fields can significantly enhance the user experience by providing more detailed information. This, in turn, can positively affect the service’s search rankings and visibility, making it easier for potential clients to find and understand service information.
How to access Service schema using Rich Snippets
Access it from METAs – Rich Snippet – Service

Clicking on the “+” symbol will open up a panel where you can start editing and customizing your Schema Template.
A pop-up will appear
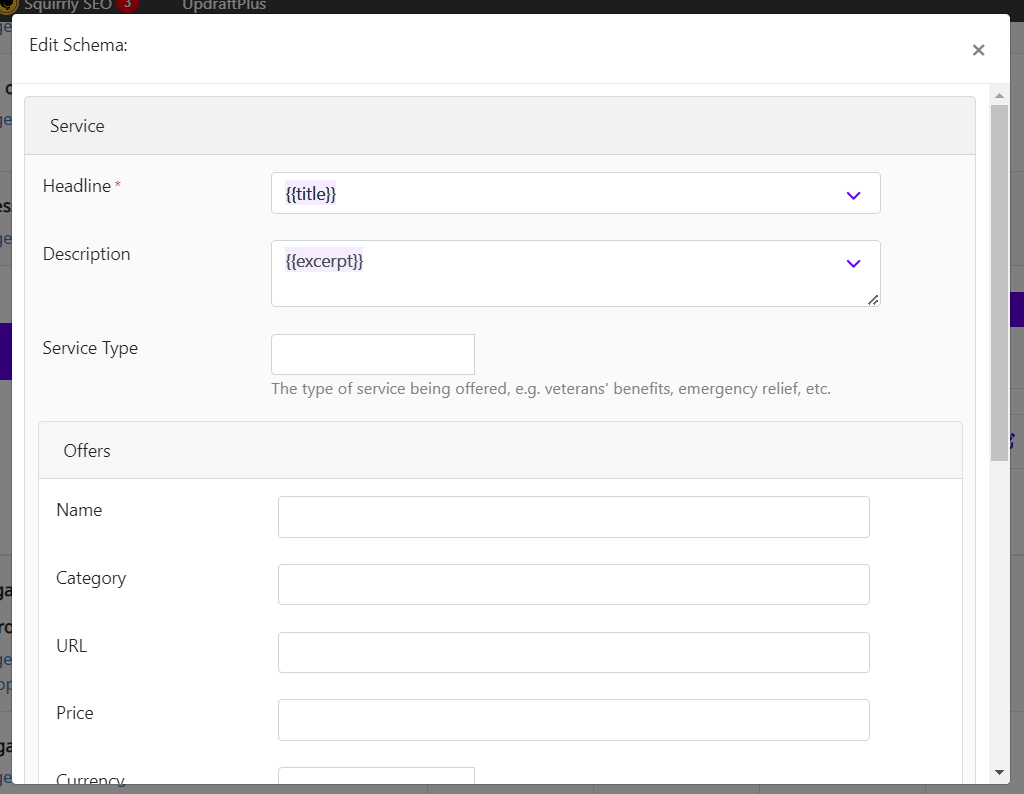
Add your data, a question and its answer.
Mandatory fields will have small red starlike symbol (*) added to them:

Description – provide a clear, concise, and compelling description of your service, this should be in between 150 to 250 words, to maintain the reader’s attention and improve search engine optimization (SEO).
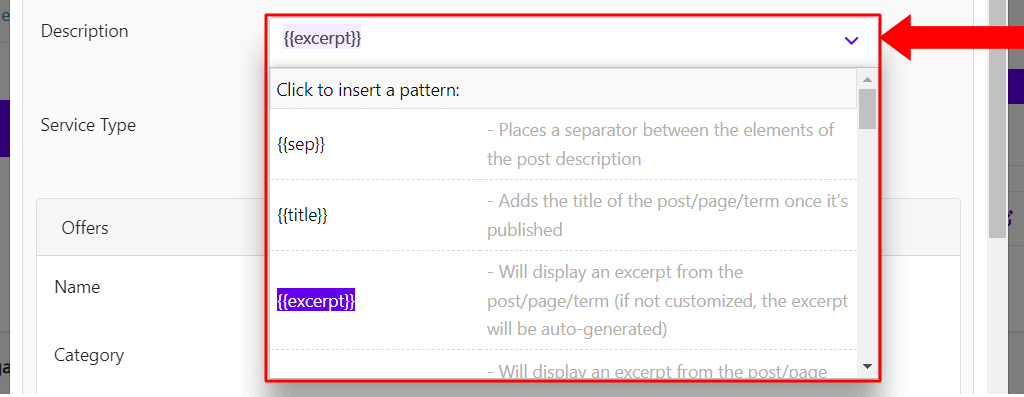
Service Type – the recommended format is a descriptive text , EG: “Web Design Services” or “Lawn Care and Maintenance”

Offers
Name – the name of the offer, here are a few examples “Monthly Web Development Subscription” or “Early Bird Consultation Discount”
Category – field groups your offer into a type, making it clear what service or product you’re providing, here is an example: IT and Web Services
Financial Planning Packages
URL – pointing to a page where the offer can be obtained
Price – price of the product or service.
Currency – currency of the price (e.g., USD, EUR) using the ISO 4217 currency code
Availability – the availability of the offer, using the defined availability types like “In Stock”, “Preorder” “Sold Out”
Price Valid From – the date when the offer starts being valid.
Price Valid Until – the date when the offer is no longer valid.

Image URL: The image should be optimized for the web to ensure fast loading times while maintaining quality; recommended format: JPEG, PNG, or WebPy.

Make sure to click on Save

With this you have a Service schema set up. All there is left to do is check it up and see if it works as expected. This is easier than you imagine, and Squirrly will help with the steps.
Verify Markup
After saving your changes, you can verify that the Service schema markup has been added correctly by viewing the page or post source code. Look for the JSON-LD markup representing the Service schema.
1. Click onJSON-LD Code – Validate JSON-LD

2. A new page / tab will open you will get you test code, click on TEST CODE
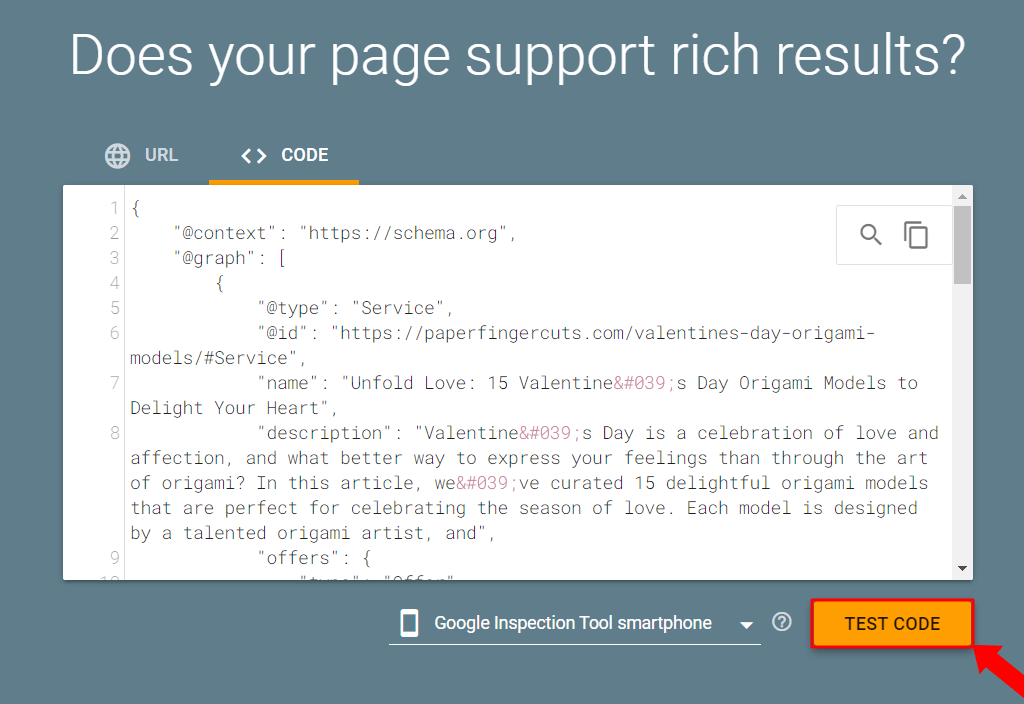
3. A small pop-up appears, and you will have to wait a few moments for the data to be processed
4. Once data is processed, you will be able to see your work, test it, share it and use it to enhance your work.

For further details, we recommend referring to the following resources
Service Schema
Software Schema
Software Schema
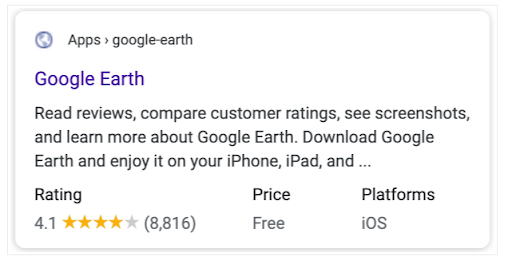
The Software schema is designed so that websites can detail information about software applications. This structured data format helps search engines understand and present software-related content effectively in search results.
Similar to implementing schemas for Events or Services, the Software schema requires providing search engines with detailed information about the software. When added to a webpage, it displays key information such as the software name, application category, operating system compatibility, and a brief description. This structured markup enhances the presentation of software in search results, giving users immediate and clear insights into the software features and requirements.
For software listings, the Software schema contains both essential and optional fields:
Mandatory Fields:
name: The name of the software or application.
applicationCategory: The type or category of the software (e.g., “Business”, “Multimedia”).
operatingSystem: The operating systems the software is compatible with.
Recommended Fields:
description: A summary or brief description of the software.
softwareVersion: The current version of the software.
softwareAddOn: Any add-ons or extensions available for the software.
softwareRequirements: Hardware or software requirements needed to run the software.
downloadUrl: A URL where the software can be directly downloaded.
screenshot: Images or screenshots showcasing the software’s interface.
offers: Details about purchasing or licensing options, including price.
Including both mandatory and recommended fields in the Software schema not only ensures the validity of the markup but also significantly increases user experience by providing detailed, useful information. This all-inclusive approach can positively affect the software’s search rankings and visibility, facilitating easier discovery and understanding for potential users.
Here is an example of Software schema looks like:
How to access Event schema using Rich Snippets
Access it from METAs – Rich Snippet – Software

Clicking on the “+” symbol will open up a panel where you can start editing and customizing your Schema Template.
A pop-up will appear

Add your data, a question and its answer.
Mandatory fields will have small red starlike symbol (*) added to them:
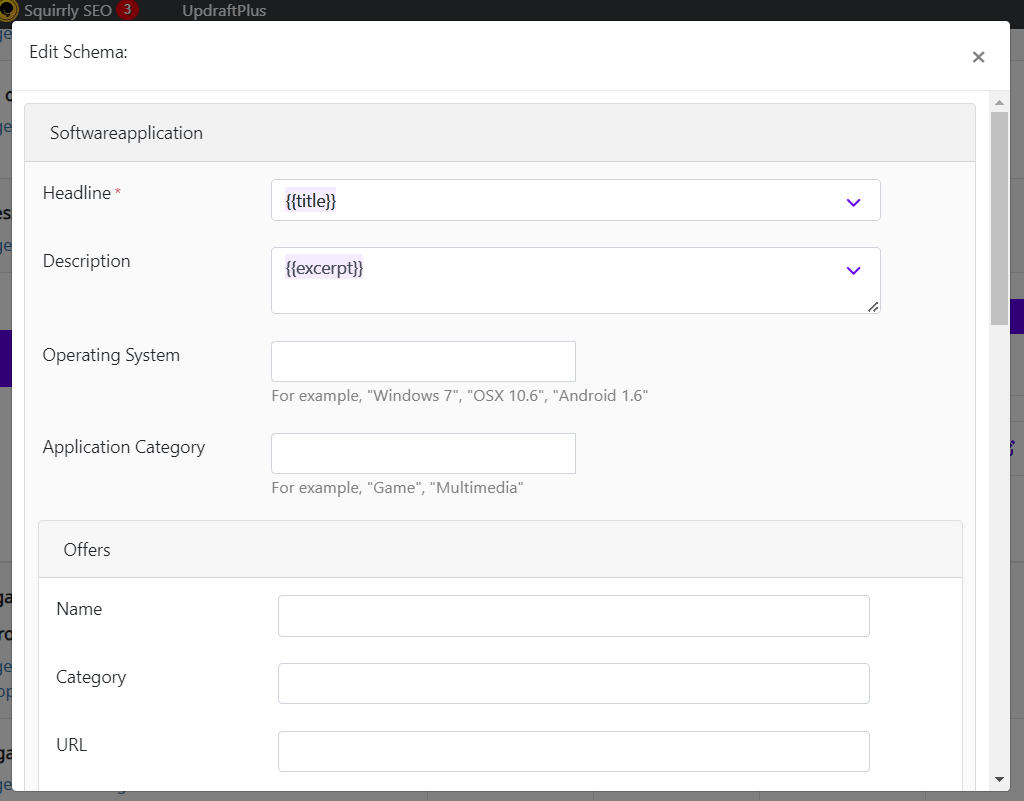
Description – best length is typically between one sentence and a short paragraph, around 50 to 150 words.

Operating system – indicates the required or supported operating system(s) on which a piece of software, application, or service is designed to run on, such as iOS, Windows, or others
Application Category – represents the classification or genre that a piece of software, application, or service falls into, based on its primary function or purpose, such as game/multimedia etc

Offers – is related to the commercial or transactional details for purchasing or using the software; include information on pricing, licensing, trials, subscriptions, or any promotional offers. include information on pricing, licensing, trials, subscriptions, or any promotional offers.
Ensure that currency is added respecting the ISO 4217 format

Add review – rating system should be 1 to 5 stars, make sure to also include review text, author, and date. This helps in parsing and analyzing the data.

Adding image URLs helps with visual appeal, clarity, increases click-through rates, improves user experience, and boosts SEO visibility.
Make sure to click on Save
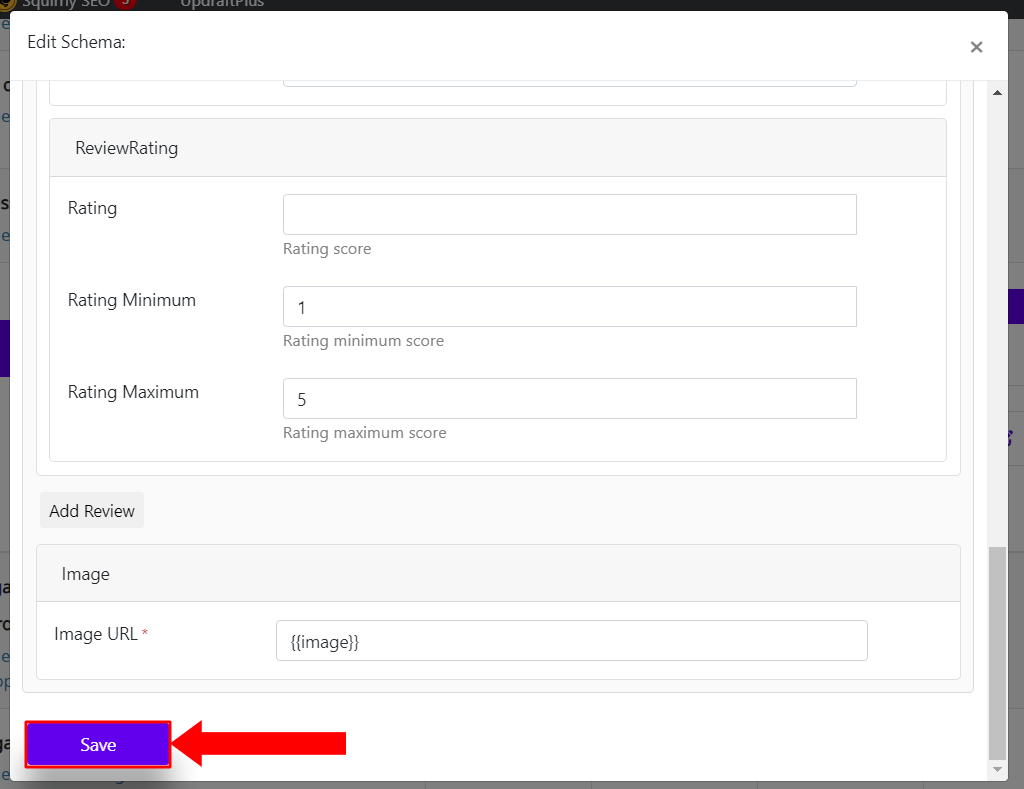
With this you have a Software schema set up. All there is left to do is check it up and see if it works as expected. This is easier than you imagine, and Squirrly will help with the steps.
Verify Markup
After saving your changes, you can verify that the Software schema markup has been added correctly by viewing the page or post source code. Look for the JSON-LD markup representing the Software schema.
1. Click on JSON-LD Code – Validate JSON-LD
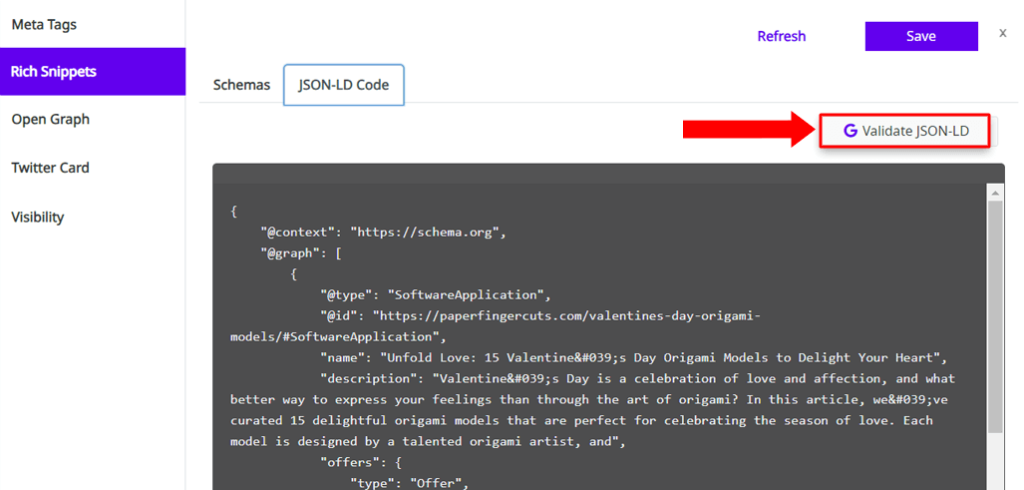
2. A new page / tab will open you will get you test code, click on TEST CODE
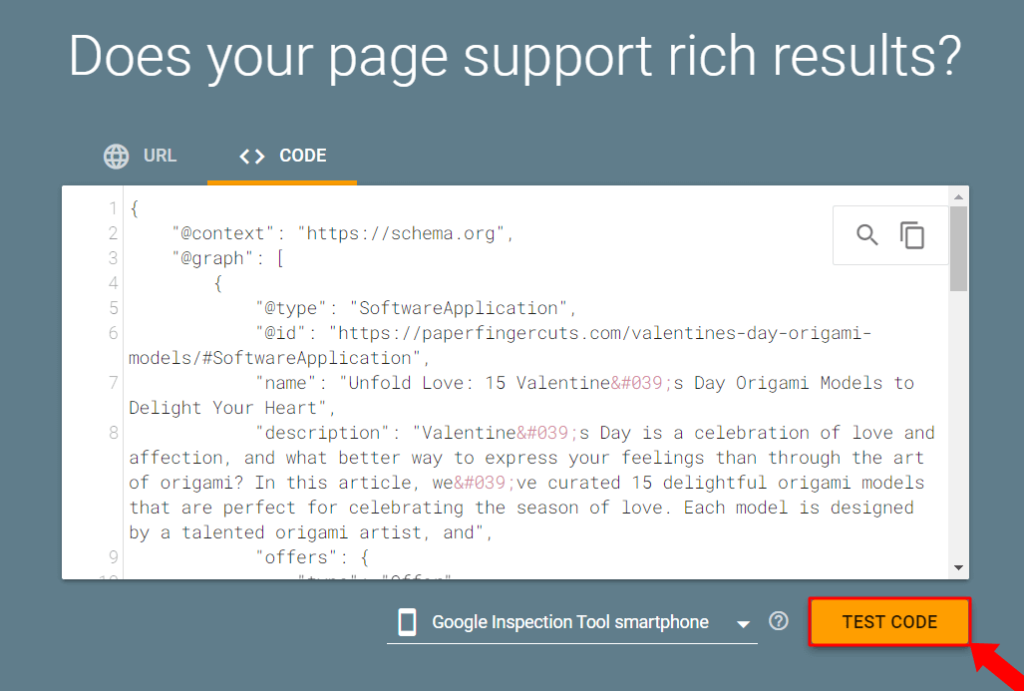
3. A small pop-up appears, and you will have to wait a few moments for the data to be processed
4. Once data is processed, you will be able to see your work, test it, share it and use it to enhance your work.

For further details, we recommend referring to the following resources
Software Schema
Software app (SoftwareApplication) structured data
Video Schema
Video Schema
The Video schema is perfect for websites looking to organize information about all video related content, such as movies, TV shows, and online clips. This setup makes it easier for search engines to understand your video content, ensuring it stands out in search results. Just like when you use schemas for music, movies, or books, adding a Video schema is all about sharing those juicy details with search engines. When you pop a Video schema onto your site, you’re highlighting all the important bits – such as video titles, who directed it, when it was released, and a neat little summary. This extra detail not only improves how your videos appear in search results but also offers a quick preview of your video to viewers.
For video content listings, the Video schema includes both mandatory and optional fields, as follows:
Mandatory Fields:
name: The title of the video.
director: The director of the video.
Recommended Fields:
datePublished: The release date of the video.
description: A brief summary of the video.
genre: The genre of the video.
image: Images associated with the video, like posters or stills.
actor: The main actors featured in the video.
duration: The length of the video.
trailer: A link to the video trailer or a teaser.
Adding these required fields proves your video is real, and including suggested fields makes it better for users by offering more details about the video. This detailed setup can help your video show up higher in search results, making it easier for people to find and get what your video is about.
Here is an example of Video schema looks like:

How to access Video schema using Rich Snippets
Access it from METAs – Rich Snippet – Video

Clicking on the “+” symbol will open up a panel where you can start editing and customizing your Schema Template.
A pop-up will appear

Add your data, a question and its answer.
Mandatory fields will have small red starlike symbol (*) added to them:
Headline – best practices for SEO and usability suggest keeping titles concise and informative, thus this should be a maximum of 60 characters or fewer.
This field is imported automatically by Squirlly SEO
You can apply this template, featuring the placeholder “{{title}}”, to embed a title: “{{title}}” This placeholder automatically fetches the title from your video details, but you have the option to substitute “{{title}}” with any title or text that suits your needs.
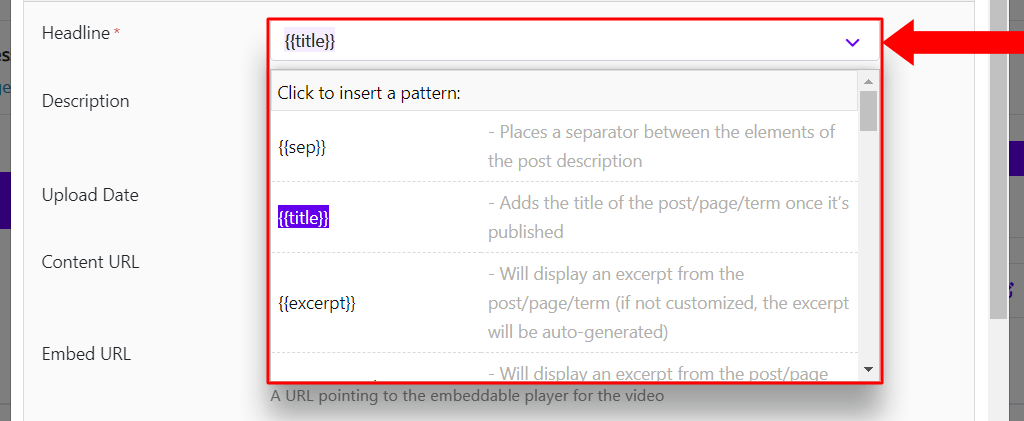
Description – a good practice is to aim for a description length of about 150 to 160 characters
This field refers to a short portion or snippet of the description that is meant to give viewers a quick overview or highlight of what the video is about.

Upload date – is the specific date and possibly the time when the video was uploaded or published to a platform or website. The format should be in ISO 8601 format (e.g., “YYYY-MM-DD”)
Content URL: a direct link to the video file itself. This URL points to the location where the video is hosted and can be accessed or streamed by a user. You can find tips and suggestions by accessing Google here:
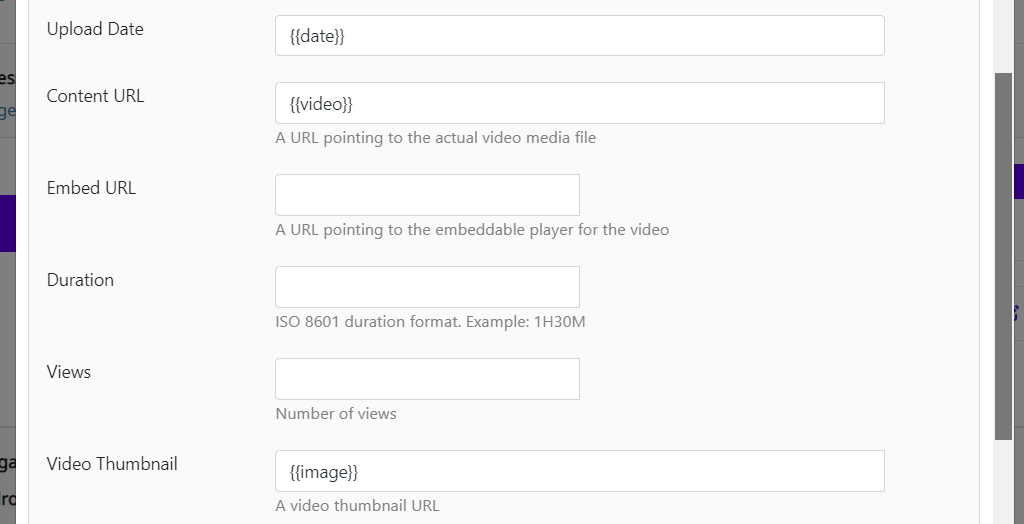
Embed URL: refers to a specific web address (URL) that allows the video to be embedded on other web pages or platforms.
Unlike the Content URL, which directly links to the video file, the Embed URL is used to insert the video into the HTML code of a website, enabling the video to be played within the context of another page without needing to direct the viewer to the original hosting site.
Duration: the length of the video, recommended format is ISO 8601 (eg: 1M20S)
Views: it’s recommended to use a numerical format, which allows for precise quantification of how many times a video has been watched.
Video Thumbnail: a small, representative image used to depict the content of the video before it is played.
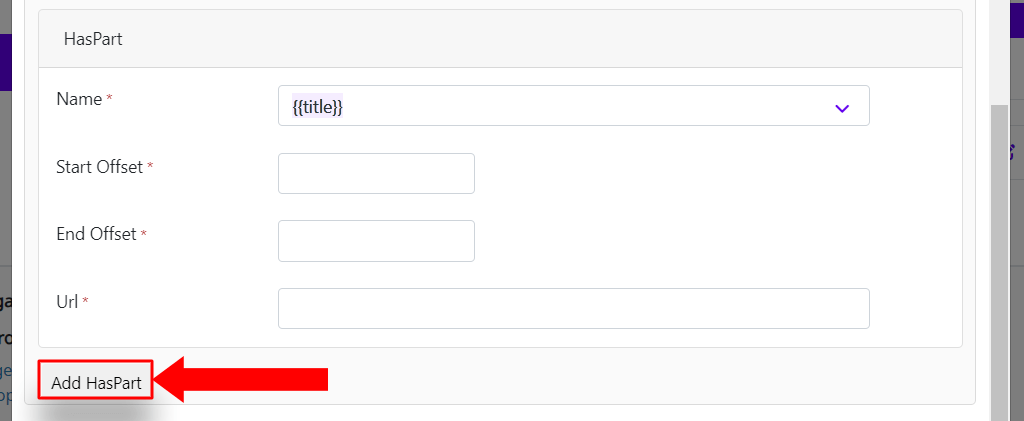
HasPart: used it to indicate that the video includes one or more distinct segments, parts, or elements that you wish to describe separately, useful for outlining chapters, sections, or various content pieces within a single video, providing a more detailed understanding of its structure and content.
Name: the name for a particular part
Start offset: indicates when the segments start, for example, if you set 120 seconds, the video starts at 2 minutes
End offset: indicates the length of the segment, if you set it for 300 seconds, it indicates that the segment will end at 5 minutes
URL – the link for the video
Make sure to click on Save

With this you have a Video schema set up. All there is left to do is check it up and see if it works as expected. This is easier than you imagine, and Squirrly will help with the
Verify Markup
After saving your changes, you can verify that the Software schema markup has been added correctly by viewing the page or post source code. Look for the JSON-LD markup representing the Software schema.
1. Click on JSON-LD Code – Validate JSON-LD
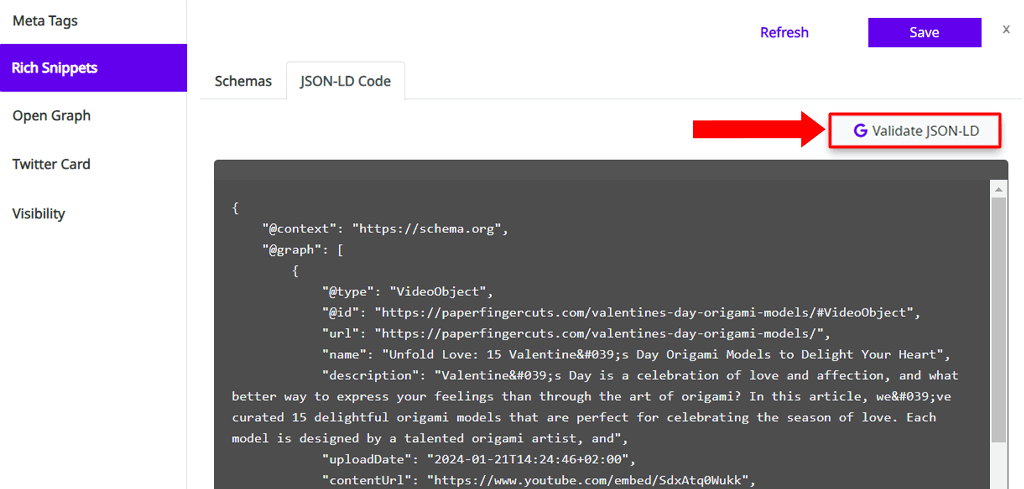
2. A new page / tab will open you will get you test code, click on TEST CODE

3. A small pop-up appears, and you will have to wait a few moments for the data to be processed
4. Once data is processed, you will be able to see your work, test it, share it and use it to enhance your work.

For further details, we recommend referring to the following resources
Podcast Schema
Podcast Schema
The Podcast schema is an excellent tool for websites looking to organize information about podcasts, ensuring they’re effectively indexed by search engines. This schema structure helps podcasts stand out in search results by providing essential details to search engines. Similar to schemas for other types of media such as music, movies, or books, implementing a Podcast schema involves sharing key information about your podcast episodes. By incorporating a Podcast schema, you’re not only enhancing how your podcast appears in search results but also offering potential listeners a quick overview of what each episode entails.
For podcast episode listings, the Podcast schema includes both mandatory and recommended fields:
Mandatory Fields:
name: The title of the podcast episode.
creator: The creator of the podcast.
Recommended Fields:
datePublished: The release date of the podcast episode.
description: A concise summary of the podcast episode.
genre: The genre or category of the podcast episode.
image: Images associated with the podcast episode, such as cover art.
contributor: Individuals who contributed to the podcast episode.
duration: The duration of the podcast episode.
audio: The URL or link to the audio file of the podcast episode.
transcript: A link to the transcript of the podcast episode.
Including these mandatory fields ensures your podcast episodes are properly identified, while incorporating recommended fields enriches the user experience by providing more comprehensive details about each episode. This detailed schema setup can significantly improve the visibility of your podcast episodes in search results, making it easier for interested listeners to discover and engage with your podcast content.
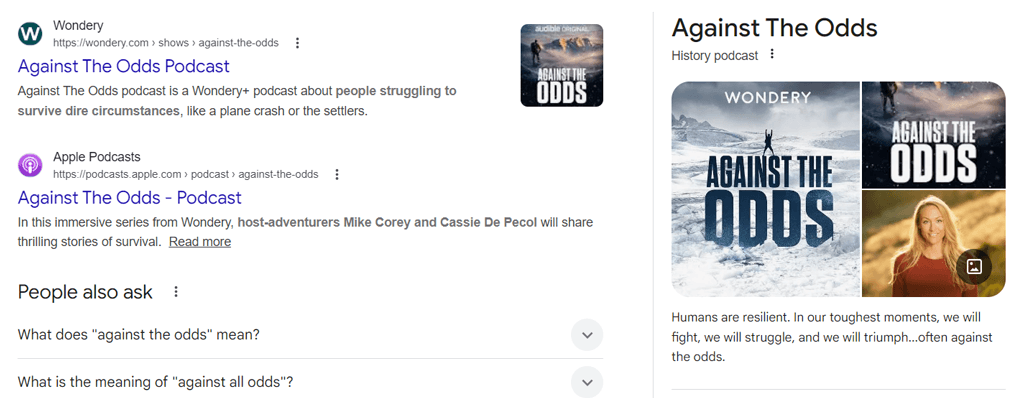
Here is an example of Podcast schema looks like:
How to access Podcast schema using Rich Snippets
Access it from METAs – Rich Snippet – Podcast

Clicking on the “+” symbol will open up a panel where you can start editing and customizing your Schema Template.
A pop-up will appear

Add your data, a question and its answer.
Mandatory fields will have small red starlike symbol (*) added to them:
Headline:serves as a concise and compelling summary of the podcast episode’s content, aiming to grab potential listeners’ attention and give them a quick insight into what the episode is about, should be around 50-60 characters
Description: a more detailed overview of the episode, elaborating on topics, guests, and key points discussed, with the optimal length of 150-250 words.

Event type: indicates if it’s an interview, a panel discussion, a narrative story, educational content, etc.
Event status: typically indicates the current state of an episode within its lifecycle, such as whether it’s upcoming, live, or has already occurred, should be a maximum of 20 words.
Event Attendance Mode: refers to how the audience can participate in or access the event, delineating between in-person, online (virtual), or a hybrid of both formats.
Publishing date – should select the publishing date, respecting the YYYY/MM/DD format
Episode duration: add this respecting the ISO 8601 duration format. Example: PT37M.
Episode URL: imported automatically by Squirrly SEO, represents the link for the podcast, it can also be added manually
Episode image URL: a specific image associated with an individual podcast episode
A resolution of at least 1400×1400 pixels is recommended for compatibility with most platforms, going up to 3000×3000 pixels for optimal clarity across devices.
Example: https://yourpodcasthosting.com/images/episode12.png
Is episode family friendly? – simply check Yes or No depending on the content you have

Audio File URL: recommended is .mp3

Season number: helps listeners navigate episodes more easily, especially for series that focus on different themes or formats from one season to the next.
Season name: represents a summary or overview of the podcast’s theme or focus.
Season URL: the specific URL for the season, from where the viewers can access each episode/podcast

Episode number: number of the episode with a brief description/name, where your audience can click and select what they desire to see.

Make sure to click on Save

With this you have a Podcast schema set up. All there is left to do is check it up and see if it works as expected. This is easier than you imagine, and Squirrly will help with the steps.
Verify Markup
After saving your changes, you can verify that the Software schema markup has been added correctly by viewing the page or post source code. Look for the JSON-LD markup representing the Software schema.
1. Click on JSON-LD Code – Validate JSON-LD

2. A new page / tab will open you will get you test code, click on TEST CODE
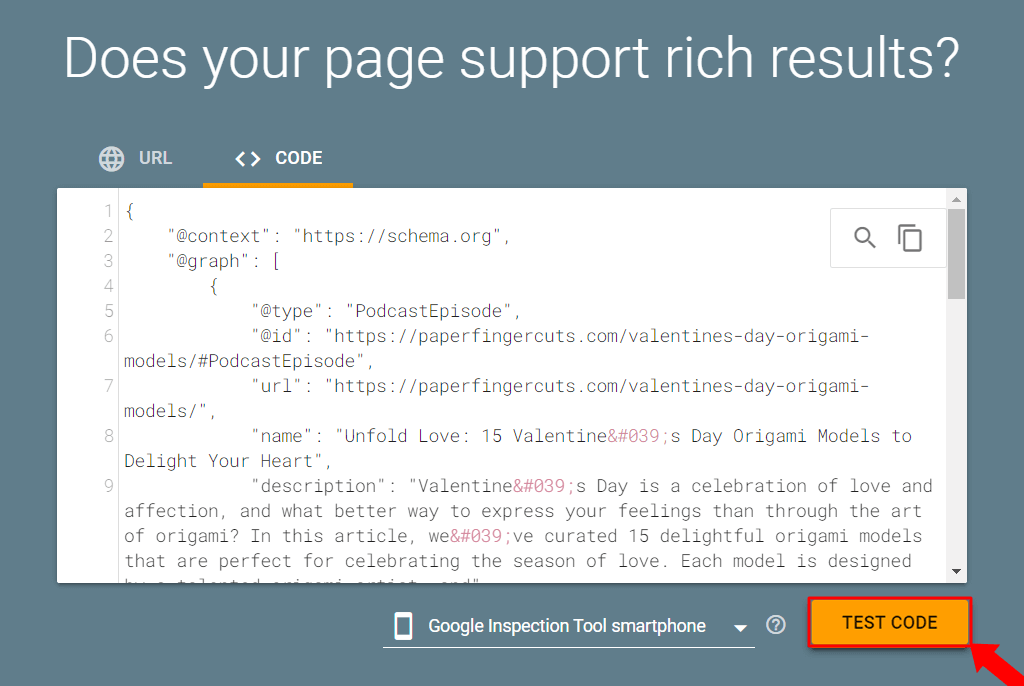
3. A small pop-up appears, and you will have to wait a few moments for the data to be processed
4. Once data is processed, you will be able to see your work, test it, share it and use it to enhance your work.

For further details, we recommend referring to the following resources
How-To Schema
How-To Schema
The How-To schema is a structured data format utilized to provide detailed information about how-to guides or step-by-step instructions on a webpage. It outlines the steps of completing tasks or projects, effectively enabling search engines to understand and display this instructional content prominently in search results.
Similar to the Event Schema, which enhances the visibility of events by detailing their specifics such as name, date, and location, the How-To schema focuses on the methodology and requirements necessary for accomplishing a particular task. By implementing this markup, content creators can improve the way search engines interpret and represent how-to content, making it more accessible to users seeking instructional guidance.
When a How-To schema is integrated into a webpage, it systematically outlines critical elements of the guide, including its title, the steps involved, the required tools or materials, and the estimated time for completion. This structured approach not only aids search engines in indexing the content more efficiently but also enhances the user experience by providing clear, actionable information directly within search results.
For detailed how-to guides, the How-To schema encompasses both essential and optional fields, as detailed below:
Mandatory Fields:
name: The title of the how-to guide.
step: The individual steps required to complete the task.
totalTime: The estimated total time required to complete the how-to guide.
Recommended Fields:
description: A brief summary of the how-to guide.
tool: The tools or materials required to carry out the task.
supply: Any supplies needed for the task.
image: Images illustrating steps or the final product.
video: Videos that provide additional instructions or demonstrations.
Incorporating the mandatory fields is crucial for creating a valid How-To schema markup, while adding the recommended fields can significantly enhance the detail and utility of the how-to guide. This not only improves the search engine rankings and visibility of the instructional content but also provides users with a richer, more informative search experience. By meticulously detailing the steps, requirements, and expected outcomes, content creators can effectively guide users through the task at hand, fostering a deeper understanding and engagement with the content.
Here is an example of How to schema looks like:

How to access HowTo schema using Rich Snippets
Access it from METAs – Rich Snippet – HowTo

Clicking on the “+” symbol will open up a panel where you can start editing and customizing your Schema Template.
A pop-up will appear

Add your data, a question and its answer.
Mandatory fields will have small red starlike symbol (*) added to them:


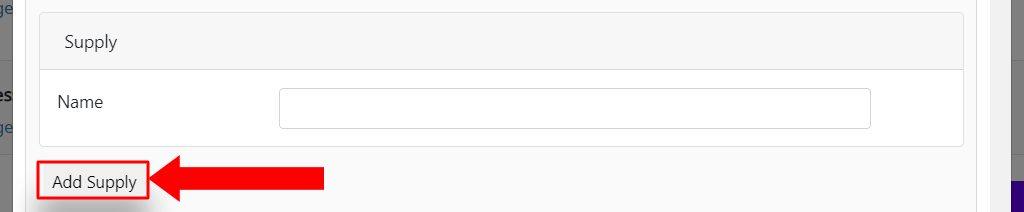


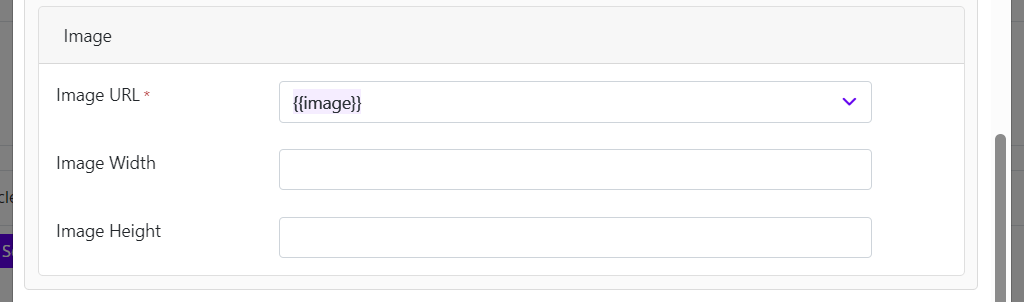
Adding image URLs helps with visual appeal, clarity, increases click-through rates, improves user experience, and boosts SEO visibility.
Make sure to click on Save

With this you have a How to schema set up. All there is left to do is check it up and see if it works as expected. This is easier than you imagine, and Squirrly will help with the steps.
Verify Markup
After saving your changes, you can verify that the How to schema markup has been added correctly by viewing the page or post source code. Look for the JSON-LD markup representing the schema.
1. Click on JSON-LD Code – Validate JSON-LD

2. A new page / tab will open you will get you test code, click on TEST CODE

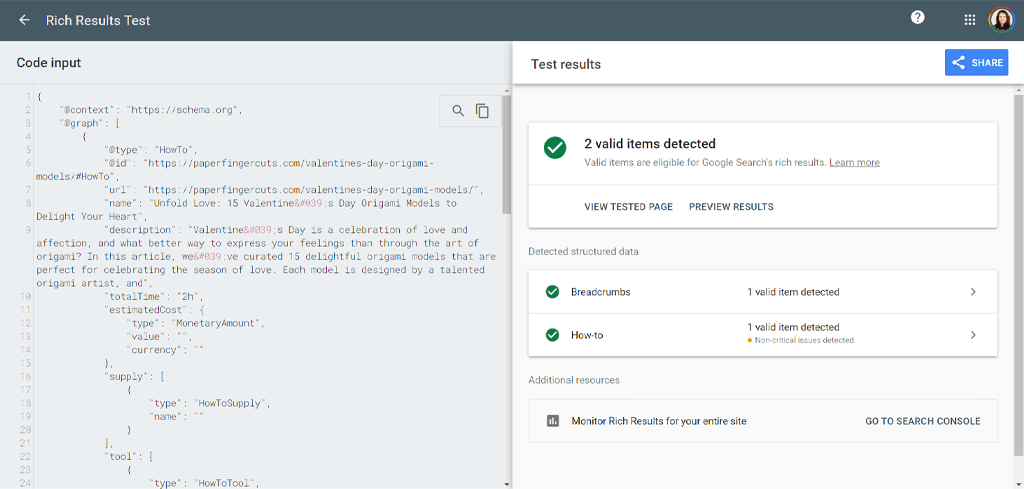
3. A small pop-up appears, and you will have to wait a few moments for the data to be processed
4. Once data is processed, you will be able to see your work, test it, share it and use it to enhance your work.
For further details, we recommend referring to the following resources
Store Schema
Store Schema
The Store schema is a structured data format specifically designed to consolidate information about a retail outlet on a webpage. It incorporates elements such as the store’s name, a concise description, physical address, operational hours, contact details, and an inventory list of products or services provided. The implementation of this schema aids search engines in accurately interpreting and showcasing store-related data.
Similar to the Event Schema, which facilitates the organized presentation of event details for enhanced search engine visibility, the Store schema aims to optimize the representation of retail information. This structured approach allows search engines to efficiently index and display relevant store data, improving the ease with which consumers can discover retail information online.
When a Store schema is integrated into a webpage, it meticulously itemizes critical information that potential customers seek, including where the store is located, how to contact it, when it is open, and what it sells or offers. This markup is instrumental in enriching search results with valuable insights into the store’s operations, thereby enhancing the user’s search experience.
For retail listings, the Store schema encompasses essential fields as well as additional fields that can offer further insight:
Mandatory Fields:
name: The official name of the store.
address: The physical location of the store, including detailed sub-properties like street address, city, and postal code.
openingHours: The hours during which the store is open for business.
Recommended Fields:
description: An overview or brief description of the store.
telephone: The contact number for the store.
image: Photographs representing the store or its products.
product: The range of products or services available at the store.
geo: The geographical coordinates of the store.
Incorporating the mandatory fields ensures the validity of the Store schema markup, while the inclusion of recommended fields significantly enriches the content, offering potential customers a comprehensive view of the store’s offerings. This detailed presentation not only boosts the store’s search engine rankings and visibility but also facilitates a more informed and convenient shopping experience for consumers. By providing clear, actionable details about the store, retailers can effectively attract and engage with their target audience, driving foot traffic and sales.
Here is an example of Store schema looks like:

How to access Store schema using Rich Snippets
Access it from METAs – Rich Snippet – Store

Clicking on the “+” symbol will open up a panel where you can start editing and customizing your Schema Template.
A pop-up will appear where you can edit your Store details:

Headline – Aim for 50-70 characters, with relevant keywords added, this range is considered optimal for SEO purposes, ensuring that the headline doesn’t get cut off in search engine results pages (SERPs).

Description – for product descriptions, aim for about 150-300 words
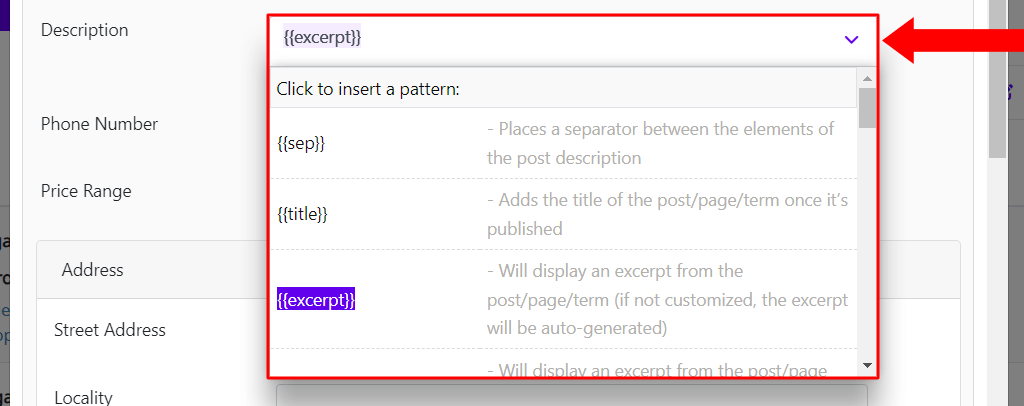
Phone number – E.164 Format: +[Country Code][Area Code/Carrier Number][Subscriber Number]
Example: +1-800-555-0199 for a US number or +44-20-7946-0018 for a UK number.
Price Range – Display the lowest and highest price in the range, separated by a dash or the word “to”. Use the currency symbol appropriate for your target audience or multi-currency symbols if your store serves multiple countries. Examples: $10 – $50, £20 to £100
For instance, the US uses the dollar sign before the amount with two decimal places ($10.99), while many European countries place the currency symbol after the amount and use a comma for the decimal separator (10,99 €).

Address – Involves adhering to international standards while ensuring local accuracy and readability. A well-structured address format can improve user experience, delivery accuracy, and even SEO performance.
- Street Address or P.O. Box: Include the street number, street name, and apartment or suite number if applicable. For P.O. Boxes, just the box number.
- City/Town: The name of the city or town.
- State/Province/Region: Depending on the country, this could be a state, province, or region.
- Postal Code: The ZIP or postal code used for mail sorting.
- Country: The country name, especially important for international mail.

Geo – Incorporating geographic coordinates, specifically latitude and longitude, into a store schema, enhances various functionalities such as location-based search, proximity calculations, and mapping services
Latitude/Longitude – Use decimal or floating-point data types to store latitude and longitude, as this ensures the chosen type can accommodate the necessary precision, for validation purposes ensure that latitude values are within the -90 to 90 range and longitude values are within the -180 to 180 range.

Opening Hours specifications – Specify opening and closing times in 24-hour format.
- Weekends: Include separate times for weekends if they differ.
- Closed Days: Indicate days the store is closed.

Image – Adding image URLs helps with visual appeal, clarity, increases click-through rates, improves user experience, and boosts SEO visibility.

Make sure to click on Save

With this you have a Store schema set up. All there is left to do is check it up and see if it works as expected. This is easier than you imagine, and Squirrly will help with the steps.
Verify Markup
After saving your changes, you can verify that the Store schema markup has been added correctly by viewing the page or post source code. Look for the JSON-LD markup representing the Store schema.
1. Click on JSON-LD Code – Validate JSON-LD

2. A new page / tab will open you will get you test code, click on TEST CODE
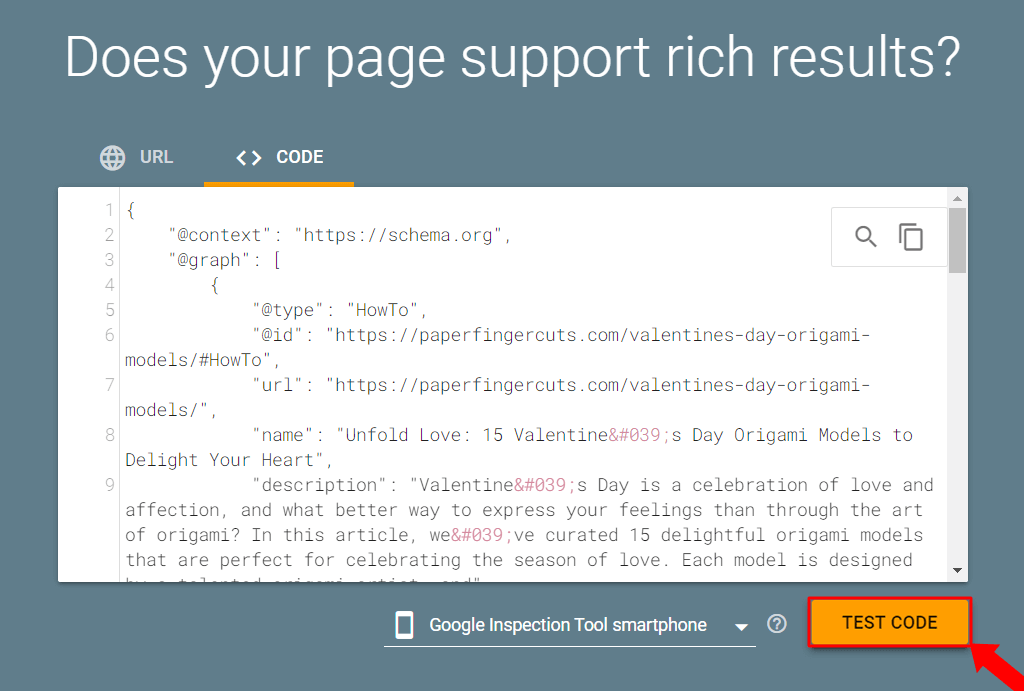
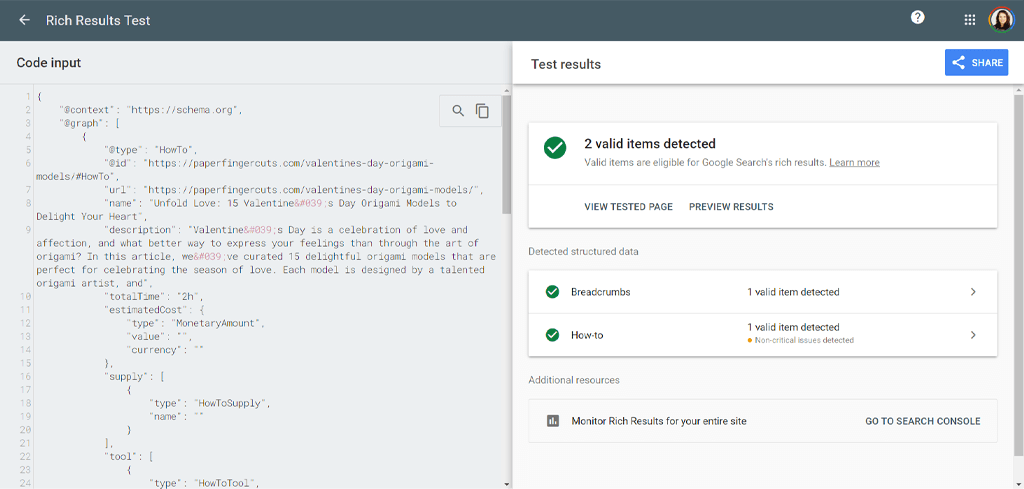
3. A small pop-up appears, and you will have to wait a few moments for the data to be processed
4. Once data is processed, you will be able to see your work, test it, share it and use it to enhance your work.
For further details, we recommend referring to the following resources
Store Schema
Local business (LocalBusiness) structured data
Restaurant Schema
Restaurant Schema
The Restaurant Schema is a structured format akin to the Event Schema, designed to provide detailed information about restaurants on a webpage. It includes properties such as the restaurant name, location, cuisine type, and more. Implementing this markup assists search engines in understanding and displaying restaurant-related content in search results more effectively.
Similar to how the other schema improves event visibility in search results, the Restaurant Schema plays a crucial role for dining establishments. It allows search engines to gather specific information about the restaurant, facilitating a better understanding and presentation of dining options to users. When a Restaurant Schema is added to a webpage, it defines essential details such as the restaurant’s name, address, opening hours, and cuisine type. This markup enhances how restaurants are presented in search results, providing users with immediate insights into what the restaurant offers.
For restaurant listings, the Restaurant Schema includes both mandatory and optional fields, as follows:
Mandatory Fields:
- name: The name of the restaurant.
- address: The physical address of the restaurant.
- cuisineType: The type(s) of cuisine the restaurant offers.
Recommended Fields:
- openingHours: The operating hours of the restaurant.
- description: A summary or brief description of the restaurant.
- menu: A link to the restaurant’s menu.
- image: Images related to the restaurant.
- reviews: Customer reviews and ratings of the restaurant.
- telephone: The contact number of the restaurant.
Including the recommended fields alongside the mandatory ones can significantly enhance the user experience by providing more comprehensive details about the restaurant. This, in turn, can positively impact the restaurant’s search rankings and visibility, making it easier for potential diners to discover and learn about the dining establishment.
An example of how a Restaurant Schema might look is akin to the provided structure for Event Schema, adapted to the specific needs and details relevant to restaurant information.
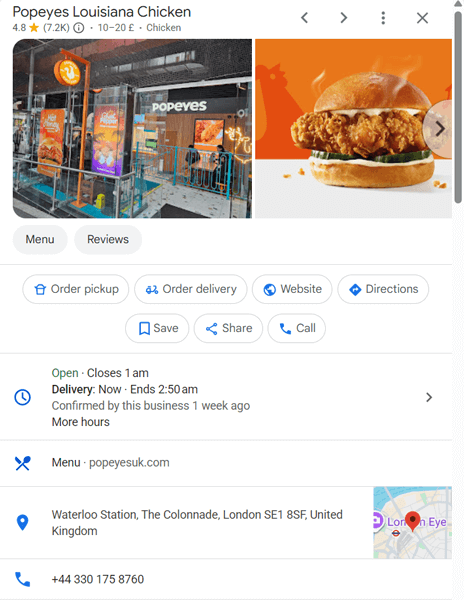
How to access Restaurant schema using Rich Snippets
Access it from METAs – Rich Snippet – Restaurant

Clicking on the “+” symbol will open up a panel where you can start editing and customizing your Schema Template.
A pop-up will appear to set the Restaurant details helping searching engines better index your restaurant.

Add your data, a question and its answer.
Mandatory fields will have small red starlike symbol (*) added to them:
Headline – Serves as a concise, attention-grabbing summary of the restaurant, effectively acting as the first impression for potential customers, aim for 10-15 words.
Description – A crucial component that provides potential customers with a concise overview of the restaurant, capturing its essence, atmosphere, and unique selling points.
Phone number – E.164 Format: +[Country Code][Area Code/Carrier Number][Subscriber Number]
Example: +1-800-555-0199 for a US number or +44-20-7946-0018 for a UK number.
Price Range – Display the lowest and highest price in the range, separated by a dash or the word “to”. Use the currency symbol appropriate for your target audience or multi-currency symbols if your store serves multiple countries.
For instance, the US uses the dollar sign before the amount with two decimal places ($10.99), while many European countries place the currency symbol after the amount and use a comma for the decimal separator (10,99 €).

Address – Involves adhering to international standards while ensuring local accuracy and readability. A well-structured address format can improve user experience, delivery accuracy, and even SEO performance.
- Street Address or P.O. Box: Include the street number, street name, and apartment or suite number if applicable. For P.O. Boxes, just the box number.
- City/Town: The name of the city or town.
- State/Province/Region: Depending on the country, this could be a state, province, or region.
- Postal Code: The ZIP or postal code used for mail sorting.
- Country: The country name, especially important for international mail.

Geo – Incorporating geographic coordinates, specifically latitude and longitude, into a store schema, enhances various functionalities such as location-based search, proximity calculations, and mapping services.

Latitude/Longitude – Use decimal or floating-point data types to store latitude and longitude, as this ensures the chosen type can accommodate the necessary precision, for validation purposes ensure that latitude values are within the -90 to 90 range and longitude values are within the -180 to 180 range.
Opening Hours specifications – Specify opening and closing times.
- Weekends: Include separate times for weekends if they differ.
- Closed Days: Indicate days the store is closed.
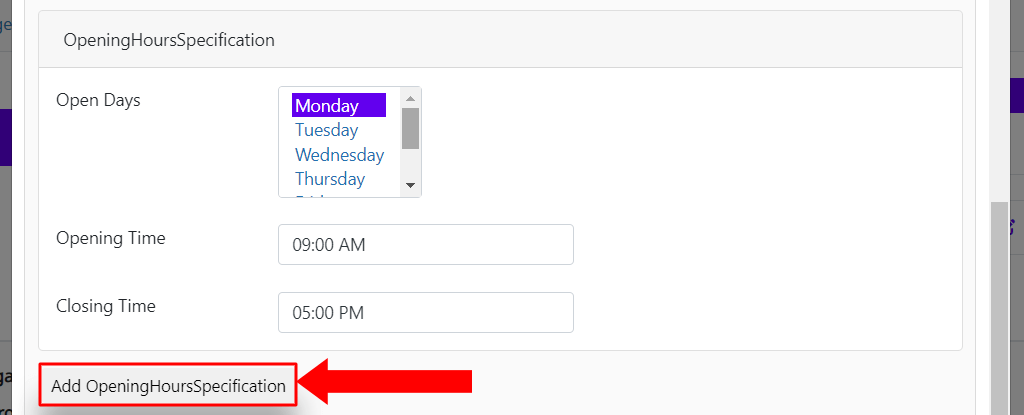
Cuisine – Highlight the type of cuisine offered, emphasizing any specialties or signature dishes.
Menu URL – Refers to the URL or web address where the restaurant’s menu can be found online, providing a direct link to the menu is beneficial for potential customers who are looking for specific dishes, pricing information, and to check the restaurant’s offerings before making a decision to visit or order online.
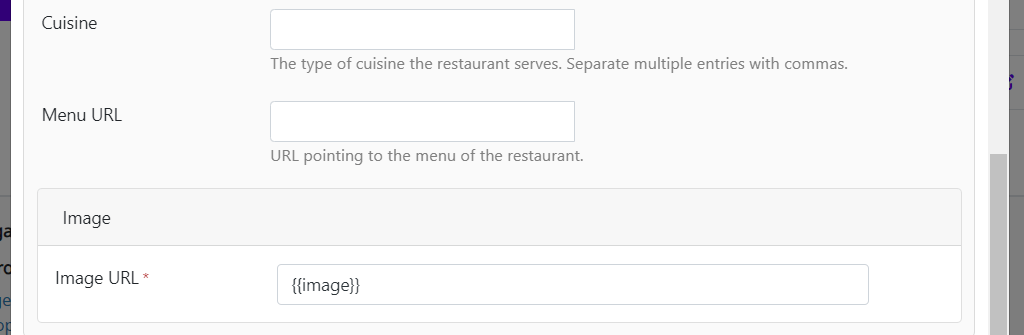
Adding image URLs helps with visual appeal, clarity, increases click-through rates, improves user experience, and boosts SEO visibility.
Make sure to click on Save

With this you have a Restaurant schema set up. All there is left to do is check it up and see if it works as expected. This is easier than you imagine, and Squirrly will help with the steps.
Verify Markup
After saving your changes, you can verify that the Restaurant schema markup has been added correctly by viewing the page or post source code. Look for the JSON-LD markup representing the Restaurant schema.
1. Click on JSON-LD Code – Validate JSON-LD

2. A new page / tab will open you will get you test code, click on TEST CODE
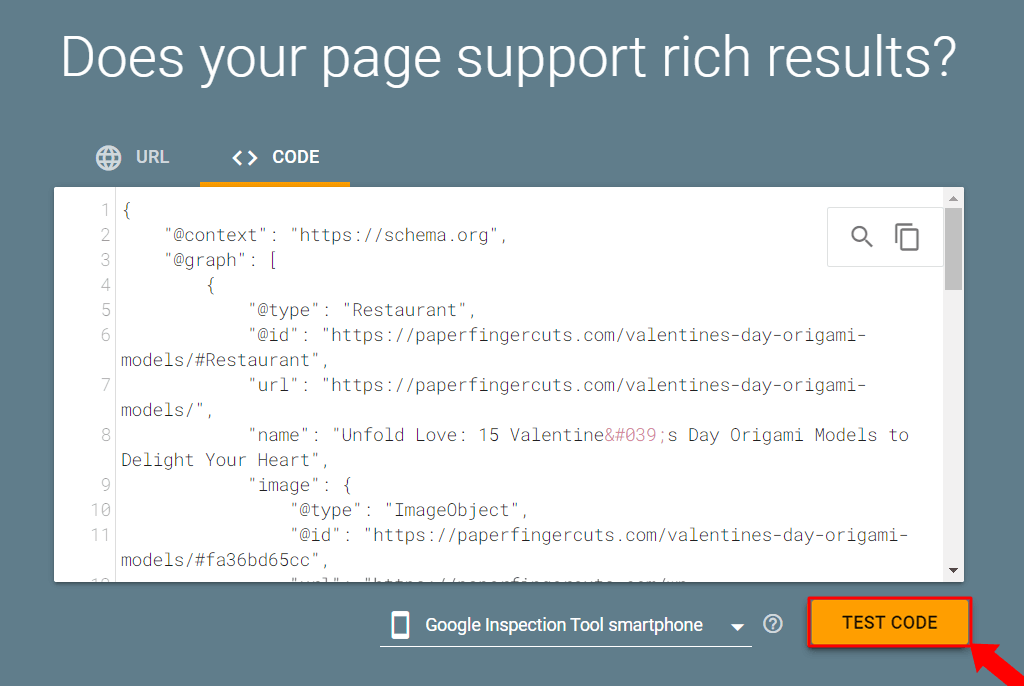
3. A small pop-up appears, and you will have to wait a few moments for the data to be processed
4. Once data is processed, you will be able to see your work, test it, share it and use it to enhance your work.

For further details, we recommend referring to the following resources
Restaurant Schema
Restaurant settings
Profile Schema
Profile Schema
The Profile schema is designed for websites to detail structured information about individuals or organizations, enhancing their visibility in search engine results. This schema is integral for enabling search engines to accurately understand and index profile information, thereby improving its discoverability online.
Similar to schemas tailored for specific content types, such as the FAQPage or NewsArticle, the Profile schema requires detailed inputs about the person or entity being profiled. By incorporating a Profile schema into a webpage, critical information is highlighted, including the name, occupation, location, and a brief description of the profile subject. This structured approach significantly enhances how profiles are displayed in search results, providing immediate and valuable insights to users.
The Profile schema encompasses essential fields, categorized into mandatory and recommended, as detailed below:
Mandatory Fields:
name: Specifies the full name of the person or the official name of the organization.
occupation: Describes the primary occupation, role, or business focus of the subject.
location: Indicates the geographical location, detailed further with address components.
Recommended Fields:
description: Offers a concise summary or introduction to the individual or organization.
image: Links to representative images or logos.
affiliation: Lists any associated institutions, organizations, or entities.
alumniOf: Mentions educational affiliations, if pertinent to the individual’s profile.
awards: Highlights notable recognitions or awards received.
skills: Details specific skills, competencies, or areas of expertise.
By thoughtfully incorporating these fields, anyone can create a more engaging and informative profile. This not only enriches the user experience but also potentially elevates the profile’s visibility and ranking in search results. The detailed presentation of profiles through this schema helps users in quickly grasping key information, facilitating a better understanding and discovery of professionals and organizations.
The main distinction between a Profile and Person Schema is found in their applications. The Person Schema is designed exclusively for individuals, capturing personal details such as name, job title, and achievements to boost visibility on search engines and ensure consistency.
On the other hand, the Profile Schema is more comprehensive, designed to hold information about both individuals and organizations across different platforms, with the flexibility to add specific details relevant to the context. The Profile Schema offers greater flexibility, tailored to cater to the diverse requirements of various platforms and their users.
How to access Profile schema using Rich Snippets
Access it from METAs – Rich Snippet – Profile

Clicking on the “+” symbol will open up a panel where you can start editing and customizing your Schema Template.
A pop-up will appear

Add your data, a question and its answer.
Mandatory fields will have small red starlike symbol (*) added to them:
Headline: Serves as a summary that captures the main focus of the profile. For an individual, it can be the professional identity, key skills, and aspirations, similar to a Person schema. For an organization or a business profile, the headline could highlight its primary mission, value proposition, or the services it offers. For example, an organization’s profile might have a headline like “Innovating Sustainable Energy Solutions for a Greener Tomorrow.” The headline is designed to grab attention and convey a snapshot of what the profile is about in a compelling way.
The “{{title}}” section might have different interpretations depending on the profile’s nature. For individual profiles, it retains its meaning as the job title, describing the person’s official position or role. For organizational or project profiles could refer to the official name or designation of the project, department, or the organization itself.
This field is automatically added by Squirrly SEO, however you can manually change it.
Description – Offers a detailed narrative about the profile, whether it’s for an individual, a company, an event, or a project. This field is where you can elaborate the background, skills, achievements, mission, or any other significant details that provide a fuller understanding of the profile subject.
This field is {{excerpt}} meaning that if not manually added/modified it will import a brief summary or snippet of the content on the page.
Email – Use a professional-looking email address, especially for business or professional profiles. This typically means using an email that incorporates the name of the individual or organization (e.g., john.doe@example.com or contact@companyname.com).

Address – It indicates where you, your business is located. It’s like dropping a pin on a map so others can find you. The format and level of detail can vary depending on the context and the need for privacy, however, for businesses we recommend adding this field.
A recommended format for structuring the “address” field is as follows:
- Street Address: The number and street name of the building (e.g., “123 Main St”).
- City/Town: The name of the city or town (e.g., “Springfield”).
- State/Province: The name of the state or province, if applicable (e.g., “Illinois”).
- Postal/Zip Code: The postal or zip code to help in mail delivery (e.g., “12345”).
- Country: The name of the country (e.g., “United States”).

Gender – This section can include a variety of options beyond just “male” or “female” to respect and acknowledge the diversity of gender identities. People might identify as non-binary, genderqueer, transgender, and more, or simply prefer not to say. For a business this field can be skipped.
Job title – Specific label that describes a the current position or role within an organization
Note: While the job title is about one’s current role and its specific functions, the headline is a broader, self-defined statement that provides a snapshot of the person’s professional identity and aspirations.
Example:
Job title: “Software Engineer” versus Headline: “Experienced Software Engineer Specializing in Machine Learning and AI”
Make sure to click on Save

With this you have a Profile schema set up. All there is left to do is check it up and see if it works as expected. This is easier than you imagine, and Squirrly will help with the steps.
Verify Markup
After saving your changes, you can verify that the Profile schema markup has been added correctly by viewing the page or post source code. Look for the JSON-LD markup representing the Profile schema.
1. Click on JSON-LD Code – Validate JSON-LD
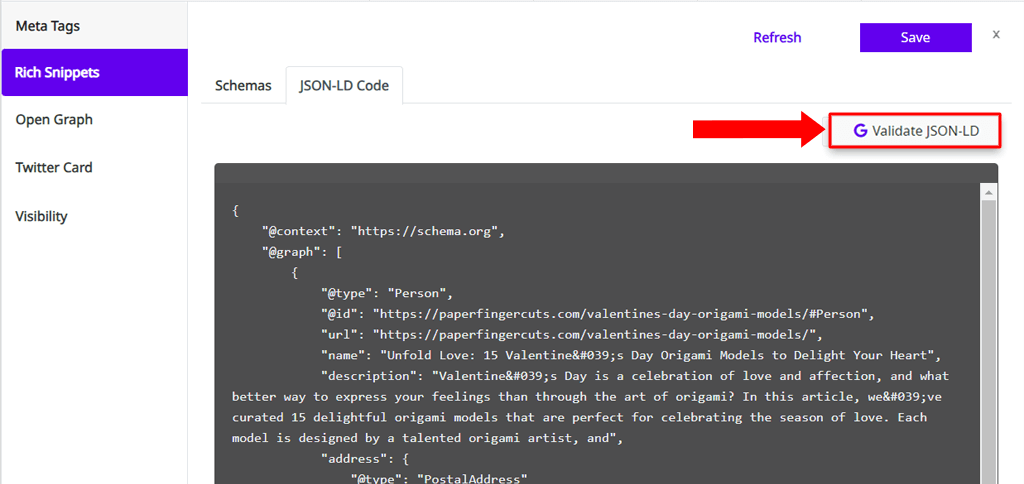
2. A new page / tab will open you will get you test code, click on TEST CODE

3. A small pop-up appears, and you will have to wait a few moments for the data to be processed
4. Once data is processed, you will be able to see your work, test it, share it and use it to enhance your work.

For further details, we recommend referring to the following resources
Profile Page Schema
Profile page (ProfilePage) structured data
Person Schema
Person Schema
The Person schema is created for web pages aiming to present structured details about individuals, enhancing their findability in search engine outcomes. This schema plays an important role in allowing search engines to precisely grasp and catalog information about people, thus boosting their online presence and discoverability.
Echoing the purpose and structure of schemas designed for various content types like FAQPage, NewsArticle or the Profile schema, this schema demands comprehensive information about the individual being described. Embedding a Person schema into a webpage emphasizes critical data such as the individual’s name, job title, location, and a succinct biography. This method improves the presentation of individuals in search results, offering immediate and pertinent insights to web searchers.
The Person schema includes vital fields, divided into mandatory and recommended categories, as outlined below:
Mandatory Fields:
name: Identifies the individual’s full name.
jobTitle: Specifies the person’s professional title or role.
location: Marks the person’s geographical location, with further specifics provided by address details.
Recommended Fields:
description: Provides a brief overview or background of the person.
image: Connects to photos representing the individual.
affiliation: Notes any connections with organizations, companies, or institutions.
alumniOf: Includes educational affiliations, where relevant.
awards: Lists significant awards or honors the person has received.
skills: Outlines particular skills, abilities, or areas of expertise.
By filling out these fields with care, you can create a personal profile that’s both engaging and packed with useful info. This makes browsing the web more enjoyable for users and can even help your profile show up better in search results. Using this schema to outline detailed profiles helps people quickly find the key info they need, making it easier for everyone to learn about and discover individuals.
Here is an example of how it can look like:

The key difference between a Person Schema and a Profile Schema lies in their scope and use cases. The Person Schema is tailored specifically for individual people, detailing personal attributes like name, job title, and achievements to enhance search engine visibility and standardization. On the other hand, the Profile Schema has a broader application, accommodating information for both individuals and entities across various platforms, and can include additional, context-specific details.
While the Person Schema focuses on structured data for SEO purposes, the Profile Schema is more versatile, designed to meet the unique needs of different platforms and their users.
How to access Person schema using Rich Snippets
Access it from METAs – Rich Snippet – Person

Clicking on the “+” symbol will open up a panel where you can start editing and customizing your Schema Template.
A pop-up will appear

Add your data, a question and its answer.
Mandatory fields will have small red starlike symbol (*) added to them:
Headline: This is a brief statement that sums up who the person is professionally. It’s like a quick snapshot of their job role and key skills. For example, “Experienced Graphic Designer Specializing in Digital Art.”
The “{{title}}” section refers to the job title or official position a person holds within an organization or a profession, this is automatically added by Squirrly SEO, however you can manually change it.
Description – Should succinctly summarize the individual’s professional background, key skills, and notable achievements. The format typically follows a brief paragraph or bullet points, focusing on the most important and relevant information.
This field is {{excerpt}} meaning that it will import a brief summary or snippet of the content on the page, and is added automatically, but it can also be manually inserted.
Email – It’s important to use a professional email format, ideally including the person’s name or a variation that makes it clear who the email belongs to. For example, a good format could be firstname.lastname@example.com or firstinitial.lastname@example.com.

Address – The format and level of detail can vary depending on the context and the need for privacy.
A recommended format for structuring the “address” field is as follows:
- Street Address: The number and street name of the building (e.g., “123 Main St”).
- City/Town: The name of the city or town (e.g., “Springfield”).
- State/Province: The name of the state or province, if applicable (e.g., “Illinois”).
- Postal/Zip Code: The postal or zip code to help in mail delivery (e.g., “12345”).
- Country: The name of the country (e.g., “United States”).

Gender – The “gender” field refers to the gender identity of the person. It’s important to handle this field with sensitivity and inclusiveness, allowing individuals to self-identify in a way that best represents their personal identity. Traditionally, gender options included “male” and “female,” but it’s increasingly recognized that gender is a spectrum, and providing more inclusive options is recommended.
Job title – Specific label that describes a the current position or role within an organization
Note: While the job title is about one’s current role and its specific functions, the headline is a broader, self-defined statement that provides a snapshot of the person’s professional identity and aspirations.
Example:
Job title: “Software Engineer” versus Headline: “Experienced Software Engineer Specializing in Machine Learning and AI”
Make sure to click on Save

With this you have a Person schema set up. All there is left to do is check it up and see if it works as expected. This is easier than you imagine, and Squirrly will help with the steps.
Verify Markup
After saving your changes, you can verify that the Person schema markup has been added correctly by viewing the page or post source code. Look for the JSON-LD markup representing the Person schema.
1. Click onJSON-LD Code – Validate JSON-LD

2. A new page / tab will open you will get you test code, click on TEST CODE

3. A small pop-up appears, and you will have to wait a few moments for the data to be processed
4. Once data is processed, you will be able to see your work, test it, share it and use it to enhance your work.

For further details, we recommend referring to the following resources
Person Schema
The Squirrly SEO Patterns List
Product Schema
Product Schema
The Product schema is utilized by e-commerce and retail websites to provide structured details about products. It enables search engines to understand the specifics of products listed on a website, thereby enhancing their visibility in search results.
Implementing the Product schema is similar to using other specific schemas. It involves giving search engines precise information about the product. When a Product schema is added to a webpage, it outlines essential information such as the product name, price, availability, and description. This markup improves how products are presented in search results, offering users immediate insights into the product details.
For product listings, the Product schema includes both mandatory and optional fields, as follows:
Mandatory Fields:
name: The name of the product.
price: The price of the product.
availability: The availability status of the product (e.g., in stock, out of stock, pre-order).
Recommended Fields:
description: A summary or brief description of the product.
image: Images related to the product.
brand: The brand of the product.
review: Reviews or ratings of the product.
sku: The stock keeping unit (SKU) to uniquely identify the product.
offers: Details about special offers or discounts.
While the mandatory fields are essential for a valid Product schema, including the recommended fields can greatly enhance the user experience by offering more comprehensive details. This, in turn, can positively impact the product’s search rankings and visibility, making it easier for potential customers to find and understand product information.

How to access Product schema using Rich Snippets
Access it from METAs – Rich Snippet – Product

Clicking on the “+” symbol will open up a panel where you can start editing and customizing your Schema Template.
A pop-up will appear

Add your data, a question and its answer.
Mandatory fields will have small red starlike symbol (*) added to them:
Product name – aim for a product name that is around 50-60 characters long, as this can ensure that the name is fully visible in search results.
The “{{product_name}}” section refers to the name for the product, this is automatically added by Squirrly SEO, however you can manually change it.

Description – Creating an effective product description involves balancing informative and persuasive language to give potential customers a clear understanding of what the product is, how it benefits them, and why it’s worth purchasing. A good product description is between 150 to 300 words.
This field is {{excerpt}} meaning that it will import a brief summary or snippet of the content on the page, and is added automatically, but it can also be manually inserted.

SKU – A Stock Keeping Unit is a unique alphanumeric code that identifies and helps track inventory for a specific product. SKUs are crucial for managing stock within a business, facilitating the tracking of inventory levels, sales, and orders across various channels and locations.

Brand name – Customers are more likely to click on products from brands they recognize. Including the brand name makes the product listing more appealing to those familiar with the brand.

Image – Adding image URLs helps with visual appeal, clarity, increases click-through rates, improves user experience, and boosts SEO visibility.

Gtin – Global Trade Item Number is a unique and internationally recognized identifier for a product. It helps to distinguish products in the global marketplace and is used to identify items for sale, inventory, or services.
The most common types of GTINs include:
- GTIN-12: Also known as UPC (Universal Product Code), primarily used in North America.
- GTIN-13: Known as EAN (European Article Number), used internationally.
- GTIN-14: Often used for packaging levels of a product.
- GTIN-8: A compact version of EAN used for smaller items.
MPN – Manufacturer Part Number is a unique identifier assigned by the manufacturer to a product.
Unlike GTINs (Global Trade Item Numbers), which are standardized and used globally across different companies and platforms, MPNs are specific to a particular manufacturer. This means that two different manufacturers might use the same MPN for different products, but within the context of each manufacturer’s offerings, each MPN refers to a specific item
ISBN – International Standard Book Number is a unique numeric commercial book identifier that is assigned to each edition and variation (except reprintings) of a book.
Note: ISBNs are obtained from a national ISBN agency. The process and costs for obtaining an ISBN can vary by country. Publishers and self-publishing authors can contact their national ISBN agency or use various services that assist in obtaining ISBNs.
Shipping option – This plays a crucial role in the overall customer experience. Offering a variety of shipping options can cater to the diverse needs and preferences of customers, influencing their decision to purchase

Return option – Return time policies for products and services vary widely across different businesses and industries.
Category – classifying and describing the type or nature of the product being offered.
Example: “Wearable Technology”
URL – Make sure it points to the definitive page where the item is fully described or can be acted upon (e.g., a product purchase page, an article’s full text, an event registration page).
Price – Make sure to use a standard currency format that includes the currency symbol ($, €, £, etc.) followed by the amount, making it clear and understandable globally. For example, $19.99 for US dollars.
Currency – Use ISO Currency Codes along with the visible price, it’s a good practice to include the ISO currency code (e.g., USD, EUR, GBP) in the content attribute.
You can find here details on what ISO 4217 format is and the currency codes
Tax included – Clearly state that the price includes tax or not. You could add a brief note such as “Tax included” near the price to keep everything crystal clear. Note that there are countries that include tax in their prices directly.

Availability – Ensure that you add the product status [Available/Out of Stock/Pre-Order] and make sure to update our inventory regularly, so keep an eye out if the status changes

Price valid until – Specifies until when the price is expected to remain valid. This information is crucial for time-sensitive offers or promotions and helps consumers make informed decisions before price changes. Use ISO 8601 format (YYYY-MM-DD)
Published date – Indicates when the review was initially posted. This helps readers understand how recent the feedback is. The recommended format is ISO 8601 format (YYYY-MM-DD) for consistency and to avoid confusion. For instance, “2024-03-22” denotes the 22nd of March, 2024.
Modified Date – Shows if and when the review was updated. Reviews may be edited for various reasons, such as to reflect a change in the reviewer’s opinion or to add information based on further product use. Knowing a review has been modified helps readers gauge the evolution of the reviewer’s experience with the product. Recommended format is ISO 8601 format. If the review hasn’t been updated, this field can be omitted or set equal to the published date.
Author name – Identifies who wrote the review. Displaying the author’s name (even if it’s a pseudonym) personalizes the review and can help readers assess the reliability of the feedback.
Rating Value: This is the numerical representation of the reviewer’s rating. Depending on the scale used (for example, 1 to 5 or 1 to 10), the value signifies the reviewer’s level of satisfaction with the product.
Rating Minimum: This optional attribute specifies the highest lowest score in the rating scale. If not provided, it’s often assumed to be 5 in a 1-to-5 rating system.
Rating Maximum: Similarly, this optional attribute indicates the highest possible score on the scale. If omitted, the default is usually 1 in a 1-to-5 rating system.

Make sure to click on Save

With this you have a Product schema set up. All there is left to do is check it up and see if it works as expected. This is easier than you imagine, and Squirrly will help with the steps.
Verify Markup
After saving your changes, you can verify that the Product schema markup has been added correctly by viewing the page or post source code. Look for the JSON-LD markup representing the Product schema.
1. Click on JSON-LD Code – Validate JSON-LD

2. A new page / tab will open you will get you test code, click on TEST CODE

3. A small pop-up appears, and you will have to wait a few moments for the data to be processed
4. Once data is processed, you will be able to see your work, test it, share it and use it to enhance your work.
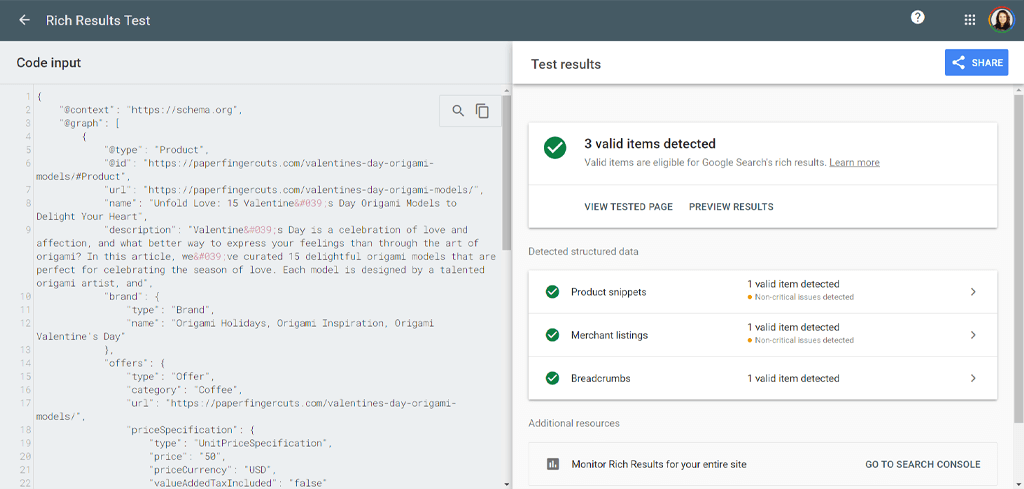
For further details, we recommend referring to the following resources
Product Schema
Product (Product, Review, Offer) structured data
Fact Check Schema
Fact Check Schema
The Fact Check schema is utilized by news organizations, fact-checking websites, and publishers to provide structured details about the veracity of claims made in content. It enables search engines to understand the specifics of fact-checking efforts listed on a website, thereby enhancing their visibility in search results.
Implementing the Fact Check schema is similar to using other specific schemas. It involves giving search engines precise information about the fact-checked claims. When a Fact Check schema is added to a webpage, it outlines essential information such as the claim being examined, the conclusion of the fact-check, and the explanation of the fact-checking process. This markup improves how fact-checked claims are presented in search results, offering users immediate insights into the credibility of the information.
For fact-checking entries, the Fact Check schema includes both mandatory and optional fields, as follows:
Mandatory Fields:
claimReviewed: The claim that is being fact-checked.
datePublished: The date when the fact check was published.
author: The organization or individual conducting the fact check.
reviewRating: The outcome of the fact check, usually represented as a rating indicating the truthfulness of the claim.
Recommended Fields:
dateModified: The date when the fact check was last updated, if applicable.
itemReviewed: Details about the specific item (e.g., statement, news article) being fact-checked.
claimInterpreter: The organization responsible for interpreting the claim, if different from the author.
url: The direct URL to the fact-checking article or report.
image: Images related to the fact check, such as logos of the fact-checking organization or relevant visual evidence.
publisher: The entity responsible for publishing the fact check, if different from the author.
While the mandatory fields are essential for a valid Fact Check schema, including the recommended fields can greatly enhance the user experience by offering more comprehensive details. This, in turn, can positively impact the visibility of fact-checking efforts in search results, making it easier for users to find and understand the context and veracity of information.
Note! The Fact check schema is also found as the Claim Review schema.
How to access Fact-Check schema using Rich Snippets
Access it from METAs – Rich Snippet – Fact-Check
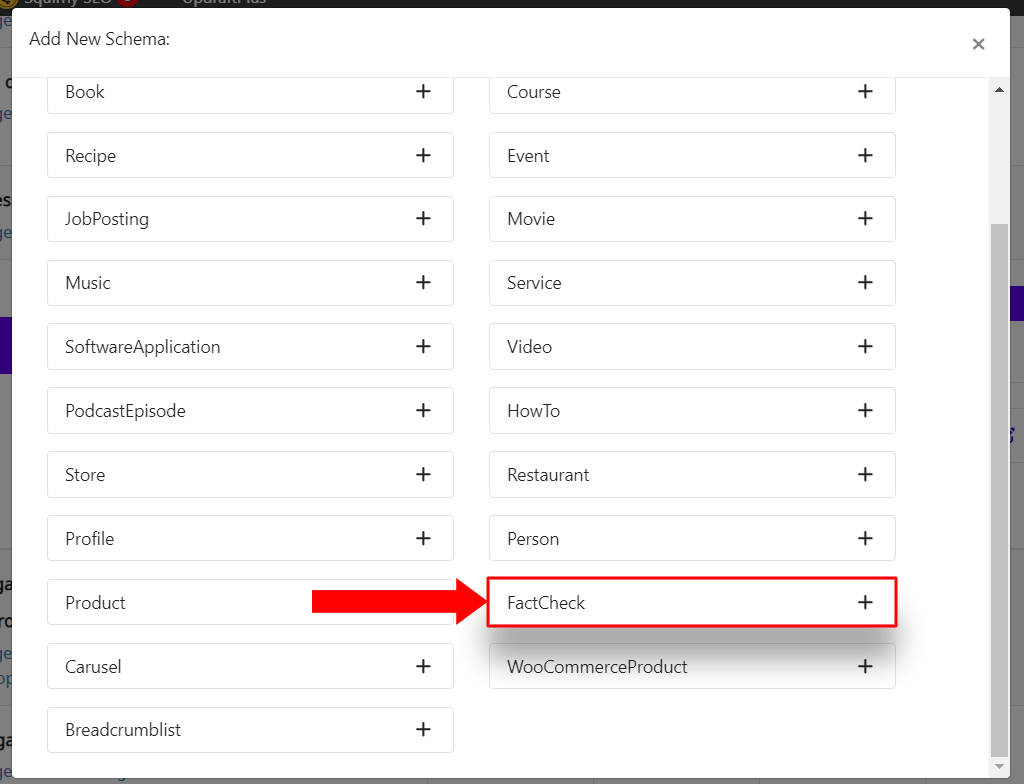
Clicking on the “+” symbol will open up a panel where you can start editing and customizing your Schema Template.
A pop-up will appear

Add your data, a question and its answer.
Mandatory fields will have small red starlike symbol (*) added to them:
Description – summarizes the claim that is being checked and may include an overview of the fact-checker’s findings. It’s meant to provide both search engines and users with a clear, concise summary of what the fact check is about and what was concluded.
This field is {{excerpt}} meaning that it will import a brief summary or snippet of the content on the page, and is added automatically, but it can also be manually inserted.

Rating – This section provides a structured way to represent the outcome of the fact check.
Rating Minimum – This property defines the lowest possible score in the rating system. Using the same 1 to 5 scale example, where 1 signifies the least truthful, worstRating would be “1”.
Rating Maximum – Defines the highest possible score in the rating system used. For example, if the rating system is from 1 to 5, with 5 being the most truthful, then bestRating would be set to “5”
Alternate Name – Provides a textual description or label for the numeric rating, allowing for a more nuanced interpretation of the ratingValue. For example, a ratingValue of “1” on a scale of 1 to 5 might have an alternateName of “False” or “Mostly False”, depending on the specifics of the rating system.
URL – Use a valid, fully qualified URL that points directly to the page where the fact check is published.
Example: “https://example.com/fact-check/the-claim-review”
Published date – Should be formatted according to the ISO 8601 standard, which is widely recognized and used for date-time representation. This standard helps to avoid confusion by providing a clear, unambiguous format. The format is YYYY-MM-DD for just the date, or you can extend it to include time in UTC as YYYY-MM-DDTHH:MM:SSZ.

Author name – Specify the author of the content, you can use either a Person or an Organization type, depending on whether the author is an individual or an entity. The name of the author or organization is provided in the name property within the author object.
Published Date – should be formatted according to the ISO 8601 standard, representing the date (and optionally time) the content was published
Headline – used to specify the headline or title of the article or fact check. This should be a concise and clear title reflecting the content of the page, should be between 50 to 70 characters
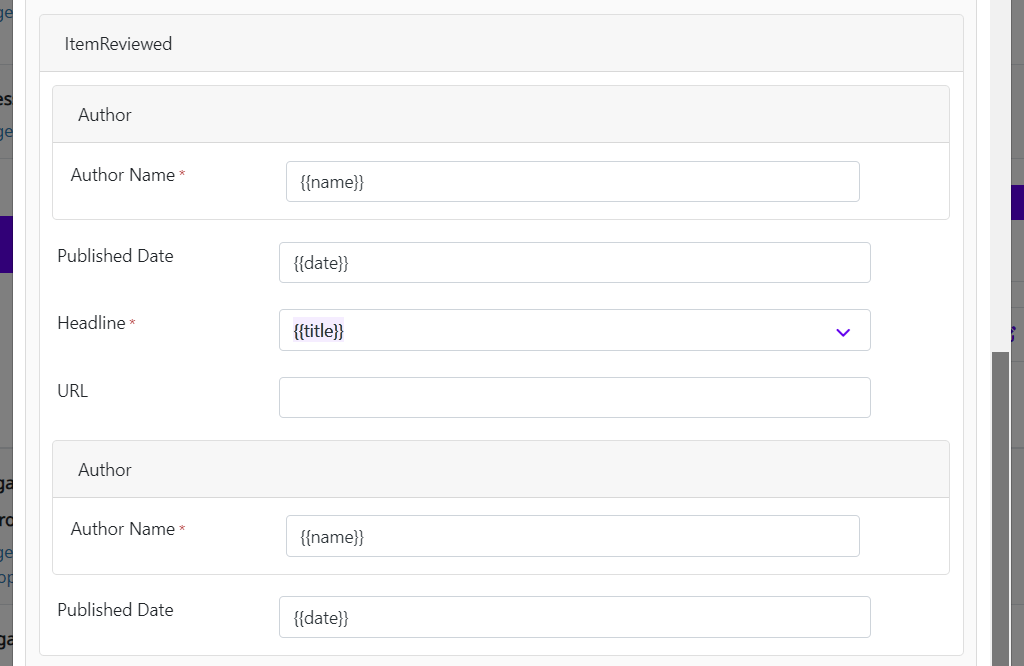
Image – Helps provide a visual representation related to the fact check. This could be an image of the claim source, a graph, a chart, or any visual aid that supports the fact-checking content.
Example: “https://example.com/image-url.jpg”

Performer Specifies – the person or organization responsible for conducting the fact check.
Name – The name of the person or organization that performed the fact check
Website or Social link – The url property should point to the official website of the author (performer) of the fact check.
Make sure to click on Save

With this you have a Fact-check schema set up. All there is left to do is check it up and see if it works as expected
Verify Markup
After saving your changes, you can verify that the Fact-check schema markup has been added correctly by viewing the page or post source code. Look for the JSON-LD markup representing the Fact-check schema.
1. Click on JSON-LD Code – Validate JSON-LD

2. A new page / tab will open you will get you test code, click on TEST CODE
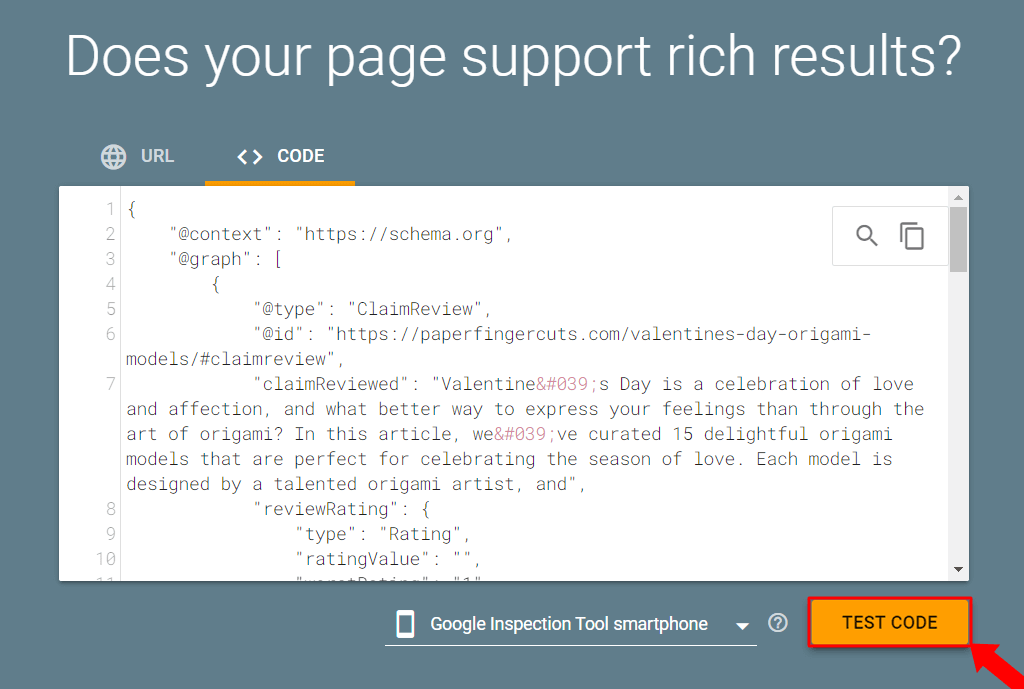
3. A small pop-up appears, and you will have to wait a few moments for the data to be processed
4. Once data is processed, you will be able to see your work, test it, share it and use it to enhance your work.

For further details, we recommend referring to the following resources
Fact check or Claim Review Schema
Fact check (ClaimReview) structured data
Carousel Schema
Carousel Schema
The Carousel (Carusel) schema is utilized primarily by websites to present a collection of items in a Carousel format, often seen in search results as a visually engaging sequence of information cards. This structured data markup is a handy tool for grouping together similar items – like articles, recipes, products, or any other content – into one easy-to-scroll Carousel. Think of it as a way to neatly organize and showcase related items on your website, making them more engaging and easier for users to browse through at a glance.
Implementing the Carousel schema involves providing structured details about each item in the Carousel. When a Carousel schema is added to a webpage, it specifies essential information about each item, such as titles, images, and descriptions, depending on the type of content being presented. This structured data markup is crucial for search engines to recognize and display the content in a Carousel format in search results, offering users a dynamic and interactive browsing experience.
For different types of content, the Carousel schema includes both mandatory and optional fields, tailored to the content type. Here’s an overview for a generic Carousel of items:
Mandatory Fields:
name: The name or title of the item in the Carousel.
image: Images representing each item in the Carousel.
Recommended Fields:
description: A summary or brief description of each item.
url: The URL of the detailed page for each item.
datePublished (for articles and blog posts): The publication date of the item.
author (for articles and blog posts): The author of the item.
While the mandatory fields are crucial for a valid Carousel schema, incorporating the recommended fields can significantly improve the user experience by offering more detailed insights into each Carousel item. This, in turn, can positively affect the content’s search rankings and visibility, making it more compelling and easier for users to discover and engage with the content.
A Carousel lets users swipe through a series of cards on mobile devices, each card representing different content like articles or products from the same website. This is called a host Carousel. To make your site’s content appear in such a Carousel, you should use Carousel structured data together with any of these supported types: Course List, Movie, Product or Recipe. This setup makes your content more engaging and accessible in search results.
The Carousel schema is versatile and can be customized to fit various content types, making it a powerful tool for webmasters aiming to showcase grouped content effectively in search results.
Note! The Carousel schema is also known as the Item List schema.
How to access Carousel schema using Rich Snippets
Access it from METAs – Rich Snippet – Carusel

Clicking on the “+” symbol will open up a panel where you can start editing and customizing your Schema Template.
A pop-up will appear

Add your data, a question and its answer.
Mandatory fields will have small red starlike symbol (*) added to them:
ItemList: This is the main schema type for your carousel. Each item within the carousel will be an element in this list.
Position – Will determine the position to where your schema will display once added, is indicated by a 1-based number, meaning the numbering starts at 1 rather than 0. The first item in the carousel would have a position of 1, the second item a position of 2, and so on.
URL – Points to the specific page or resource where more detailed information about the item can be found.
Note: Every URL in the list should be unique and on the same domain, including any subdomains or parent domains, as the page currently being viewed.
Schema type – Refers to the specific category or nature of the items being presented in the carousel, and indicates whether the carousel contains courses, movies, recipes, restaurants, or any other specific type of items.
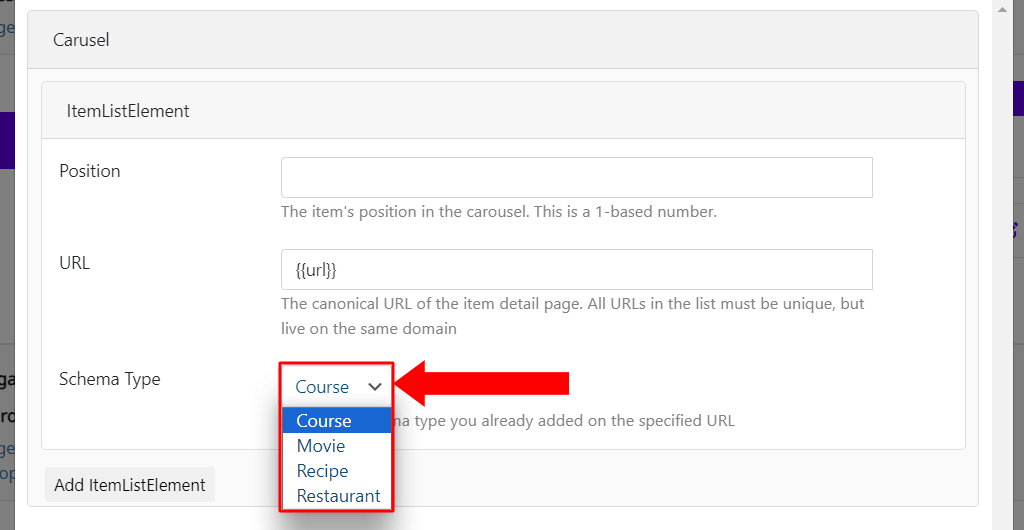
Add Item List element – Allows adding another item to your schema

Make sure to click on Save
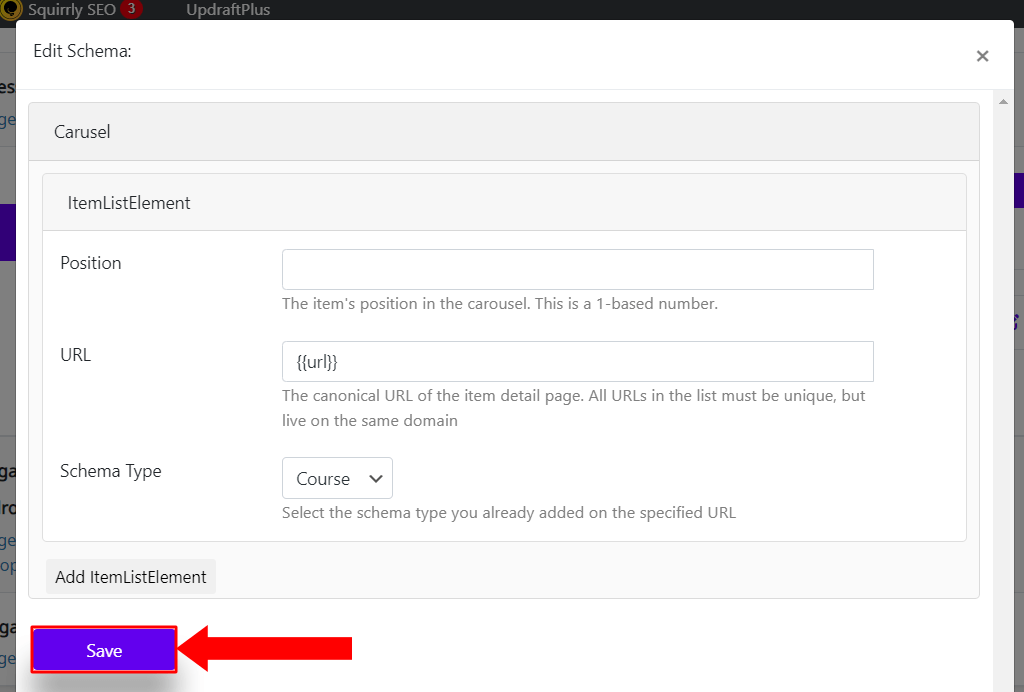
With this you have a Carousel schema setup. All there is left to do is check it up and see if it works as expected. This is easier than you imagine, and Squirrly will help with the steps.
Verify Markup
After saving your changes, you can verify that the Carousel schema markup has been added correctly by viewing the page or post source code. Look for the JSON-LD markup representing the Carousel schema.
1. Click on JSON-LD Code – Validate JSON-LD
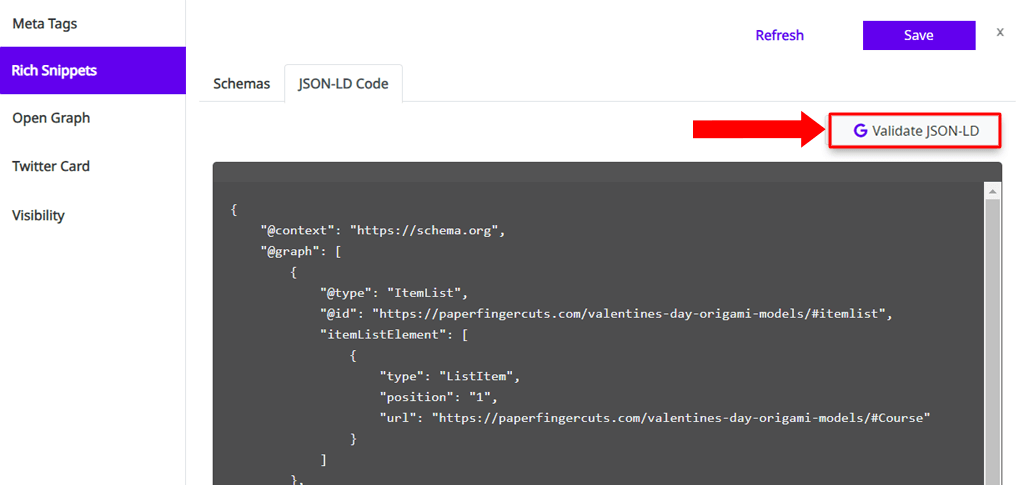
2. A new page / tab will open you will get you test code, click on TEST CODE

3. A small pop-up appears, and you will have to wait a few moments for the data to be processed
4. Once data is processed, you will be able to see your work, test it, share it and use it to enhance your work.
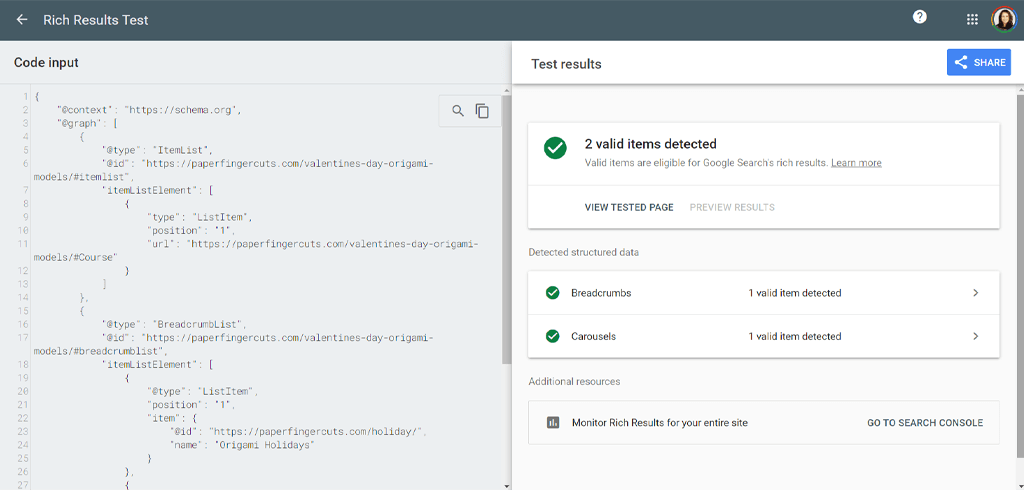
For further details, we recommend referring to the following resources
Carousel or ItemList Schema
Carousel (ItemList) structured data
WooCommerce Product Schema
WooCommerce Product schema
The WooCommerce Product schema serves as a cornerstone for e-commerce and retail sites built with WooCommerce on WordPress, facilitating the structured presentation of product information. This schema allows search engines to grasp the intricacies of each product listed, significantly boosting their visibility in search results.
It is important to note that WooCommerce itself doesn’t have a unique name for the schema; it uses the same standard Schema.org terminology. However, WooCommerce, being a WordPress plugin, allows for easy integration of this schema through various SEO plugins or custom code snippets, making it straightforward to apply the Product schema to your online store.
By integrating the Product schema into WooCommerce pages, it conveys critical product details—like name, price, availability, and description—to search engines, thus enhancing how these products appear in search queries. This structured data markup is pivotal for improving user interaction with product listings directly from search results by providing immediate, detailed insights.
For WooCommerce listings, ensure you have your Product schema set up by adding the mandatory and recommended fields to provide a comprehensive set of information for each product:
Mandatory Fields:
name: Identifies the product.
price: Lists the product’s cost.
availability: Indicates if the product is in stock, out of stock, or available for pre-order.
Recommended Fields:
description: Offers a concise overview of the product.
image: Displays related product imagery.
brand: Specifies the product’s brand.
review: Includes customer reviews or product ratings.
sku: The unique stock keeping unit for product identification.
offers: Provides information on any special promotions or discounts.
Incorporating these fields into the Product schema not only fulfills the basic requirements for structured data but also ensures that your WooCommerce schema inherits these traits, which in turn enhances the listing with detailed insights that can significantly improve the user’s browsing experience. Including the suggested fields specifically offers a detailed story for each product, which can enhance its search rankings and visibility.
This thorough method simplifies the process for potential customers to find and comprehend what’s being offered, thus aiding in a more knowledgeable purchasing decision.
How to access WooCommerce Product schema using Rich Snippets
Access it from METAs – Rich Snippet – WooCommerceProduct

Clicking on the “+” symbol will open up a panel where you can start editing and customizing your Schema Template.
A pop-up will appear
Add your data, a question and its answer.
Mandatory fields will have small red starlike symbol (*) added to them:

Make sure to click on Save
Squirrly SEO seamlessly integrates with WooCommerce to implement Product schema, streamlining and automating the optimization process for product pages. This integration eliminates the need for manual coding by website owners, ensuring that their product pages are effectively optimized for search engines.
With this you have a WooCommerce Product schema set up. All there is left to do is check it up and see if it works as expected. This is easier than you imagine, and Squirrly will help with the steps.
Verify Markup
After saving your changes, you can verify that the WooCommerce Product schema markup has been added correctly by viewing the page or post source code. Look for the JSON-LD markup representing the WooCommerce Product schema.
1. Click on JSON-LD Code – Validate JSON-LD

2. A new page / tab will open you will get you test code, click on TEST CODE

3. A small pop-up appears, and you will have to wait a few moments for the data to be processed
4. Once data is processed, you will be able to see your work, test it, share it and use it to enhance your work.
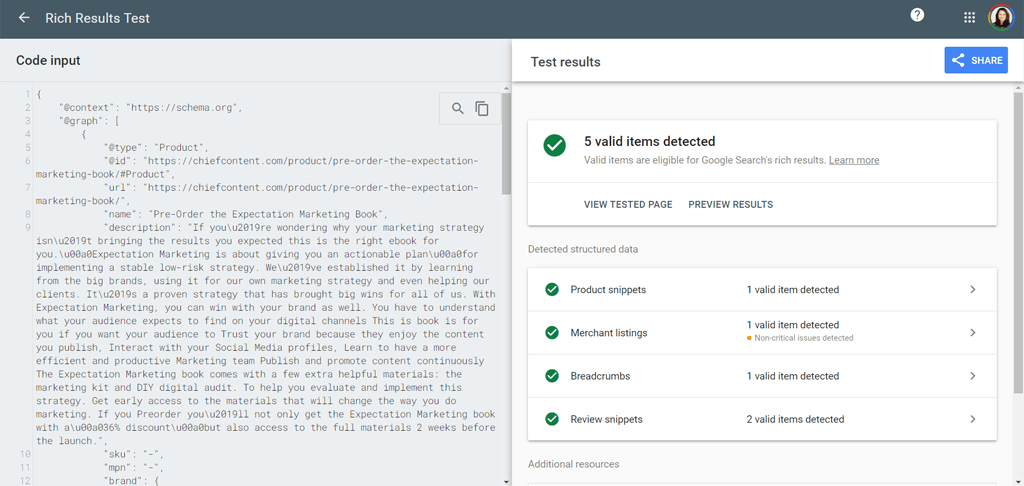
For further details, we recommend referring to the following resources
Product Schema
Product (Product, Review, Offer) structured data
BreadcrumbList Schema
BreadcrumbList Schema
Introducing the BreadcrumbList Schema, a structured data format meticulously designed to enhance the navigation and understanding of website hierarchies. This schema plays a crucial role in improving user experience and search engine optimization by providing clear, breadcrumb trails on a webpage. It includes properties like the item’s name and its position within the site structure, guiding both users and search engines through a website’s layout seamlessly.
The BreadcrumbList Schema is essential for websites aiming to offer a more organized and user-friendly navigation experience. By implementing this structured data, websites help search engines understand the page’s position within the site hierarchy, leading to more informative and visually appealing search results. Similar to implementing schemas such as Event Schema or FAQPage, the Breadcrumb Schema requires to mark up web pages with specific information about each breadcrumb link. This includes:
Mandatory Fields:
itemListElement: Details of each breadcrumb, including the item’s name and position in the site hierarchy.
item: The URL of the item within the breadcrumb trail.
Recommended Fields:
name: The name of the breadcrumb item.
position: The item’s position in the sequence of the breadcrumb trail.
While the mandatory fields ensure the basic structure is recognized by search engines, incorporating the recommended fields enhances the detail and clarity of the breadcrumb path, significantly improving user navigation and site understanding.
By adopting the Breadcrumb Schema, websites not only improve their usability but also enhance their visibility in search results. This structured approach to site navigation ensures that users and search engines can effortlessly understand and navigate the website’s structure, promoting a better overall web experience. Implement the Breadcrumb Schema today, and illuminate the path for your website’s visitors and search engines alike.
Here is an example of Breadcrumb schema looks like:

How to access Breadcrumblist schema using Rich Snippets
Access it from METAs – Rich Snippet – Breadcrumblist

Clicking on the “+” symbol will open up a panel where you can start editing and customizing your Schema Template.
A pop-up will appear

Add your data, a question and its answer.
Mandatory fields will have small red starlike symbol (*) added to them:
In this schema make sure to add the following:
Position – as this determines where the item is placed
Name – make sure it is a unique name, fro each element
URL – add the link for the item
For each new element, you wish to add, ensure that you add a new ItemListElement

After all your elements are added, make sure to Save

With this, your Breadcrublist schema is now in place. The only thing left is to verify its functionality and ensure it performs as anticipated. This process is simpler than you might think, and Squirrly will guide you through the necessary steps.
Verify Markup
After saving your changes, you can verify that the Breadcrublist schema markup has been added correctly by viewing the page or post source code. Look for the JSON-LD markup representing the Breadcrublist schema.
1. Click on JSON-LD Code – Validate JSON-LD
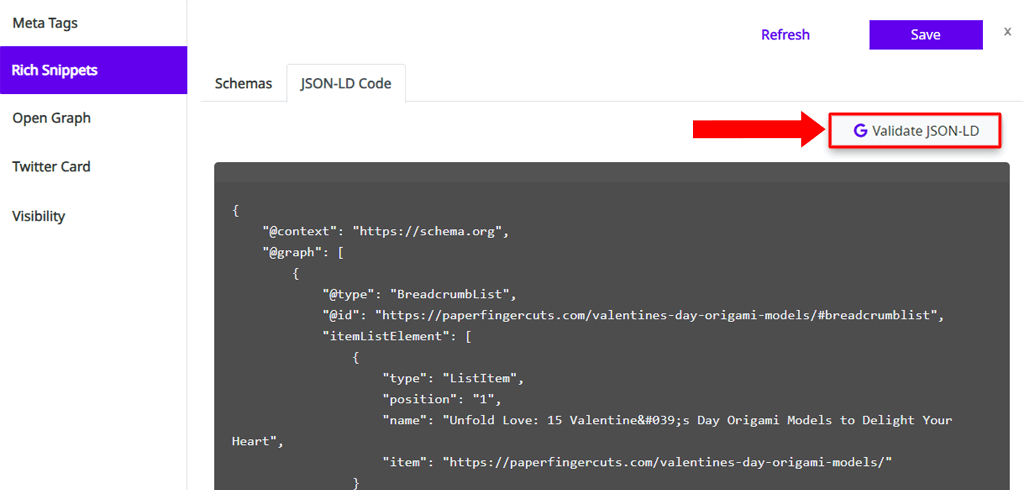
2. A new page / tab will open you will get you test code, click on TEST CODE

3. A small pop-up appears, and you will have to wait a few moments for the data to be processed
4. Once data is processed, you will be able to see your work, test it, share it and use it to enhance your work.
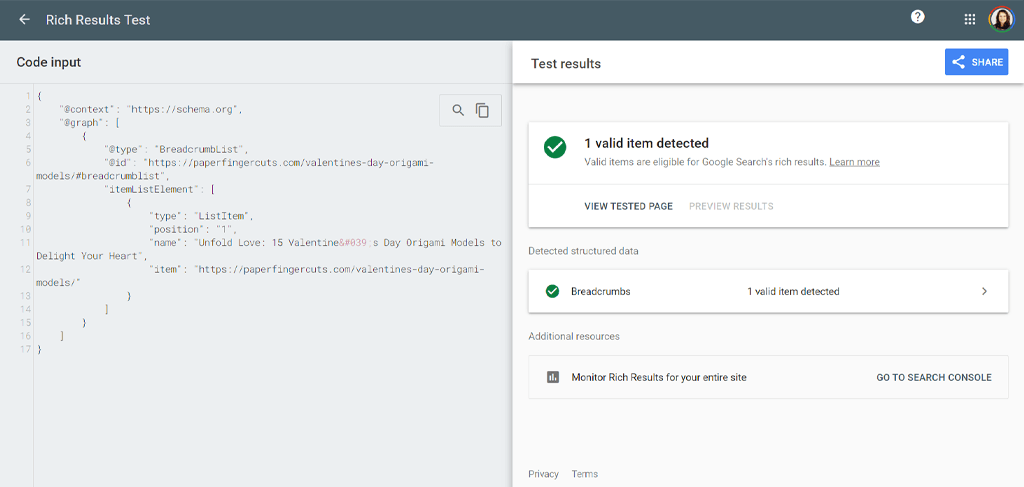
For further details, we recommend referring to the following resources
BreadcrumbList Schema
Breadcrumb (BreadcrumbList) structured data
Troubleshooting your Rich Snippets and Schemas
Troubleshooting
While testing your rich snippet you may receive a message like this: “Non-critical issues detected”. The “Non-critical issues detected” message indicates that while the structured data is valid and can be processed by search engines, there may be additional recommendations or suggestions for improvement that are not mandatory. These could be additional properties or more detailed information that could enhance the rich snippet or the way the data is understood by search engines, but omitting them does not invalidate the schema.

What you need to do:
To resolve these non-critical issues, you can usually view the details provided by the testing tool to see what additional information can be added or what minor improvements can be made to optimize your structured data further.

To solve this fo to the Rich snippet and click the Edit button

Add the indicated markup in this case the Course Provider Name

Make sure to save your changes and then verify if everything is working

Rich Snippets and Schemas with Squirrly
Rich Snippets and Schemas with Squirrly
Enhance your online presence and content with rich snippets, unlocking a world of structured data possibilities to set your website apart in search results. These dynamic snippets, featuring details like star ratings and prices, elevate your link, making it more captivating and clickable.
Squirrly offers a user-friendly solution for implementing rich snippets using Schema markup, streamlining the process and ensuring search engines understand your content’s context and relevance. With our new “Review Schema” and “AggregateRating Schema” features in Squirrly Advanced SEO 2.2.9, you can provide structured data about individual reviews and overall ratings for products or services.
Easily incorporate multiple reviews within schemas like “Book” or “Event,” and rest assured knowing Squirrly has your back, while making your website shine with rich snippets.
Important!
Adding rich snippets with Squirrly is easy, but some manual input is required for Schema fields. Rest assured – you can easily preview and fix any missing details. Plus, Squirrly safeguards your data, so let’s make your website shine together!
Why choose Squirrly?
Squirrly SEO’s Schemas streamlines the inclusion of structured data, particularly JSON-LD markup, within your website’s content. This automates the process, enabling you to save valuable time while ensuring your content adheres to schema standards for improved search engine visibility.
- Optimize Your Content
Utilize Squirrly’s SEO features to optimize your content, including adding relevant keywords, meta descriptions, and engaging titles.
- Easily Add Structured Data
With built-in tools, Squirrly makes it simple to add structured data to your content for elements like recipes, events, products, and more.
- Preview and Test
Before publishing, use Squirrly’s preview feature to see how your rich snippets will appear in search results, ensuring everything looks great before going live.
- Increase Visibility
Once optimized with rich snippets using Squirrly, expect a boost in visibility and clicks, driving more traffic to your site.
Leverage Squirrly’s powerful tools to enhance your content with rich snippets and leave a lasting impression in search results!
What are Schemas and how can I use them?
A schema is a standardized way of organizing and presenting structured data on webpages to improve search engine visibility and user experience.
Schemas, also known as semantic vocabulary or microdata, are tags that can be added to HTML to enhance how search engines interpret and display web pages in search results. The schema.org vocabulary, jointly developed by major search engines like Google, Bing, Yahoo!, and Yandex, is widely used for this purpose. The main aim of schemas is to provide search engines with additional context about the content on a page, enabling them to categorize and index it more accurately, thus improving search result relevance.
Rich Snippets represent the ability to create and customize structured data markup for specific content types on a website, and it comes with specific types of structured data markup used to provide additional context and information about news articles, FAQs, books, courses, and recipes, respectively. They refer to search results that are enriched with additional data, such as images, star ratings, prices, or author details, providing users with more context and potentially increasing click-through rates.
These snippets are generated by search engines when web pages include structured data following schema.org guidelines. This structured data allows search engines to better understand the content, leading to the enhanced presentation of search results.
JSON-LD (JavaScript Object Notation for Linked Data) is a method of encoding linked data using JSON, recommended by Google for structuring data on websites. Its purpose is to simplify the implementation of structured data by organizing and connecting it to the type of content on the website, such as articles, products, or events, using schemas from schema.org. JSON-LD serves as the “coding” side of implementing schema.org schemas on a website. By embedding JSON-LD scripts in the head section of HTML, it informs search engines about the content’s context in a structured and easily processable format. This setup facilitates the display of rich snippets in search results, enhancing the user experience.
In summary, schemas provide the vocabulary for describing content, rich snippets enhance search results with additional data, and JSON-LD is the method used to implement schemas and enable the display of rich snippets by search engines.
With Squirrly you can automate this process, as we strive to make things easier for you.
Important:
If you want to add custom schema (a type of structured data in JSON-LD format) to your website, you have two scenarios where this option is available:
- Without Advanced SEO Pack Plugin: If you haven’t installed the “Advanced SEO Pack” plugin on your website, you can directly add custom JSON-LD schema. This means you can go ahead and input your structured data without needing any additional plugin settings.
- With Advanced SEO Pack Plugin, but Custom Rich Snippets Disabled: If you have the “Advanced SEO Pack” plugin installed, you need to make sure the “Custom Rich Snippets” feature is turned off. You can do this by going to “Squirrly SEO > All Features” in your website’s dashboard and disabling the option there. Once disabled, you’ll be able to add your custom JSON-LD schema.
Thus, to add Custom Schema by Code:The custom JSON-LD option will be available when the Advanced SEO Pack plugin is not installed. Or when Advanced SEO Pack is installed but the Custom Rich Snippets option is disabled from Squirrly SEO > All Features.
In simple terms, you can add custom code for structured data to your website either if you don’t use the Advanced SEO Pack plugin or if you have it but ensure a specific feature is turned off. This allows you to manually add or adjust the structured data according to your needs.
How to access Rich Snippets?
There are 2 ways to get Rich Snippets, and use them to your advantage.
1) In WordPress go to Overview – Optimize – Bulk SEO
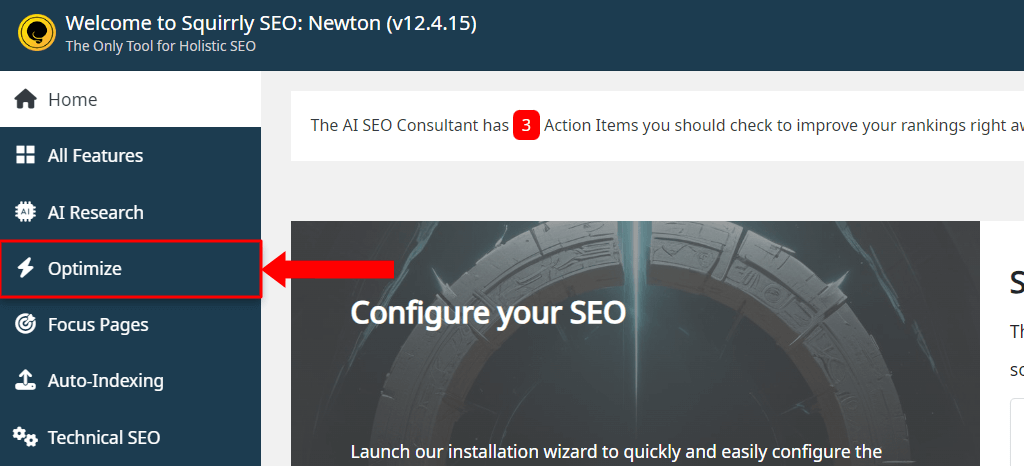
2) From the Dashboard go to Squirrly SEO > Optimize > Bulk SEO > METAs > Rich Snippets

Doing either of these, will land you on the BULK SEO page.
To reach Rich Snippets – click on METAs
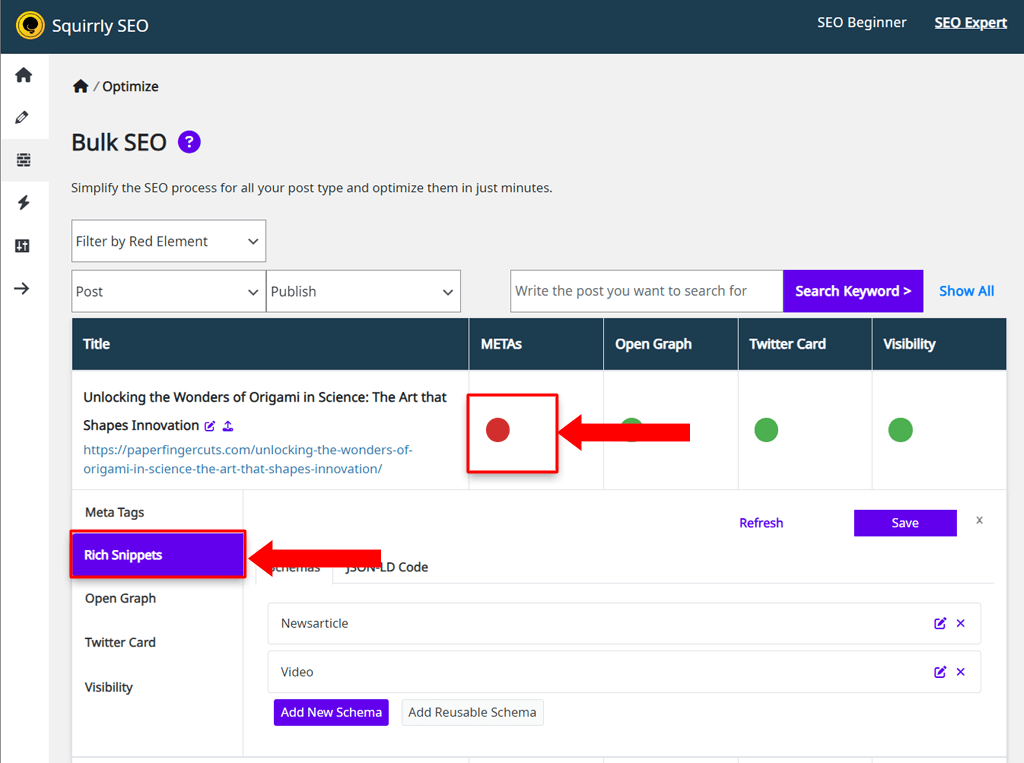
A drop down menu will open, with multiple options.
To add a new schema go to : Rich Snippets and click on Add New Schema
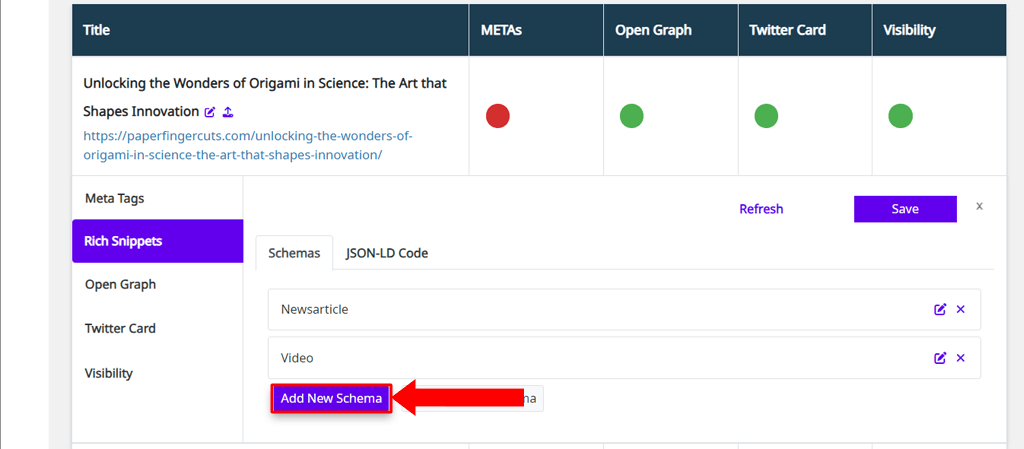
Clicking on the Add New Schema button will open up a new pop-up panel with a list of all the available schema types. As you can see from the screenshot below, Squirrly offers many different schema types to choose from.

Clicking on the “+” symbol will open up a panel where you can start editing and customizing your Schema Template.
The good news is that Squirrly has your back and fields will be automated when it comes to setting up your schemas,and providing a solid foundation with a list of patterns. You can think that Patterns in schemas are like recipes that tell you how to arrange information on your website so search engines can easily understand it. Adding these patterns helps you know what ingredients (information) to use and how to mix them (format them) so that when search engines read your site, they know exactly what it’s about. By changing the item covered by a pattern, that change will automatically get reflected inside your schemas too, thus winning you a lot of time, and keeping things updated without extra effort.
Understanding schemas and implementation strategies for schemas?
Ready for your new opportunities? If you’re up for this, let’s break it down and see how you can make the best of each possibility.
Schema is in essence a structured format that has the role to enhance visibility and accessibility for users seeking information online.
Depending on your needs, you can use schemas to improve search ranking, and provide richer and more informative snippets for users searching online.
Each schema is used based on your data, and it’s important to use the correct one. Squirrly SEO helps you in this matter, by providing a list of Rich Snippets, automated, that import data directly from your work. Essentially, these schemas act similar to templates that help organize your website’s information in a way that search engines can easily understand. By following these patterns, you can present details about various content types — such as events, products, or articles — more effectively.
This organized presentation makes your website’s information more accessible to search engines, enhancing the probability that it will be displayed in search results, possibly with additional details like images or dates shown directly on the search page.
These are the options that you can use.
- Newsarticle Schema –
- FAQ page –
- Book Schema –
- Course Schema –
- Recipe Schema –
- Event Schema –
- JobPosting Schema –
- Movie Schema –
- Music Schema –
- Service Schema –
- Software Schema –
- Video Schema –
- Podcast Schema –
- How-to Schema –
- Store Schema –
- Restaurant Schema –
- Profile Schema –
- Person Schema –
- Product Schema –
- Fact-Check Schema –
- Carusel Schema –
- WooCommerce Schema –
- Breadcrumblist Schema –
- Troubleshooting:
Rich and featured snippets leverage schemas to enhance search results by displaying additional data from websites. This can include breadcrumbs, reviews, article data, or company information, making search results more informative and engaging.
Here is an example of how schemas can enhance your website’s growth, visibility, and accessibility.
Getting Started
From initial setup to exploring key features, find everything you need to begin your journey with Squirrly in this section.





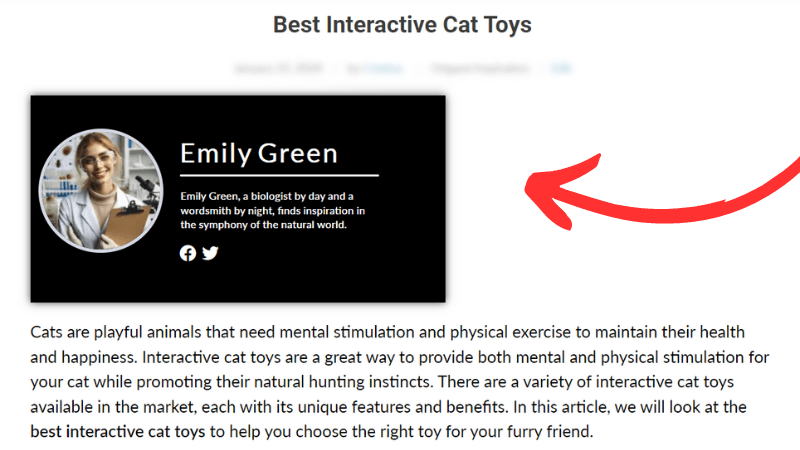


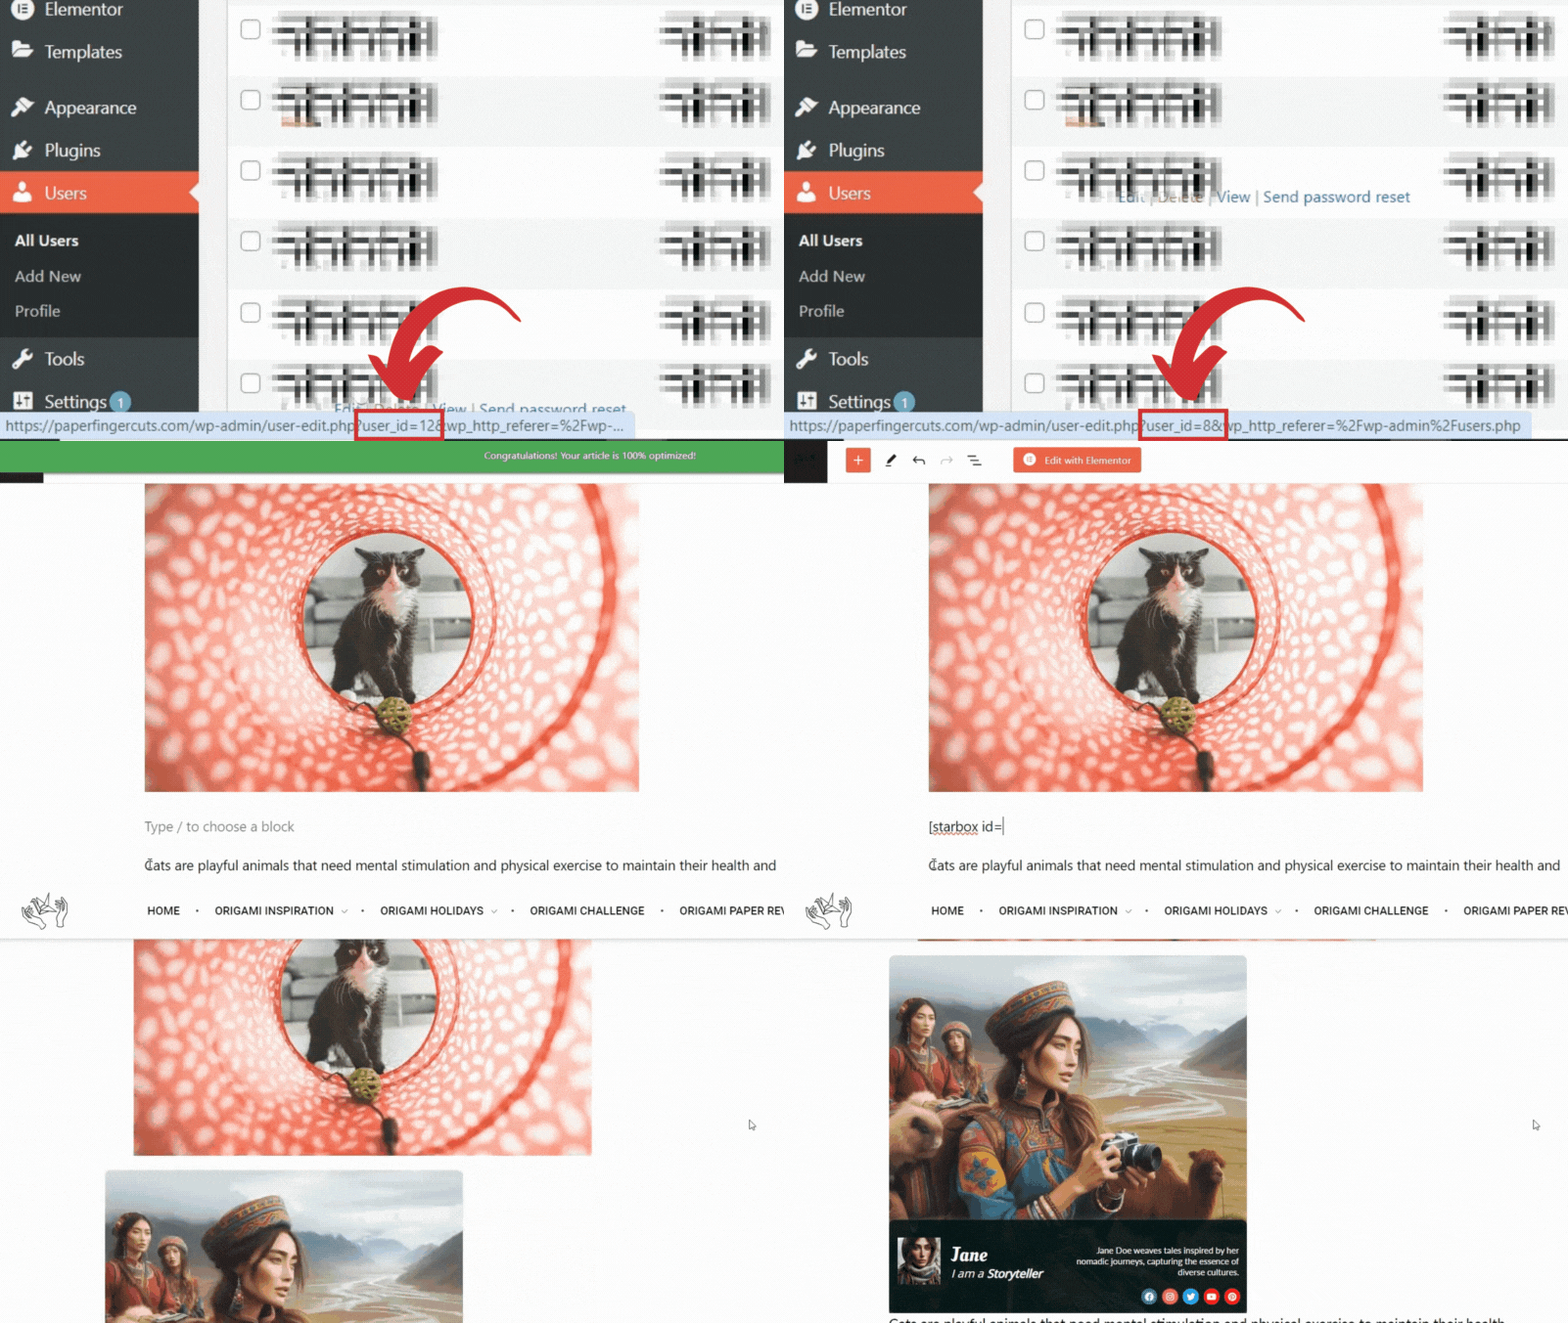
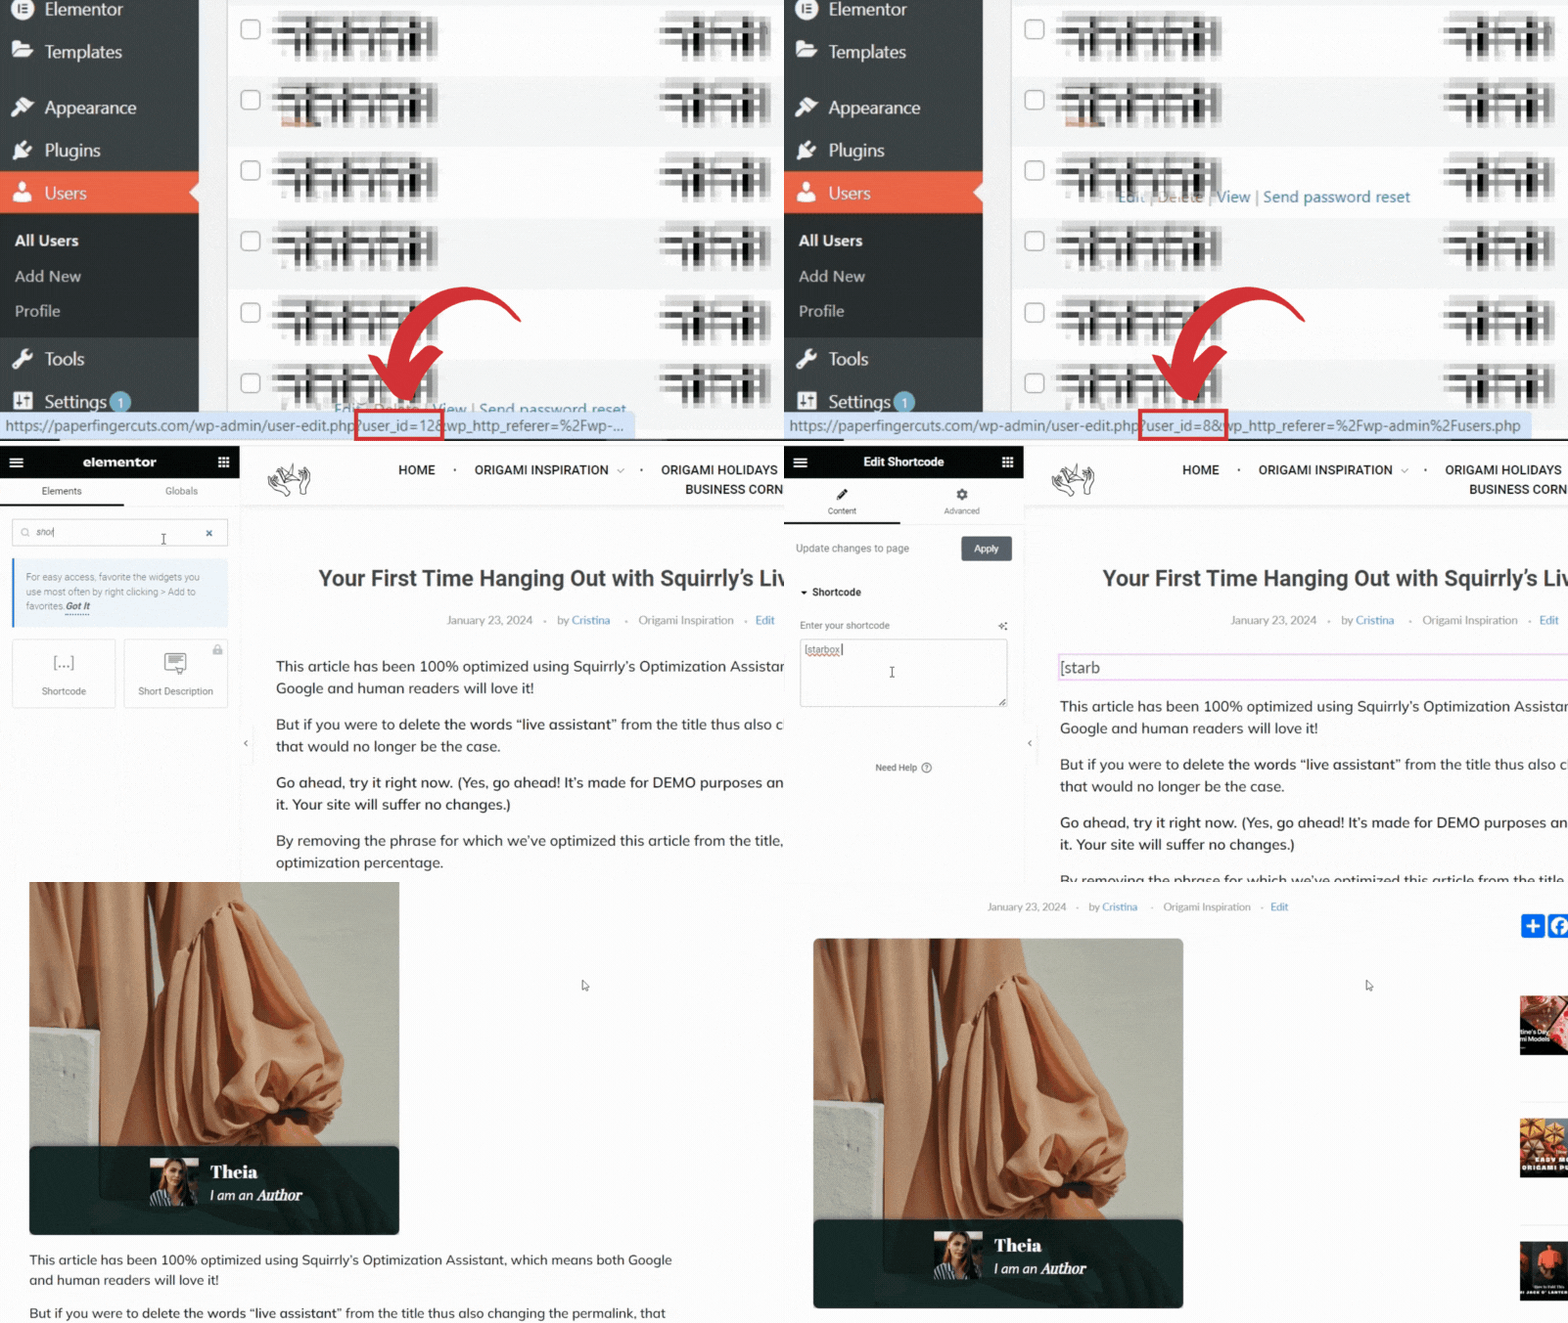












Social Media Details
Important: The ‘First Time Setup’ option in the menu is designed to assist you with creating your first Starbox author bio box. After you have successfully completed setting up your first Starbox author bio box, this option will no longer appear in the menu.
Starbox PRO makes it easier to connect with your audience through social media. How? By enabling you to customize your author bio box with engaging social media details.
Here are the customizations you can make here: